๐ŸพOrbis329 total

Hytale Creatures & Mobs โ€” Complete Wiki

All 329 known entities of Orbis โ€” wild animals, aquatic life, NPCs, tribes, monsters and bosses. Updated Hytale creature wiki.

Showing 329 of 329 creatures

Hytale Animals โ€” Wildlife of Orbis

110
๐Ÿ–

Wild Piglet

Pig Wild Piglet

Friendly
Zone 1

Wild Piglets wander the farmsteads and village outskirts of Zone 1, rooting through soft earth and following adult pigs at a respectful distance. Completely peaceful, they have no interest in conflict and will trot away when startled rather than stand their ground. Despite their small size and modest 30 HP, spotting one is often a reliable sign that a settlement or food source is nearby. Each piglet encountered is preserved as a World Memory, reflecting how even the smallest, most ordinary creatures shape the living texture of Orbis.

๐Ÿ–

Wild Pig

Pig Wild

Friendly
Zone 1

Wild Pigs are a familiar sight around Zone 1 settlements, foraging through clearings and farmland with their characteristic low-slung gait. Peaceful by nature, they will not initiate a fight even when approached closely. Hunters value them for practical reasons: a slain Wild Pig reliably yields Raw Pork and Light Hide, both useful early-game materials. With 74 HP they can take a few hits before going down, so dispatching one cleanly rewards a little patience. Each pig you encounter is recorded as a World Memory, binding even routine hunts to the broader story of your time on Orbis.

๐Ÿชฒ

Trilobite

Neutral
Caves

Trilobites have persisted in Orbis's caves since long before the current age, crawling their segmented bodies across stone floors and through the edges of shallow underground water. They are neutral creatures โ€” content to mind their own business until threatened, at which point they will retaliate. Approach with reasonable caution if you need the Raw Fish they reliably drop; with 81 HP they hit harder than their prehistoric appearance suggests. Their existence as a World Memory hints that even a brief cave expedition can leave a lasting mark on the world's record.

๐Ÿš

Black Trilobite

Trilobite Black

Neutral
Caves

The Black Trilobite is a darker, more heavily armoured variant of its cave-floor kin, identifiable by the deep obsidian hue of its chitinous shell. Like ordinary trilobites it is neutral โ€” it will ignore you unless you provoke it โ€” but its reinforced plating gives the impression of something that has survived deeper, harsher passages than most cave creatures ever see. It drops Raw Fish on death, making it a practical target for players exploring the underground food chain. As with all trilobites, each encounter is preserved as a World Memory.

๐Ÿฆ

Sparrow

Friendly
Zone 1

Sparrows are one of the most familiar sights in the temperate forests and meadows of Zone 1 โ€” small, restless birds flitting from branch to branch and filling the air with brief bursts of song. They are completely harmless and will simply fly away when approached. Hunting one yields Raw Wildmeat and 1โ€“2 Dark Feathers guaranteed, making them a consistent early-game source of light crafting materials. Their sightings are preserved as World Memories, a gentle reminder that Orbis's wildlife runs deeper than its most dangerous inhabitants.

๐Ÿฆ‡

Bat

Neutral
Caves

Bats are a constant presence in Orbis's Caves โ€” hang above a torch-lit tunnel long enough and you will hear the rustle of wings before you see them. They are neutral, leaving explorers alone unless disturbed, but a careless swing or stray arrow can turn a whole roost hostile in seconds. With only 15 health they go down easily, though in tight underground passages numbers can be a real problem. They drop nothing, but their appearance reliably signals that deeper, darker chambers are close by. Every encounter is recorded as a World Memory.

๐Ÿฆœ

Parrot

Friendly
Zone 3

Parrots are among the most visually striking inhabitants of the Tropical Jungle, darting between canopy branches in flashes of vivid color. Peaceful by nature, they pose no threat to players and will not retaliate even if disturbed. Hunting one yields Raw Wildmeat along with one or two Red Feathers โ€” light crafting materials valued for their brightness. Because every encounter is recorded as a World Memory, even a casual sighting carries weight in the unfolding story of your time on Orbis.

๐Ÿฆ

Greenfinch

Finch Green

Friendly
Zone 1

Small enough to be overlooked among the leaves, the Greenfinch flits through the upper canopy of the Emerald Grove in quick, darting movements. It is entirely harmless and will not retaliate if approached. Players who hunt one receive Raw Wildmeat and one or two Red Feathers as guaranteed drops. Quiet as the encounter may seem, it is preserved as a World Memory โ€” a small but permanent note in the record of everything you have done across Orbis.

๐Ÿฆ

Bluebird

Friendly
Zone 1

The Bluebird is a familiar sight in the temperate woodlands of the Emerald Grove, its bright plumage and cheerful song making it easy to locate in the underbrush. Wholly peaceful, it offers no resistance to players who approach. Defeating one always yields Raw Wildmeat and Blue Feathers โ€” a distinct drop that sets it apart from other small birds. The encounter registers as a World Memory, weaving even this gentle creature into the broader tapestry of your journey on Orbis.

๐Ÿฆ‰

Snowy Owl

Owl Snow

Neutral
Zone 3

Gliding low and near-silently over Borea's frozen flats, the Snowy Owl is a patient hunter that has mastered life in the harshest cold of Orbis. Unlike many creatures of the tundra, it will not attack unless provoked โ€” but corner one or strike first and it will retaliate swiftly. Hunting it rewards Raw Wildmeat and one or two Red Feathers. The encounter is etched into the World Memory system, making even a reluctant confrontation in the snow part of your permanent record on Orbis.

๐Ÿง

Penguin

Friendly
Zone 3

Penguins waddle along Borea's icy coastlines in unhurried groups, entirely unbothered by the presence of players. They are among the most sociable and harmless creatures on Orbis โ€” fully peaceful and incapable of harm. No resources drop from them, which makes every encounter purely observational. Nevertheless, each sighting is preserved as a World Memory, recording these waddling coastal residents as a quiet but genuine chapter in your travels across the frozen reaches of Orbis.

๐Ÿฆ

Woodpecker

Friendly
Zone 1

High in the canopy of the Emerald Grove, the Woodpecker announces itself long before you see it โ€” a rapid drumming against bark that echoes through the undergrowth. This cheerful forest bird poses no threat, content to chisel away at tree trunks in search of insects. Getting close enough to observe it is easy; it simply does not care about your presence. When hunted, it yields Raw Wildmeat and 1โ€“2 Red Feathers. Your encounter with it is preserved as a World Memory.

๐Ÿฆœ

Crow

Neutral
All Zones

Crows appear wherever Orbis feels unsettled โ€” forest fringes, crumbling ruins, and the edges of contested territories. They hold their ground if you wander too close, watching with sharp eyes before deciding whether to flap away or retaliate. Leave them alone and they will do the same. Across all zones their dark silhouettes are a reliable landmark, often hinting that something significant โ€” or sinister โ€” lies nearby. Hunting one yields Raw Wildmeat and 1โ€“2 Dark Feathers, and the moment is captured in your World Memory.

๐Ÿฆ

Raven

Neutral
All Zones

Where battles have been fought and ruins stand silent, Ravens gather. Larger and more deliberate than their crow cousins, these dark birds carry a reputation for intelligence across every corner of Orbis. They will not strike first, but provoke one and the whole group turns โ€” 49 health points means a raven flock is a genuine irritant if you are already wounded. Travelers have learned to read their presence as a map of Orbis's violent history. Hunting a Raven yields Raw Wildmeat and 1โ€“2 Dark Feathers, logged in your World Memory.

๐Ÿฆฉ

Flamingo

Neutral
Zone 3

Standing ankle-deep in Zone 3's tropical shallows, the Flamingo is one of Orbis's most visually striking inhabitants. It keeps to wetlands and coastal pools, unhurried and uninterested in conflict โ€” but nudge one and it will defend itself before retreating. A flock in flight, all 49 health points of pink-feathered grace sweeping overhead, is a genuine spectacle worth pausing to watch. Should you hunt one, it leaves behind Raw Wildmeat and 1โ€“2 Red Feathers. The encounter is saved as a World Memory.

๐Ÿฆ‡

Ice Bat

Bat Ice

Neutral
Zone 3

<p>The <strong>Ice Bat</strong> is the cold-region flying swarm creature of the <span class="chip chip-zone">Whisperfrost Frontiers (Zone 3)</span>, a hostile bat adapted to the frozen tundra that menaces players in the same blizzards that already make Zone 3 one of the most punishing environments in Hytale. Where the Yeti is the zone's apex megafauna and the Outlanders its organized human threat, the Ice Bat is its ambient aerial nuisance โ€” a low-tier mob that travels in groups and turns the simple act of crossing an open snowfield into a fight on two fronts: against the storm, and against the things that live in it. For players pushing into the frozen north, the Ice Bat is the creature that punishes anyone who treats the cold as merely a background hazard.</p> <h2>Combat & encounter</h2> <p>Ice Bats are hostile on sight and built around the disorientation of being swarmed from above. (community-sourced) the encounter reads as a fast, flying harassment โ€” a group of Ice Bats descends on the player while they are already dealing with the visibility and damage-over-time of a Zone 3 blizzard, which means the player is often taking environmental damage before the bats themselves are even the most pressing threat. The danger is therefore less any single bat and more the swarm: an Ice Bat is trivial to kill, but a pack of them arriving mid-storm forces the player to split attention between the storm and the mobs, and a player who ignores the swarm to push through the weather takes steady damage from both at once.</p> <p>The recommended response is the one for any flying swarm: deal with them in bursts rather than chasing individuals, and never let the swarm linger while you keep moving through the storm. (speculation) consistent with their framing as cold-adapted bats, Ice Bats plausibly fight harder and respawn more aggressively inside active blizzards, which means the player's single best tool is often timing โ€” push through the open snowfield when the storm is calm, and the bats are manageable; push through during a blizzard, and the swarm plus the weather becomes a real threat. The Ice Bat is, in that sense, the creature that enforces the rhythm of Zone 3's weather.</p> <h2>Lore & origin</h2> <p>Hytale's official material establishes the Whisperfrost Frontiers as a frozen tundra with regular snowstorms that reduce visibility and inflict damage over time, and the Ice Bat slots cleanly into that ecosystem as its ambient flying fauna. (speculation) the cleanest read is that the Ice Bat is a natural cold-adapted creature of Zone 3 rather than anything Void-touched or supernatural โ€” the mundane wildlife of the frozen north, the way a regular bat is the mundane wildlife of a cave. That makes the Ice Bat part of what makes the Whisperfrost Frontiers feel like a real biome with its own ecology, rather than just a cold obstacle course, and it places it alongside the bison, elk, and polar bears of the tundra as one of the creatures that actually lives there.</p> <h2>Loot & rewards</h2> <p>No official drop table exists; treat any specific item list you see elsewhere as (community-sourced) and unconfirmed. What is consistent with the Ice Bat's place in the ecosystem is that it would drop low-tier reagents tied to cold-adapted fauna โ€” leathery wings, frost-touched components, or materials used in recipes that need a steady supply of basic cold-region ingredients. Because Ice Bats are encountered throughout Zone 3 and travel in swarms, they function as renewable filler content for players who need bulk cold-themed materials while farming the zone for rarer drops. They are not a target for their own sake, but a background harvest that adds up over a long trek through the tundra.</p> <div class="callout"> <p><strong>Tip:</strong> Time your crossings with the weather, not just the mobs. An Ice Bat swarm inside an active blizzard is a real threat because you are taking storm damage while you fight them; the same swarm in calm weather is a trivial cleanup. Push through open snowfields when the storm is quiet, and the Ice Bats stay manageable.</p> </div> <h2>Ice Bat โ€” Frequently Asked Questions</h2> <h3>Where do I find Ice Bats in Hytale?</h3> <p>In the Whisperfrost Frontiers (Zone 3) โ€” the frozen tundra. They are hostile cold-adapted flying creatures encountered throughout the zone, typically in groups, and they are most dangerous during the zone's regular blizzards.</p> <h3>How dangerous is an Ice Bat?</h3> <p>(community-sourced) Not very, individually โ€” a single Ice Bat is trivial to kill. The danger is the swarm combined with the weather: a pack arriving mid-blizzard forces you to split attention between storm damage and the bats, and taking both at once is what makes Zone 3 punishing.</p> <h3>Are Ice Bats supernatural or Void creatures?</h3> <p>(speculation) No โ€” the cleanest read is that they are natural cold-adapted wildlife of Zone 3, the mundane fauna of the frozen north, the same way a regular bat is the mundane fauna of a cave. They are part of what makes the tundra feel like a real biome with its own ecology.</p> <h3>What does an Ice Bat drop?</h3> <p>No official drop table exists; any specific item list is community-sourced. Expect low-tier reagents tied to cold-adapted fauna โ€” leathery wings, frost-touched components, basic cold-region crafting materials โ€” a renewable filler harvest for bulk ingredients during long treks through the tundra.</p>

๐Ÿฆ‰

Brown Owl

Owl Brown

Neutral
Zone 1

The Brown Owl waits out the daylight hours perched deep in Zone 1's forest canopy, blending into bark and shadow with uncanny patience. Approach too close and it will retaliate โ€” those talons are sharper than they look. Killing one yields Raw Wildmeat along with one or two Dark Feathers, useful for fletching and crafting. Because this encounter is preserved as a World Memory, your first run-in with this silent hunter leaves a permanent mark on Orbis's record of your journey.

๐Ÿฆ†

Duck

Friendly
Zone 1

Ducks waddle along the banks of Zone 1's ponds and rivers, perfectly at home in the shallows and entirely unbothered by passing adventurers. They pose no threat and will never initiate a fight. Hunt one down and it drops Raw Wildmeat plus one or two Red Feathers โ€” a small but useful haul for early crafting. The encounter is catalogued as a World Memory, so your first time crossing paths with one of these unassuming birds becomes part of Orbis's story of you.

๐Ÿ•Š

Pigeon

Friendly
All Zones

Pigeons are the background noise of Orbis โ€” found in every zone, fluttering around market stalls, crumbling ruins, and rooftops wherever civilization has left its mark. They are entirely harmless and won't fight back even if provoked. Hunters pick them for Raw Wildmeat and a guaranteed drop of one or two White Feathers. Humble as it seems, this encounter earns a slot in your World Memory, marking the first time you noticed the small, overlooked creatures that quietly inhabit every corner of the world.

๐Ÿฆ…

Pterodactyl

Neutral
Caves

The Pterodactyl is one of Orbis's more unsettling cave dwellers โ€” a prehistoric flier that glides silently through ancient cavern biomes, riding thermal vents with wide leathery wings. With 60 health it takes considerably more punishment than most cave fauna. It won't attack unless disturbed, but the tight quarters of underground passages make that easy to do by accident. Bring it down and you'll collect Raw Wildmeat and one or two Blue Feathers. The first sighting is recorded as a World Memory.

๐Ÿฆ…

Hawk

Neutral
Zone 1

Hawks rule the open skies of Zone 1's Emerald Grove, riding updrafts with effortless precision while scanning the ground for prey far below. They don't go looking for trouble with adventurers, but corner one or stray into its territory and it will retaliate without hesitation. At 38 health it hits harder than it looks. Defeating one guarantees Raw Wildmeat and a drop of one or two Dark Feathers. That first aerial confrontation becomes a World Memory, etching the encounter into your permanent record on Orbis.

๐Ÿฆ

Tetrabird

Neutral
Zone 1

Unlike any bird in the real world, the Tetrabird walks on four legs โ€” a quirk of Orbis biology that makes it immediately recognizable in Zone 1's meadows and forests. It won't attack unprovoked, though it will retaliate if cornered. Hunters seek it out for a reliable haul: every kill guarantees Raw Wildmeat and one to two Dark Feathers, making it a useful early-game resource target. The Tetrabird is also preserved as a World Memory, so encounters with it leave a permanent mark on your chronicle of Orbis.

๐Ÿฆ…

Vulture

Neutral
Zone 2

Thermal currents above the Howling Sands carry the Vulture in wide, patient circles โ€” it has no interest in fighting, but it won't flee without reason either. Disturb one and it will strike back. Scavenging is its primary occupation; it thrives where death is common, which in this unforgiving desert biome means it is rarely idle. Bringing one down yields Raw Wildmeat and one to two Dark Feathers as guaranteed drops. As a World Memory creature, each Vulture encounter is permanently recorded in your chronicle, adding a touch of permanence to what might otherwise feel like routine desert hunting.

๐Ÿชถ

Archaeopteryx

Neutral
Caves

Deep in Orbis's cave systems, where light barely reaches and the air carries the weight of deep time, the Archaeopteryx clings to rocky ledges and shallow overhangs. This feathered relic predates the surface world's fauna in every meaningful sense โ€” a living fossil that evolution seems to have left behind. It won't attack first, though provoking it is unwise in the confined dark. Each one drops Raw Wildmeat and one to two striking Blue Feathers, a crafting material worth seeking out. Its status as a World Memory means your cave encounters build into something lasting in your record of Orbis.

๐ŸŠ

Crocodile

Hostile
Zone 3

Lurking just beneath the surface of Zone 3's tropical rivers and swamps, the Crocodile is a masterclass in patient predation. It attacks without warning the moment prey steps too close to the water's edge, and with 145 HP it can sustain a prolonged fight. Killing one is worth the risk โ€” each Crocodile drops Heavy Hide and Raw Wildmeat in guaranteed quantities. The encounter is recorded as a World Memory, marking it as a significant chapter in your story on Orbis.

๐Ÿข

Tortoise

Friendly
Zone 1

The Tortoise is one of Orbis's most unhurried residents, shuffling through Zone 1's grasslands and forest edges at its own pace. Peaceful by nature, it poses no threat unless actively harmed โ€” even then its 103 HP shell-bearing frame makes it a tough target. Hunters who do take one down receive Raw Wildmeat and Sturdy Chitin, the latter valued for its defensive crafting applications. This long-lived creature is etched into Orbis as a World Memory, a quiet but permanent mark on your journey.

๐Ÿธ

Rhino Toad

Toad Rhino

Neutral
Zone 1

The Rhino Toad is a hulking amphibian that haunts the marshes and wetland areas of Zone 1, its horned head and 124 HP frame making it an imposing sight at the water's edge. It won't charge at players unprovoked โ€” but corner it or land an attack and it hits back hard. Experienced hunters farm Rhino Toads for Raw Wildmeat and a reliable yield of Medium Hide. Like all encounters saved as World Memory, running into one along a soggy trail becomes a moment that persists in Orbis's living record.

๐ŸฆŽ

Sand Lizard

Lizard Sand

Neutral
Zone 2

Sunbaked and slow-moving, the Sand Lizard is a fixture of the Howling Sands, basking on scorched rock formations and retreating into loose dunes when threatened. It won't attack unless cornered โ€” but with 103 health points it can take a surprising amount of punishment before it turns on its aggressor. Hunters prize it for the guaranteed Raw Wildmeat and Medium Hide it leaves behind. Because every clash with one is preserved as a World Memory, even a brief skirmish on the dunes carries a quiet permanence in Orbis.

๐Ÿฆ•

Trillodon

Neutral
Caves

Deep beneath the surface of Orbis, the Trillodon rules the cave systems like a relic from a forgotten age. This massive reptile is a neutral presence โ€” it will not charge unprovoked, but disturb it and you will feel the full weight of its 145 health points bearing down on you. Survivors describe encounters in the prehistoric dark as humbling and disorienting. Bring it down and it yields a guaranteed 2โ€“3 Heavy Hide and 2โ€“3 Raw Wildmeat, making it a valuable if dangerous hunting target. The Trillodon is preserved as a World Memory, so every kill echoes in Orbis.

๐ŸŒต

Cactee

Neutral
Zone 2

Wandering the sun-scorched dunes of the Howling Sands, the Cactee is one of Orbis's stranger sights: a small cactus that has simply decided to walk. It minds its own business and will not attack unless you provoke it, but its spiny exterior makes cornering one an uncomfortable experience. Harvest a Cactee and it drops its full cactus body in three guaranteed pieces โ€” Bottom, Middle, and Top โ€” making it a quirky but reliable source of cactus material in an unforgiving desert biome. Its existence is etched into the World Memory of Orbis, a curious footnote in the wilds of Zone 2.

๐ŸŽ

Horse

Neutral
Zone 1

Few discoveries in Zone 1 change how you move through Orbis quite like finding a Horse. These majestic animals graze the open meadows and are neutral by nature โ€” approach calmly and there is no threat, but startle one carelessly and it will defend itself. Tame a Horse and you gain a mountable companion that dramatically accelerates overland travel. Should circumstances demand it, a defeated Horse yields 1โ€“2 Raw Wildmeat and 1โ€“2 Medium Hide as guaranteed drops. Every Horse tamed or lost in the wilds of Orbis is preserved as a World Memory.

๐Ÿ‡

Rabbit

Friendly
Zone 1

The humble Rabbit is a familiar and gentle presence in Zone 1's meadows and forest edges, hopping through the grass without any interest in confrontation. It is entirely peaceful and will never attack a player. Despite its small size and modest 49 health points, hunting rabbits is practical early-game resource gathering: each one drops a guaranteed Light Hide and 1โ€“2 Raw Wildmeat. They scatter quickly at the first sign of approach, so patience and positioning matter. The Rabbit's existence is preserved as a World Memory โ€” even the smallest creatures of Orbis leave their mark.

๐Ÿช

Camel Calf

Neutral
Zone 2

Camel Calves are the young of the desert pack animals that endure Orbis's punishing Howling Sands. Despite their age, they already carry the stoic resilience of their kind โ€” wandering close to the adults, learning the rhythms of survival in a landscape where water and shade are luxuries. With 94 health points they are surprisingly hardy for juveniles. They won't start a fight, but push one far enough and it will retaliate. Every encounter with a Camel Calf is preserved as a World Memory, making your time among the dunes part of your permanent story.

๐Ÿ”

Desert Chick

Chicken Desert Chick

Friendly
Zone 1

The Desert Chick is a familiar sight near settlements in Zone 1, pecking industriously at the dirt between patches of grass and loose grain. Completely harmless and unbothered by passing travelers, it goes about its routines with the cheerful single-mindedness of a creature that has nothing to fear. With only 8 health points it is one of the most fragile lives on Orbis, a tiny pulse of warm color against pale earth. It carries no loot, but its presence marks a place as lived-in and inhabited. This little bird is registered as a World Memory โ€” proof that small lives matter in the wider tapestry of Orbis.

๐Ÿ„

Calf

Cow Calf

Neutral
Zone 1

Calves are the youngest members of the domesticated cattle herds that graze in the open pastures of Zone 1, often found wandering close to their mothers near villages and farmsteads. Still growing into the sturdy frames of adult bovines, they survey the world with wide, curious eyes and pose no threat whatsoever. Stumble into one and it may shuffle away or simply stand its ground โ€” but it will only retaliate if genuinely provoked. At 60 health points it is a resilient young animal. No loot falls from it; this calf's value lies in the pastoral life it represents. Its existence is etched into Orbis as a World Memory.

๐Ÿ

Kid

Goat Kid

Neutral
Zone 3

High in the rocky terrain of Zone 3's cold mountains, where few travelers bother to look, you'll find the Kid โ€” a young goat already testing the limits of its natural climbing ability. These juveniles pick their way across ledges and loose scree with a confidence that seems implausible for an animal so small, mirroring the sure-footedness that defines their species. With 36 health points they are not without stamina. They're neutral by temperament and won't charge first, but corner one on a narrow mountain path and it will push back. Each Kid's brief life on the high slopes is preserved as a World Memory in Orbis.

๐Ÿ‘

Lamb

Sheep Lamb

Friendly
Zone 1

The Lamb is a common sight on the gentle slopes and open grasslands of Zone 1, contentedly grazing wherever a patch of green invites it to linger. Weighing in at 29 health points, it is light-bodied and clearly unbothered by the world around it โ€” a fully peaceful animal that will not fight under any circumstances. Its soft fleece and small stature make it easy to overlook, yet the Lamb plays a quiet role in Orbis's agricultural rhythms, gathered into the flocks that graze near Outlander settlements. It drops nothing when defeated, but every Lamb encountered is woven into the world as a World Memory, a gentle thread in Orbis's living story.

๐Ÿ—

Warthog Piglet

Neutral
Zone 2

Stumbling across a Warthog Piglet in the arid scrublands of Orbis's second zone is a reminder that even the harshest landscapes harbour young life. These small tusked piglets wander near their parents, and while they won't charge a player unprovoked, they will squeal and retaliate if you get too rough. At 81 health they're sturdier than they look โ€” don't mistake their size for fragility. No loot drops from them, but crossing paths with one is logged as a World Memory, quietly marking your journey.

๐Ÿฆฃ

Bison Calf

Neutral
Zone 1

Born into the sweeping grasslands of Orbis's first zone, Bison Calves trail the herd closely, their long wool already thickening against the open-plains wind. They won't engage a player who keeps their distance, but like most herd animals, pushing a calf too hard risks drawing attention from the adults nearby. At 94 health they can absorb a surprising amount of punishment for a juvenile. They yield no loot, but the World Memory system records your first encounter with one โ€” a small footnote in your larger story on Orbis.

๐Ÿฆฃ

Bison

Neutral
Zone 1

Few sights in Orbis's first zone are as impressive as a Bison herd moving across the open plains โ€” a wall of wool and horn that makes the ground shudder. These animals are neutral, not aggressive, but with 126 health backing up each individual, a provoked Bison is a genuine threat. Bring one down and you'll walk away with a guaranteed two to three pieces of Raw Beef and two to three Medium Hides, enough to make a dedicated hunting trip worthwhile. The World Memory system marks your first kill, tying this iconic creature to your personal history on Orbis.

๐Ÿ

Mouflon

Neutral
Zone 3

High above the lowlands, the Mouflon picks its way across rocky slopes and highland meadows of Zone 3 with surprising sure-footedness. Its thick curved horns are both a display of status and a weapon it won't hesitate to use if you wander too close โ€” this animal is neutral, not tame. With 81 health points and a tendency to flee before fighting, it rewards patient hunters. Bring it down and you'll claim guaranteed Raw Wildmeat and Light Hide. Every encounter here is preserved in World Memory.

๐Ÿ–

Piglet

Pig Piglet

Friendly
Zone 1

Waddling between fence posts and muddy puddles near the settlements of Zone 1, the Piglet is one of the most familiar sights in early Hytale. Raised by farmers and Outlander communities alike, this small animal has no quarrel with players โ€” it is entirely friendly and will not retaliate even if bumped. Weighing in at only 25 health points, it is fragile but endearing. Young ones dart around pens and open fields, adding genuine life to the pastoral corners of Orbis. It carries no drops, but its existence is preserved in World Memory.

๐Ÿช

Camel

Neutral
Zone 2

Few animals embody the Howling Sands of Zone 2 quite like the Camel. Built to endure scorching heat and lengthy treks with minimal water, this desert-adapted giant is a practical companion for any traveler willing to treat it right. Neutral by disposition, it won't charge at you unprovoked โ€” but with 126 health points it can certainly take a hit. Riders can mount it, making it invaluable for crossing the expansive dunes. Killing one yields guaranteed Raw Beef and Light Hide. The Camel's story in your journey is saved as a World Memory.

๐Ÿ‡

Bunny

Friendly
Zone 1

Darting through clover patches and sunlit clearings across Zone 1, the Bunny is perhaps the most harmless creature you'll encounter in Orbis. Entirely friendly, it scatters at the slightest sound and never fights back regardless of provocation. Its 25 health points make it delicate โ€” a single misstep can end its bounding sprint. No loot falls when one is felled, making its value purely ambient: the Bunny brings a sense of quiet life to the Emerald Grove's softer meadows. Still, every sighting is woven into World Memory, a small testament to Orbis's living detail.

๐Ÿ

Ram

Neutral
Zone 1

The Ram is not a creature to underestimate simply because it grazes in Zone 1's pastoral fields. This thick-set horned male can flip from placid to furious in an instant โ€” neutral until cornered or struck, at which point it lowers its massive head and charges with genuine force. At 124 health points it hits harder than most early-game animals. Patient players who earn its trust can even mount it for a ride across the meadows. Felling one drops guaranteed Raw Wildmeat and Light Hide. The Ram's story in your world is saved as a World Memory.

๐Ÿ—

Boar

Neutral
Zone 1

Boars are stocky, thick-hided wild pigs that root through the undergrowth of Zone 1's forests. They won't charge unprovoked โ€” but corner one or draw your blade nearby and it will answer with surprising aggression, using its tusks to punish careless players. With 81 HP it can absorb punishment before going down. Hunting boars is a reliable early-game investment: every kill guarantees Raw Wildmeat and Medium Hide, making them a staple source of food and basic crafting materials. The World Memory system records each encounter, weaving your history with these animals into the broader story of Orbis.

๐Ÿ—

Warthog

Neutral
Zone 2

Built for the punishing heat of Zone 2's arid plains, the Warthog is a heavier, more hardened relative of the common boar. Its curved tusks and bristled hide signal a creature that has adapted to harsher conditions โ€” and its 103 HP reflects that toughness. Like the boar it stays neutral unless provoked, but fighting a Warthog mid-desert with no shelter nearby is a different proposition than an early-zone scuffle. Bringing one down yields a solid haul: Raw Pork and Medium Hide, both dropping in guaranteed quantities. The World Memory system logs these encounters, marking your passage through the Howling Sands.

๐Ÿ‘

Sheep

Friendly
Zone 1

Among the gentlest creatures grazing the meadows of Zone 1, Sheep pose no threat whatsoever โ€” they will not retaliate even if struck. Their real value lies in what they leave behind: every kill drops Raw Wildmeat, a Light Hide, and one to three Wool Scraps, making them an efficient multi-resource farm target for players stocking up on food and textiles early in the game. They tend to cluster in open grassy areas, making them easy to locate. The World Memory system records your dealings with these peaceful animals, threading even mundane moments of survival into the living record of Orbis.

๐Ÿ—

Boar Piglet

Neutral
Zone 1

The Boar Piglet is a young wild pig found roaming alongside adult boars in the forests of Zone 1. Small and only lightly built with 29 HP, it won't start a fight on its own โ€” but like its parents, it will retaliate if cornered or struck. Though it carries no loot, players should be cautious: stirring up a piglet can agitate nearby adults, turning a harmless encounter into something more dangerous. The World Memory system records even these small moments, preserving your relationship with the fauna of Orbis across the full arc of your journey.

๐ŸŽ

Foal

Horse Foal

Neutral
Zone 1

The Foal is a young horse encountered in the open lands of Zone 1, still too small and untrained to be ridden. At 49 HP it is fragile but not entirely defenceless โ€” while it won't seek a fight, it will kick back if attacked. The fact seed suggests its lineage connects to the rideable horses that make travel across Orbis faster, hinting that the foal represents the early life stage of a valued mount. It leaves no loot behind, giving it purely ecological role: a sign of life and herd activity in the region. The World Memory system records encounters with even these young animals.

๐Ÿ”

Desert Chicken

Chicken Desert

Friendly
Zone 1

The Desert Chicken scratches through the sun-baked soils of Zone 1, pecking at seeds and insects with unhurried determination. A familiar presence near frontier settlements, it roams close to homesteads and lays eggs dependably throughout the day. Peaceful by nature, it poses no threat whatsoever and will simply scatter if approached too quickly. Hunters value it for its guaranteed drops of Raw Chicken and Light Hide. This particular bird has left its mark on the world โ€” every sighting is preserved as a World Memory on Orbis.

๐Ÿฆƒ

Turkey Chick

Neutral
Zone 1

Bumbling through the undergrowth of Zone 1's forests and farmland, the Turkey Chick is a young ground bird that has barely found its footing in the world. It won't pick a fight unprovoked, but corner one or swing without warning and it will peck back with surprising indignation for something so small. With only 15 health points it falls quickly in any confrontation. Hunters who do bring one down can expect Raw Wildmeat and Light Hide in return. The Turkey Chick's presence is catalogued as a World Memory, woven permanently into the fabric of Orbis.

๐Ÿ„

Cow

Neutral
Zone 1

Domesticated and dependable, the Cow grazes across the pastures of Zone 1 in the company of village life. These bovines have been raised for generations alongside Orbis settlements, and their calm demeanor reflects that deep familiarity with people โ€” they won't charge unless genuinely provoked. With a substantial 103 health points, they take a fair few hits before going down. Once defeated, they reliably yield Raw Beef and Medium Hide in quantities useful for sustaining any early camp. Their story on Orbis is preserved as a World Memory.

๐Ÿ”

Chick

Chicken Chick

Friendly
Zone 1

Newly hatched and barely larger than a fist, the Chick toddles around Zone 1 farmyards and settlements with boundless curiosity and absolutely no sense of danger. It is entirely friendly โ€” no amount of provocation will make it fight back. With just 7 health points, it is among the most fragile creatures on Orbis. Perhaps for that reason, its brief appearances are considered meaningful enough to be woven into the world's own World Memory. It carries no loot, being a chick and all โ€” but its presence adds undeniable warmth to any homestead.

๐Ÿ”

Chicken

Friendly
Zone 1

A staple of Zone 1 settlements, the Chicken spends its days scratching at the dirt around homesteads and village edges, hunting for seeds and the occasional bug with single-minded focus. Completely peaceful and oblivious to any threat it might pose โ€” which is none โ€” it simply goes about its business and lays eggs near wherever people have built. With 29 health points it won't last long in a fight, and hunters regularly collect its guaranteed Raw Chicken and Light Hide drops. This common bird's story is nonetheless etched into Orbis as a World Memory.

๐Ÿฆƒ

Turkey

Neutral
Zone 1

Turkeys scratch through the leaf litter of Zone 1's forests and farmland clearings, keeping largely to themselves unless disturbed. Though neutral by nature, they will peck back if cornered โ€” don't mistake their plodding gait for complete passivity. With 38 HP they go down quickly, and every kill is guaranteed to yield Raw Wildmeat and Light Hide. This encounter is preserved as a World Memory, so the hunt becomes part of your permanent story on Orbis. A modest but reliable source of early-game resources.

๐Ÿ

Ram Lamb

Neutral
Zone 1

Don't let the youth fool you โ€” a Ram Lamb is a compact wall of muscle and keratin with 81 HP and a short temper. This young horned male roams Zone 1 farmland and grassland, and while it won't charge unprovoked, a single careless blow is enough to trigger a headbutt that sends players stumbling back. It carries no loot, but the World Memory tag means every clash with one is woven into your permanent record on Orbis. Approach with respect, or keep your distance.

๐Ÿ–

Pig

Friendly
Zone 1

Pigs are the gentle constant of Hytale's settled landscapes โ€” common around villages and farms of Zone 1 and completely unbothered by passing adventurers. Friendly through and through, they pose no threat and won't retaliate no matter the circumstance. When slaughtered, each pig drops 1โ€“2 Raw Pork and a piece of Light Hide, making them a reliable early food source for any explorer restocking supplies. This encounter is marked as a World Memory on Orbis. A humble animal, but one that keeps many travellers fed.

๐Ÿ

Goat

Neutral
Zone 3

Where the terrain grows steep and the cold bites harder, goats thrive. These sure-footed animals navigate the rocky slopes of Zone 3's frigid mountains with unhurried confidence, pausing to graze on whatever sparse vegetation survives the altitude. Neutral by disposition, a goat will only fight back when struck first. Hunters who make the climb are rewarded: a kill drops 1โ€“2 Raw Wildmeat and 1โ€“2 Light Hide guaranteed. World Memory status means every confrontation on those heights is permanently recorded on Orbis.

๐Ÿ

Mouflon Lamb

Neutral
Zone 3

The Mouflon Lamb is a young wild sheep of Zone 3's highland terrain โ€” smaller than its adult counterpart but already carrying the distinctive curving horns of its kind. It roams mountain plateaus and rocky hillsides without straying far from the herd, and while its neutral temperament means it won't attack first, provoking one may draw the attention of nearby adults. At 49 HP it can take a few hits before going down. It carries no loot when slain, but every encounter is sealed into Orbis as a World Memory.

๐Ÿบ

Black Wolf

Wolf Black

Hostile
Zone 1

Black Wolves are among the most dangerous pack hunters in the Emerald Grove. Their dark coats let them blend into shadowed underbrush, making detection difficult until they are already closing in. They attack on sight and coordinate with packmates to flank and overwhelm prey โ€” a lone traveler caught off guard rarely fares well. Defeating one guarantees Raw Wildmeat and 1โ€“2 Medium Hides, making them a worthwhile hunt if you can manage the numbers. This encounter is recorded in Orbis as a World Memory.

๐ŸฆŒ

Antelope

Neutral
Zone 2

The Antelope is a swift grazing animal that drifts across the open savannas of the Howling Sands, rarely staying in one spot for long. It is not aggressive and will not retaliate unless cornered, preferring to sprint away from any perceived threat. Hunters willing to close the distance can earn 1โ€“2 Raw Wildmeat and 1โ€“2 Light Hides from a successful kill. Despite its non-threatening nature, tracking one at speed takes patience. This creature is catalogued in Orbis as a World Memory.

๐Ÿปโ€โ„๏ธ

Polar Bear

Bear Polar

Hostile
Zone 3

Polar Bears command the frozen expanses of Borea with an imposing presence โ€” large, powerful, and immediately hostile to anything that enters their territory. They do not wait to be provoked; the moment they detect an intruder, they charge. At 103 health they can absorb a considerable amount of punishment before going down. The reward for a hard-fought victory is 2โ€“3 Heavy Hides and 2โ€“3 Raw Wildmeat, making Polar Bears a valuable target for crafters needing thick armor materials. This encounter is recorded in Orbis as a World Memory.

๐ŸฆŒ

Stag

Deer Stag

Neutral
Zone 1

Stags are unhurried woodland inhabitants of the Emerald Grove, moving quietly through clearings and forest paths in search of grazing. They are not aggressive and will retreat when threatened rather than stand their ground. Up close, they carry 103 health โ€” sturdy enough that carelessly chasing one can still leave you winded. A successful hunt yields 1โ€“2 Raw Wildmeat and 1โ€“2 Light Hides, essentials for early-game crafting. Their calm presence makes them feel like living scenery right until the moment you need what they carry. This creature is recorded in Orbis as a World Memory.

๐Ÿ†

Snow Leopard

Leopard Snow

Hostile
Zone 3

Snow Leopards are the silent executioners of Borea's high peaks โ€” their spotted white coats blend so thoroughly into snowy terrain that many players only realize one is nearby when the attack has already begun. They are aggressively territorial and will strike on sight without hesitation. A fight with one is fast and punishing; at 103 health they hit hard enough to demand serious preparation. Taking one down rewards 4โ€“8 Raw Wildmeat and 1โ€“2 Medium Hides. Surviving the encounter leaves a mark on Orbis as a World Memory.

๐Ÿฆฆ

Armadillo

Neutral
Zone 2

The Armadillo is a small armored mammal that wanders the arid scrublands of the Howling Sands. Despite its compact size, it carries 103 health points โ€” enough durability to shrug off a glancing blow before curling into a tight defensive ball. It won't attack first, but disturbing one will trigger that curl reflex and a quick retaliation. Hunters value it for the guaranteed Raw Wildmeat and Sturdy Chitin it drops, the latter being a useful crafting material. This creature is preserved as a World Memory, so each encounter with an Armadillo is permanently recorded in Orbis.

๐Ÿบ

Hyena

Hostile
Zone 2

Hyenas are pack-hunting scavengers that prowl the sun-baked savannas of the Howling Sands. They are hostile by nature โ€” spotting a player triggers an immediate coordinated charge from the group, making solo encounters deceptively dangerous. With 103 health points each, a full pack can overwhelm an unprepared traveler in seconds. Taking them down yields guaranteed Raw Wildmeat and Medium Hide, both worthwhile rewards for Zone 2 crafting needs. As a World Memory creature, every Hyena you kill is written into Orbis's permanent record โ€” an acknowledgment that this pack was real, and the fight was earned.

๐ŸฆŒ

Doe

Deer Doe

Neutral
Zone 1

The Doe is a graceful woodland herbivore that grazes quietly across the lush forests of the Emerald Grove. She poses no threat whatsoever โ€” neutral in temperament, she will bolt at the first sign of danger rather than stand her ground. With 81 health points she's among the lighter creatures in Zone 1, making her a reliable early-game food source. Hunting her guarantees Raw Wildmeat and Light Hide, the latter useful for basic leather-working projects. Her wandering patterns through the sunlit canopy also make her a pleasant landmark for new explorers learning the Grove's geography โ€” and a World Memory entry each time she falls.

๐ŸฆŒ

Moose Cow

Neutral
Zone 3

The Moose Cow is the docile female counterpart of the great moose species that dominates the pine forests of Borea. She won't initiate a fight โ€” neutral and slow-moving, she goes about her business grazing among frozen trees โ€” but she will retaliate if cornered. At 103 health points she's a sturdy animal, and the payoff reflects that: she drops 2โ€“3 portions of Raw Wildmeat alongside Medium Hide, making her one of the better hunting targets in Zone 3's harsh cold. Her encounter is preserved as a World Memory, giving each hunt a permanent place in Orbis's living record.

๐Ÿป

Grizzly Bear

Bear Grizzly

Hostile
Zone 1

The Grizzly Bear is one of the most formidable predators you'll encounter in the Emerald Grove. It doesn't wait for provocation โ€” this massive 124-health animal is hostile on sight, charging with a ferocity that has ended many an overconfident adventurer's run. It actively defends a wide territory, so simply wandering too close is enough to trigger an attack. The payoff for defeating one is substantial: guaranteed Heavy Hide in 1โ€“2 pieces and 2โ€“3 portions of Raw Wildmeat. As a World Memory, every Grizzly you fell is catalogued in Orbis's record โ€” proof of a fight that tested your preparation.

๐Ÿ…

Sabertooth Tiger

Tiger Sabertooth

Hostile
Zone 3

Borea's frozen wilds hide a predator that has no patience for the unprepared โ€” the Sabertooth Tiger. This prehistoric big cat uses the terrain itself as cover, stalking silently through snowfields before launching a sudden ambush. With 124 health and an aggression that triggers on detection, it attacks without warning. Defeating one guarantees Raw Wildmeat and Medium Hide in useful quantities. Encounters here are etched permanently into Orbis as a World Memory, so every brush with this beast leaves its mark on your journey.

๐Ÿบ

White Wolf

Wolf White

Hostile
Zone 3

Camouflage is the White Wolf's greatest weapon. Its snow-white coat blends so perfectly into Borea's frozen landscape that you may not spot the threat until it's already closing the gap. Hostile by nature, it attacks on sight and backs that aggression with 103 health. Kills yield Raw Wildmeat and Medium Hide. The White Wolf is also a World Memory creature โ€” meeting one is recorded in Orbis, giving your expedition through Borea a persistent narrative thread beyond simple survival.

๐ŸฆŠ

Fox

Neutral
Zone 1

Quick, alert, and surprisingly self-possessed, the Fox is a regular sight in the Emerald Grove's forests and open meadows. As a neutral animal it won't initiate a fight, but corner one or swing first and it will defend itself. With only 38 health it won't last long in a sustained confrontation. A successful hunt yields Raw Wildmeat, making foxes a lightweight but reliable early food source. This is also a World Memory creature, so your first genuine encounter with a fox is quietly noted by Orbis itself.

๐ŸฆŒ

Mosshorn

Neutral
Zone 1

The Mosshorn is one of the most recognizable sights in the Emerald Grove โ€” a hulking, moss-draped horned beast that drifts through ancient forests with the unhurried calm of something that has few natural enemies. Neutral in temperament, it won't charge unless provoked, but at 124 health it can absorb considerable punishment when it does retaliate. Hunters who bring one down are rewarded generously: four to eight pieces of Raw Wildmeat plus Heavy Hide, making it one of the most rewarding hunts in Zone 1. Orbis also records this encounter as a World Memory.

๐ŸฆŒ

Moose Bull

Neutral
Zone 3

Towering antlers and a deliberate, unhurried gait define the Moose Bull of Borea's cold pine forests. This large herbivore is neutral โ€” it has little interest in conflict unless pushed into it, but with 124 health behind those antlers, provoking one is a decision worth reconsidering. Bringing one down yields two to three cuts of Raw Wildmeat and Medium Hide, solid returns for hunters willing to brave Zone 3's bitter cold. The Moose Bull is a World Memory creature, so Orbis keeps a record of every meaningful encounter you have with one.

๐Ÿ

Mouse

Friendly
All Zones

Blink and you might miss one โ€” the Mouse is among the smallest living things on Orbis, darting between grass tufts, squeezing into cave crevices, and threading through the cluttered corners of settlements. It poses no danger whatsoever and will scatter at the first sign of trouble. Despite its fragility, every Mouse you spot is preserved as a World Memory, so these fleeting sightings carry an unexpected weight in your adventure's record. No loot, no threat โ€” just a tiny heartbeat woven into the fabric of every zone.

๐Ÿฆฆ

Meerkat

Neutral
Zone 2

Meerkats are the watchful sentinels of the Howling Sands. They live in tight-knit burrow colonies beneath the desert floor, and the sight of a group standing upright on their hind legs โ€” scanning the horizon for danger โ€” is one of Zone 2's most recognisable vignettes. Approach too close or make a threatening move and they will bite back; they won't pick a fight, but they won't flee either. Each encounter is etched into your World Memory. They drop nothing when killed, so the real reward here is observation.

๐Ÿธ

Frog

Frog Green

Friendly
Zone 1

The green Frog is a staple of Zone 1's wetter corners โ€” bogs, lily-dotted ponds, and slow-moving streams on the edges of the Emerald Grove. It hunkers low on mossy stones or half-submerged logs, blending seamlessly into the surrounding green. Entirely peaceful, it will never attack and simply leaps away if you draw near. Still, the moment counts: every frog sighting is logged as a World Memory, making these quiet amphibians small but genuine markers of your journey through Orbis. They carry no drops.

๐ŸฆŽ

Gecko

Friendly
Zone 2

Find a warm, sun-bleached wall or a cluster of sandstone boulders in the Howling Sands and there's a good chance a Gecko is clinging to it โ€” motionless until your shadow falls across it, then gone in a flash. This small desert lizard is entirely harmless, relying on stillness and its mottled hide rather than flight speed for concealment. It's one of the subtler signs of life that Zone 2 hides in plain sight. Geckos leave no drops, but each one spotted is preserved in your World Memory, rewarding patient explorers who notice the details.

๐Ÿธ

Frog

Frog Blue

Friendly
Zone 1

Unlike its common green cousin, the blue Frog stands out against the vegetation of Zone 1's marshes and pond banks โ€” its vivid colouring making it one of the more striking small creatures you'll stumble across in the Emerald Grove. It is completely peaceful and will hop away without any fuss if approached. There's nothing to fight and nothing to loot here; the blue Frog's value lies entirely in the moment of discovery. That moment is recorded as a World Memory, so keen-eyed explorers who seek out this rarer colour variant will find it woven permanently into their journey.

๐Ÿฟ

Squirrel

Friendly
Zone 1

Few creatures in the Emerald Grove are as effortlessly charming as the Squirrel. This bushy-tailed rodent darts between the canopies of Zone 1's ancient trees, completely uninterested in the adventures of passing players. It poses no threat whatsoever โ€” watch it leap from branch to branch and you begin to understand why Orbis feels alive even in its quieter corners. Your encounter with this harmless little creature is preserved as a World Memory, a small but genuine piece of your journey through these sun-dappled woods.

๐ŸŒ

Magma Snail

Snail Magma

Friendly
Zone 1

The Magma Snail is a contradiction wrapped in a shell โ€” a slow, gentle mollusk carrying what appears to be volcanic heat within its body. Found in the damp forests and marshes of Zone 1, it wanders at a leisurely pace and never turns aggressive. Despite its placid nature, hunters seek it out deliberately: a defeated Magma Snail is guaranteed to yield Raw Wildmeat and Essence of Fire, making it a practical early-game resource stop. Your time spent tracking one through the wetlands is recorded as a World Memory.

๐Ÿ

Marsh Snake

Snake Marsh

Neutral
All Zones

The Marsh Snake has spread to practically every environment on Orbis โ€” grasslands, tangled jungles, and the dripping tunnels of underground caves alike. Neutral by disposition, it will not strike unless it feels cornered or threatened, so careful players can move past one without incident. Provoke it, however, and those 36 hit points back up a genuinely venomous bite. Every kill drops a Venom Sac, a resource with uses well beyond the marsh itself. Because this reptile turns up across all zones, your first encounter with it is saved as a World Memory.

๐Ÿ›

Silk Larva

Larva Silk

Neutral
Zone 1

Hidden among fallen logs and leafy undergrowth in Zone 1's temperate woodlands, the Silk Larva spends its days spinning and minding its own business. It is a neutral creature โ€” leave it undisturbed and it will never initiate a fight, but crowd it and it will defend itself. Its modest 25 hit points mean a swift resolution either way. The practical reason to engage one: Raw Wildmeat is a guaranteed drop, offering straightforward sustenance for early foragers. Your first run-in with a Silk Larva is written into Orbis as a World Memory.

๐Ÿ€

Rat

Neutral
Caves

Rats scurry through the deepest passages of Orbis, thriving wherever scraps collect โ€” cave floors, dungeon corridors, forgotten sewers. They won't attack unless cornered, but a startled rat can still draw blood. With only 21 health they go down quickly, and every kill is recorded as a World Memory, lending even these humble encounters a touch of lasting significance. They reliably drop Raw Wildmeat and Light Hide, making them a practical early source of basic crafting materials for adventurers willing to delve underground.

๐Ÿชฑ

Hatworm

Neutral
Caves

At first glance the Hatworm looks like a mushroom โ€” its cap mimics the rounded dome of a cave fungus with surprising accuracy. This small cave-dwelling worm poses no threat on its own, content to inch through the damp stone passages of Orbis without any interest in adventurers. Neutral by nature, it only retaliates if provoked. It carries nothing of value, but its quirky resemblance to subterranean flora makes it one of those creatures that stops explorers mid-step, unsure for a moment whether they're looking at a plant or a worm.

๐Ÿ€

Molerat

Neutral
Caves

The Molerat has spent generations reshaping Orbis's cave systems from the inside out, carving branching tunnels through rock and soil with blunt, powerful claws. It won't strike first โ€” 61 HP of compact muscle is reserved for defense when cornered. Killing one yields Raw Wildmeat and Light Hide, making it a worthwhile stop on any underground expedition. This creature is etched into the World Memory of Orbis, meaning your interactions with it form part of a larger, persistent story beneath the surface.

๐ŸŒ

Frost Snail

Snail Frost

Neutral
Zone 3

Life in Borea's frozen wastes has fused shell with frost in the Frost Snail, producing a creature that carries a thick, ice-coated carapace wherever it slowly crawls. Despite looking like little more than a curiosity, it will retaliate if disturbed, so give it space if you have no quarrel with it. A clean kill reliably drops Raw Wildmeat alongside Essence of Ice โ€” the latter making it a sought-after harvesting target for crafters working cold-themed recipes. Its existence is part of Borea's World Memory.

๐Ÿ

Cobra

Snake Cobra

Hostile
Zone 2

Sunbaked and lethal, the Cobra is one of the Howling Sands' most recognizable hazards. When it detects an intruder it rears back, flares its hood, and strikes without hesitation โ€” this is an animal hardwired to attack on sight, not to warn. Its 74 HP belies how quickly the fangs find their mark. A venom sac is left behind on every kill, making cobras worth hunting for poison-based crafting โ€” provided you can close the distance before its strike does. World Memory logs every deadly encounter.

๐Ÿ

Rattlesnake

Snake Rattle

Hostile
Zone 2

Sand-coloured and nearly invisible against the dunes, the Rattlesnake is one of the Howling Sands' most treacherous surprises. It does not wait to be cornered โ€” the moment it detects a presence it coils and strikes. With 61 health it is not a prolonged fight, but the attack comes fast and with little warning. Killing one always yields a Venom Sac, making rattlesnakes worthwhile targets for alchemists and crafters who need toxin components. Every encounter is recorded as a World Memory on Orbis.

๐Ÿฆ‚

Scorpion

Hostile
Zone 2

The Scorpion rules its stretch of Howling Sands with armoured patience. At 124 health it can absorb far more punishment than it looks, and its venomous tail lash punishes anyone who wades in carelessly. Killing one is worth the effort: a Venom Sac drops every time, and there is a 50% chance of recovering Sturdy Chitin โ€” a durable crafting material prized for its resistance. Treat this creature as a mid-priority threat: not a wipe risk on its own, but dangerous when other desert hazards are nearby. Each kill becomes part of your World Memory.

๐ŸฆŒ

Stag

Temple Deer Stag

Neutral
Zone 1

The Stag is a creature of quiet dignity, moving through the forested glades of the Emerald Grove with measured grace. A true herbivore, it keeps to itself and will not charge unless pressed into a corner โ€” back it into a dead end and it will defend itself. Watching a stag pick through sun-dappled undergrowth is one of those small, unhurried moments that make Orbis feel alive. This sighting is preserved as a World Memory, a gentle reminder that not every creature in Hytale is defined by conflict.

๐Ÿธ

Frog

Temple Frog Orange

Friendly
Zone 1

Small, vivid, and completely unbothered by your presence โ€” the Frog is a fixture of the Emerald Grove's wetter corners. It haunts the edges of ponds, shallow marshes, and any patch of ground where water lingers. Entirely harmless, it will hop away or simply sit still as you approach, unbothered and unhurried. Easy to overlook, yet somehow satisfying to find, this unassuming amphibian is the kind of ambient life that reminds adventurers that Orbis is a world worth exploring even when there's nothing to fight. This encounter is saved as a World Memory.

๐Ÿฆ

Greenfinch

Temple Finch Green

Friendly
Zone 1

Flash of emerald feathers, a burst of song, and the Greenfinch is already gone โ€” this small bird moves through the Emerald Grove canopy in quick, restless arcs. It's peaceful toward players and spends its days darting between branches far above the forest floor. Hunting it is entirely optional, but those who do will find it drops Raw Wildmeat and a guaranteed one to two Red Feathers โ€” worth keeping for crafting. This encounter is saved as a World Memory, preserving even this breezy, birdsong-filled moment as part of your wider story on Orbis.

๐Ÿธ

Frog

Temple Frog Green

Friendly
Zone 1

Dotting the muddy banks of ponds and marshes across Zone 1, the green Frog is one of Orbis's most unassuming residents. It poses no threat whatsoever โ€” with only a single point of health, even a careless footstep could end it. Mostly it just sits, blinks, and occasionally leaps into the water at the slightest disturbance. Encountering one marks a moment worth keeping: this small amphibian is preserved as a World Memory, quietly logging your presence in the world's living record.

๐Ÿฆ

Bluebird

Temple Bluebird

Friendly
Zone 1

Few sights in the Emerald Grove are as cheerful as a Bluebird flitting between the canopy boughs, its song cutting through the rustling leaves. Peaceful by nature, it will not engage the player, but its eighteen points of health mean it can take a stray shot or two before going down. Hunters value it as a reliable source โ€” every kill yields Raw Wildmeat and Blue Feathers without fail. The bird is also recorded as a World Memory, making each encounter a small chapter in your journey through Orbis.

๐Ÿฟ

Squirrel

Temple Squirrel

Friendly
Zone 1

Quick and skittish, the Squirrel spends its days leaping between the towering trees of the Emerald Grove, bushy tail trailing behind it as it vanishes into the canopy. It is entirely peaceful and flees at the slightest hint of danger โ€” with just one point of health, it has good reason to be cautious. While it drops nothing on death, simply spotting one feels like catching a glimpse of Zone 1 at its most alive. Each sighting is logged as a World Memory, threading the creature into the fabric of your adventure on Orbis.

๐Ÿธ

Frog

Temple Frog Blue

Friendly
Zone 1

Where the green variety blends into the reeds, the blue Frog stands out like a jewel dropped at the water's edge. Found near the same ponds and marshes of Zone 1, it shares its emerald-tinted cousin's peaceful temperament and fragile one-point health pool. It will never attack, spending its time perched on lily pads or half-submerged in the shallows, watching the world with wide, unblinking eyes. Like all of Orbis's small wonders, an encounter with it is woven into your World Memory, a fleeting note in the record of your travels.

๐Ÿ‡

Bunny

Temple Bunny

Friendly
Zone 1

Few creatures in the Emerald Grove embody the gentle side of Orbis quite like the Bunny. This small rabbit hops through sun-dappled meadows and forest undergrowth without a care, completely indifferent to passing adventurers. It poses no threat whatsoever and will simply dart into the bushes if disturbed. Spotting one is an easy pleasure in Zone 1, and because this modest creature is woven into the World Memory of Orbis, even an idle moment watching it graze becomes part of your permanent story in this world.

๐Ÿฆ‰

Brown Owl

Temple Owl Brown

Neutral
Zone 1

The Brown Owl haunts the forest canopy of Zone 1 with silent authority. Though classified as nocturnal, this bird of prey can be found perched motionless in the high branches during daylight hours, watching the ground below with sharp amber eyes. It won't strike first, but corner one or strike carelessly and those talons become dangerous fast โ€” this hunter has 29 hit points and is far sturdier than it looks. Bring it down and it always yields Raw Wildmeat along with one or two Dark Feathers, making it a worthwhile target for early crafters. This encounter is preserved as a World Memory.

๐Ÿฆ†

Duck

Temple Duck

Friendly
Zone 1

Waddling along the banks of ponds and slow-moving waterways in Zone 1, the Duck is a familiar and wholly peaceful presence. It won't react to players at all โ€” even splashing right past one causes no alarm. With 18 hit points it is a practical early food source: every Duck drops Raw Wildmeat and one or two Red Feathers without fail. Those vibrant feathers are a useful crafting material worth gathering whenever you pass by a wetland. Because the Duck is part of the World Memory of Orbis, even a quick hunting stop along the riverbank leaves a trace in your permanent record.

๐ŸฆŒ

Doe

Temple Deer Doe

Neutral
Zone 1

Quiet and unhurried, the Doe browses the sun-dappled clearings of the Emerald Grove without any sign of aggression. She will not strike first, but startle her and she'll bolt into the underbrush. With no recorded drops and a single point of health, she is as fragile as she is peaceful. Her presence feels like a promise that the wilder parts of Orbis still hold beauty worth preserving โ€” and every crossing is etched into Orbis as a World Memory.

๐Ÿ€

Rat

Edible Rat

Neutral
Caves

Rats thrive in the hidden underworld of Orbis โ€” the caves, dungeon corridors, and forgotten sewers that run beneath every major structure. As scavengers, they aren't hunting players; they're simply going about their business. Disturb one, however, and it will bite back. Their neutral disposition means they're easily avoided if you watch where you're stepping in tight underground passages. For spelunkers who prefer a quiet descent, these rodents serve more as atmosphere than genuine hazard.

๐Ÿฑ

Cat

Friendly
Zone 1

Quietly threading its way through the settlements of Zone 1, the Cat is one of the few truly peaceful creatures on Orbis. It poses no threat whatsoever and won't flee in panic โ€” it simply exists on its own terms, wandering near homes and campsites with the quiet confidence of an animal that knows it belongs. Players looking for a companion rather than a fight will find in the Cat a small, unassuming presence that can be tamed and kept close. Sometimes the most valuable thing in a dangerous world is a moment of calm.

๐Ÿฆ•

Dimetrodon

Neutral
Caves

Prowling the ancient passages of Orbis's cave systems, the Dimetrodon is a relic of a much older world. Its distinctive dorsal sail catches what little light filters through the underground, making it unmistakable even at a distance. It won't charge a player on sight โ€” but corner it or strike first and those powerful jaws will answer. There is something haunting about encountering a creature this ancient so far beneath the surface, as though the caves themselves have preserved it across eons of geological time.

๐Ÿถ

Dog

Friendly
Zone 1

Dogs are among the most familiar faces you will encounter wandering the meadows and settlements of Zone 1. Loyal by nature, a dog that bonds with you will follow at your heels across Orbis without complaint, making long expeditions feel a little less lonely. They pose no threat to anyone โ€” these animals are purely peaceful companions. No loot falls when one dies, so the only thing worth taking from a dog is its company.

๐Ÿ‡

Jackalope

Neutral
Zone 2

The jackalope cuts a peculiar silhouette in the sun-scorched dunes of Zone 2's desert โ€” a rabbit body crowned with branching antlers, darting between rock formations in short, skittish bursts. It will not pick a fight, but corner one and you will quickly learn those legs can kick. Approach with patience rather than speed if you want to get close. No items drop from these creatures, so encounters with them are purely for curiosity's sake.

๐Ÿ’

Macaque

Neutral
Zone 3

High in the canopy of Zone 3's dense jungles, macaques spend their days leaping between branches, grooming, and watching everything below with sharp, inquisitive eyes. They are not aggressive by nature, but they will defend themselves if you get too close or startle them โ€” a provoked macaque can be surprisingly quick. Their real value is as part of the jungle's atmosphere, chattering overhead while you explore the undergrowth. They drop nothing when killed.

๐Ÿ”

Prehistoric Chicken

Neutral
Caves

Descended from an era long before the surface world was shaped, the Prehistoric Chicken scratches at the cave floor in dim cavern biomes, looking deceptively mundane for something that ancient. It shares the neutral temperament of its distant modern relatives โ€” leave it alone and it will return the favour. The darkness of the Caves clearly suits it; millions of years underground have done little to diminish its appetite for grubs. It leaves nothing behind when it dies.

๐Ÿฆ•

Triceratops

Neutral
Caves

Few creatures in Orbis's cave systems manage to convey quiet immensity the way the Triceratops does. This massive three-horned herbivore moves through the deep cave regions with calm purpose, grazing on whatever subterranean vegetation it finds. Neutral unless provoked, it will lower its frill and charge if it decides you are a threat โ€” the sheer bulk behind that movement is not something to dismiss. Nothing drops from a slain Triceratops, but finding one wandering a prehistoric cavern is a reward in itself.

Aquatic Creatures in Hytale โ€” Ocean Life of Orbis

35
๐Ÿ

Moray Eel

Eel Moray

Hostile
Ocean

What looks like empty reef is often anything but โ€” the Moray Eel wedges itself into crevices and coral gaps across Ocean zones, striking the moment prey enters range. It attacks on sight, making shallow reef exploration considerably more dangerous than it appears. With 74 health and a lunge that comes with almost no warning, this predator has caught many swimmers off guard. Defeating one guarantees a drop of Raw Fish, and every encounter is preserved as a World Memory on Orbis.

๐Ÿฆˆ

Hammerhead Shark

Shark Hammerhead

Hostile
Ocean

The Hammerhead Shark is one of the most recognizable and dangerous creatures patrolling Orbis's open Ocean zones. That broad, mallet-shaped head isn't just distinctive โ€” it gives the shark exceptional sensory range, letting it detect threats and prey across wide arcs before they even notice it. Hostile and relentless, it attacks on sight with 145 health behind every charge. It drops one to two pieces of Raw Fish and is forever marked in your World Memory, a testament to surviving the deep.

๐ŸŸ

Lava Coelacanth

Shellfish Lava

Neutral
Volcanic Cave

Deep inside Volcanic Caves, where the air shimmers with heat and molten rock pools glow orange, the Lava Coelacanth drifts through superheated water that would kill most creatures on contact. An ancient lineage preserved in extreme conditions, this fish won't initiate aggression โ€” but corner it or strike first, and it retaliates. It has 29 health and will reliably drop Raw Fish when defeated. The fact that such a creature exists at all is remarkable, and Orbis marks every sighting as a World Memory.

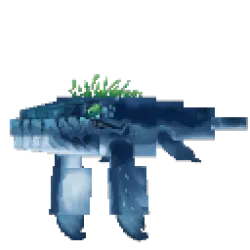
Humpback Whale

Humpback Whale

Whale Humpback

Friendly
Ocean

<p>The <strong>Humpback Whale</strong> is the largest passive creature of the <span class="chip chip-zone">Ocean</span> biome and one of the signature non-hostile encounters players have while sailing or diving in Hytale. Where the Kraken is the Ocean's apex predator and the reef fish are its ambient life, the Humpback Whale is the Ocean's majesty โ€” a enormous, docile animal whose presence is the reward for venturing out over deep water rather than a threat to be survived. For players exploring Orbis's seas, a whale sighting is the moment that shifts the Ocean from a hazard to a destination.</p> <h2>Behavior & interactions</h2> <p>The Humpback Whale is not a combat creature, and treating it like one is a category error. (community-sourced) it is passive toward the player and does not attack even when approached, which puts it in the small category of Hytale creatures โ€” alongside the Kweebecs of Zone 1 โ€” that exist to be observed rather than fought. Its behavior is ambient: it surfaces, dives, and travels through the open ocean on its own route, and a player who crosses its path gets a brief, cinematic encounter with one of the largest moving things in the game.</p> <p>The interaction the whale offers is logistical and navigational, not combative. (speculation) consistent with Hytale's emphasis on creatures that populate a believable world, the whale's role is to make the Ocean feel alive โ€” its sheer scale communicates that the sea is a real biome with real inhabitants, not just a wet obstacle between continents. Players who follow a whale are being shown the ocean, and the whale's travel route plausibly doubles as a loose guide toward open water, reefs, or whatever else the deep ocean contains.</p> <h2>Lore & origin</h2> <p>The Ocean is established in official Hytale material as a full zone rather than a filler biome, and the Humpback Whale is part of how that identity is sold. (speculation) the presence of a docile, whale-sized creature in the same waters as the Kraken is deliberate worldbuilding โ€” it establishes that the Ocean is not uniformly hostile, that it supports life at every scale from reef fish to leviathans, and that the danger of the Kraken is a specific threat rather than the default state of the sea. That nuance is what separates a living biome from a monster-spawning box.</p> <h2>Significance & rewards</h2> <p>The whale is not a loot source in the conventional sense; treat any specific drop claims as (community-sourced). Its significance is experiential and worldbuilding rather than material โ€” encountering one is itself the reward, the way a rare ambient event in any exploration game is the reward. (speculation) it is plausible that Hytale ties some form of indirect value to the whale โ€” a photography-style objective, a navigation cue, or a marker for nearby points of interest โ€” but the core reason to seek one out is the encounter itself, not a drop table.</p> <div class="callout"> <p><strong>Tip:</strong> Don't attack the whale โ€” it's not a fight, it's a sighting. The value of a Humpback Whale encounter is the encounter itself, and a player who sails alongside one gets a far better return than one who treats it as a target.</p> </div> <h2>Humpback Whale โ€” Frequently Asked Questions</h2> <h3>Where do I find the Humpback Whale?</h3> <p>In the Ocean biome โ€” open water, typically away from shallow coastlines. It is the largest passive creature of the sea and travels its own route through deep water.</p> <h3>Is the Humpback Whale hostile?</h3> <p>No. (community-sourced) it is passive toward the player and does not attack even when approached. It exists to be observed, like the Kweebecs of Zone 1.</p> <h3>Can you fight it?</h3> <p>You can attack it, but it isn't a combat creature โ€” treating it like one is a category error. There is no boss fight here; the whale is an ambient, docile animal.</p> <h3>Does it drop anything?</h3> <p>No official drop table exists; any specific item claims are community-sourced. The whale's value is experiential โ€” the encounter itself is the reward, not a loot drop.</p>

๐ŸŸ

Frostgill

Neutral
Zone 3

Borea's frozen lakes and icy rivers are home to the Frostgill, a cold-water fish built for survival where temperatures would paralyze most aquatic life. It won't attack unless provoked โ€” swim past carefully and it pays you no mind, but harm it and expect a fight. With 81 health it's no pushover among the region's fauna. Catching one guarantees Raw Fish, making it a reliable food source for anyone willing to brave Borea's biting cold. Like all creatures here, a Frostgill encounter becomes part of your World Memory on Orbis.

๐ŸŸ

Rainbow Trout

Trout Rainbow

Friendly
Zone 1

Rainbow Trout dart through the clean rivers and shallow streams of Zone 1, their flanks catching the light in vivid splashes of colour. These fish are entirely peaceful โ€” they pose no threat and will simply scatter if disturbed. Catching one always yields a piece of Raw Fish, making them a reliable early food source for travellers passing through Orbis. Because killing a Rainbow Trout is recorded as a World Memory, even routine fishing carries a quiet, personal weight in this world.

๐ŸŸ

Black Piranha

Piranha Black

Hostile
Zone 3

Dark-scaled and relentless, the Black Piranha is the predator of Zone 3's murky waterways. It never hunts alone โ€” these fish operate in ravenous schools, swarming any creature that enters their territory on sight. With 45 hit points and coordinated group behaviour, wading into infested water without a plan is a quick way to die. Defeat them and you are guaranteed to collect Raw Fish, though survivors will remember the encounter long after: every kill with a Black Piranha school is sealed in the World Memory of Orbis.

๐ŸŸ

Pike

Neutral
Zone 1

The Pike is a patient, solitary predator lurking in the rivers and lakes of Zone 1. It will not strike without cause โ€” but disturb one and it turns aggressive fast, biting with the full force of its 38 hit points. Anglers and explorers who know to stay calm near the water can pass without incident. Bring one down and you stand to collect one or two pieces of Raw Fish. Like all encounters that matter in Orbis, clashes with the Pike leave their mark as permanent World Memories.

๐ŸŸ

Bluegill

Friendly
Zone 1

Bluegills are small, unassuming panfish that gather in the still ponds and quiet lakes scattered across Zone 1. Placid by nature, they present no danger whatsoever โ€” they glide serenely through the shallows and pay little mind to whatever passes overhead. They are a dependable source of Raw Fish for anyone in need of a quick meal early in their journey through Orbis. Small as the moment may feel, every Bluegill caught is woven into the World Memory, a quiet reminder that even the smallest lives matter in this land.

๐ŸŸ

Piranha

Hostile
Zone 3

Piranha packs turn the tropical rivers of Zone 3 into feeding frenzies. These vicious schooling fish attack on sight, swarming anything that enters their waters with relentless snapping jaws. A single piranha is manageable, but the school hunts as one organism โ€” spread-out attacks and staying mobile are key to surviving a crossing. They go down with 38 health points and always drop Raw Fish. Every encounter with a piranha school is preserved as a World Memory in Orbis.

๐ŸŸ

Salmon

Friendly
Zone 3

Salmon are migratory fish that travel upstream through the cold northern rivers of Zone 3, following routes set long before any adventurer arrived on Orbis. Peaceful by nature, they will never turn on a player and pose no threat whatsoever. Spotting a salmon mid-leap against a current is one of the quieter, more memorable sights the waterways of Orbis have to offer. They always drop Raw Fish when caught or killed, and their journeys are logged as World Memories.

๐ŸŸ

Catfish

Neutral
Zone 1

The catfish hugs the muddy beds of Zone 1's rivers and lakes, sifting through silt with its barbels for anything edible. It is not looking for trouble โ€” approach without provocation and it will simply drift away. Corner it or strike first, however, and it will defend itself with surprising force for a bottom-dweller. With 29 health points, it is no pushover in a close fight. Fishing or hunting one always yields Raw Fish, and the catfish's quiet existence is preserved as a World Memory on Orbis.

๐ŸŸ

Minnow

Friendly
Zone 1

Minnows are the smallest fish darting through the shallow streams and riverside shallows of Zone 1 โ€” easy to overlook but impossible to ignore once you spot a whole school flickering through sunlit water. Completely harmless, they will never react aggressively to a player passing by. At just 15 health points they are fragile, and a single strike will end them. Each one reliably drops Raw Fish, making them a modest but accessible food source for early survival. Their presence is recorded as a World Memory in Orbis.

๐Ÿชผ

Red Jellyfish

Jellyfish Red

Neutral
Ocean

Drifting on ocean currents with no particular direction, the Red Jellyfish is one of Orbis's most visually striking marine creatures โ€” its translucent crimson bell pulsing with each slow undulation. It will not seek out a swimmer, but brush against its trailing tentacles and you will feel the sting. With 38 health points it can take a hit before retreating, making accidental contact more costly than it looks. It drops 2โ€“3 Raw Fish with certainty, and every encounter in the open ocean is sealed as a World Memory.

๐Ÿฆ€

Crab

Neutral
Ocean

Crabs scuttle along the shorelines and shallow tidal flats of the Ocean zone, their armored shells making them surprisingly resilient for such small creatures. With 49 health, a crab won't crumble at the first splash โ€” but it won't pick a fight either, unless you wade too close and give it reason. Provoke one and you'll meet those claws up close. Kill one and it drops Raw Fish, making beach crabs a practical food source for early coastal survival. This creature is preserved as a World Memory, so every crab encounter leaves a mark on Orbis.

๐Ÿก

Pufferfish

Neutral
Ocean

The pufferfish drifts through Ocean waters looking entirely harmless โ€” until something gets too close. When threatened, it rapidly inflates into a spiny sphere, a display that doubles as a genuine deterrent. At 38 health it won't absorb punishment for long, but this fish isn't hunting you; leave it alone and it leaves you alone. Anglers willing to brave the spines will find a guaranteed Raw Fish drop waiting. The pufferfish's dramatic threat display is recorded as a World Memory, preserving that tense moment of inflation in Orbis's living history.

๐Ÿชผ

Green Jellyfish

Jellyfish Green

Neutral
Ocean

Translucent and unhurried, the Green Jellyfish pulses through open ocean waters on invisible currents. Its trailing tentacles aren't decorative โ€” brush against them and you'll feel the sting. This creature won't chase you down, but it won't move out of your way either, making careless swimmers the most frequent victims. Defeat one and it yields 2 to 3 Raw Fish guaranteed, more than most Ocean creatures its size. Its ghostly silhouette drifting through deep water is captured as a World Memory, a quiet reminder that not every danger in Orbis announces itself loudly.

๐Ÿ 

Sailfin Tang

Tang Sailfin

Friendly
Ocean

The Sailfin Tang is one of the Ocean's most immediately striking residents. Its tall, sail-like dorsal fin and vivid striped flanks make it easy to spot weaving between coral formations in warm shallows. Completely peaceful by nature, it poses no threat whatsoever โ€” you could swim alongside a whole school without incident. With just 20 health it falls quickly if targeted, yielding Raw Fish on every kill. Like all its reef companions, the Sailfin Tang is enshrined as a World Memory, its elegant shape a small but genuine piece of Orbis's living ocean record.

๐Ÿ 

Blue Tang

Tang Blue

Friendly
Ocean

Few sights in Orbis's Ocean are as immediately vivid as a Blue Tang darting through coral. Its electric blue coloration and rapid, darting movement make it one of the most recognizable reef fish in warm waters. Entirely friendly, it will not react to players at all โ€” it simply lives its life among the corals and goes about its business. At 20 health it's fragile and yields Raw Fish when caught. What sets it apart from its reef neighbors isn't its behavior but its appearance: this World Memory captures the specific shade of blue that lights up Orbis's underwater world.

๐Ÿชผ

Yellow Jellyfish

Jellyfish Yellow

Neutral
Ocean

Drifting silently through the waters of Orbis's Ocean, the Yellow Jellyfish is a translucent, bioluminescent wanderer that trails long, stinging tentacles beneath its golden bell. It poses no threat unless you swim too close โ€” provoke or brush against it and those tentacles will answer. Killing one guarantees 2โ€“3 Raw Fish, making it a reliable food source for ocean voyagers. Every encounter with this creature is preserved as a World Memory, weaving it permanently into your journey through Orbis.

๐Ÿฆž

Lobster

Neutral
Ocean

The Lobster lurks among the rocky shelves and sandy beds of Orbis's Ocean floor, armored in a hard chitinous shell and armed with a pair of powerful claws. It will not pick a fight unprovoked, but back one into a corner and its claws clamp down hard. With 61 health it takes more punishment than most ocean creatures before going down. Defeat one and it yields Raw Fish. Because this encounter is saved as a World Memory, every lobster you face becomes part of your permanent record in Orbis.

๐Ÿ 

Clownfish

Friendly
Ocean

Tucked between the waving fronds of coral in Orbis's tropical reef zones, the Clownfish is a tiny, vividly striped fish that poses absolutely no threat. Its bright orange-and-white coloration makes it one of the most recognizable sights beneath the Ocean's surface. Completely peaceful, it will never retaliate even if attacked. Fishing one up guarantees a Raw Fish. Every encounter is preserved as a World Memory, so even this small, unhurried fish leaves a mark on your time in Orbis.

๐Ÿ 

Lemon Peel Tang

Tang Lemon Peel

Friendly
Ocean

Named for the vivid citrus-yellow hue that covers its disc-shaped body, the Lemon Peel Tang darts through the coral reefs and warm shallows of Orbis's Ocean. Its striking color is an unmistakable flash of brightness among the blues and greens of the deep. Entirely harmless and friendly, it will not fight back under any circumstances. It always drops Raw Fish when caught. Since it is recorded as a World Memory, spotting this reef fish stitches another luminous moment into the tapestry of your voyage across Orbis.

๐Ÿชผ

Cyan Jellyfish

Jellyfish Cyan

Neutral
Ocean

Unlike its yellow cousin, the Cyan Jellyfish casts an eerie blue-green glow through the darker layers of Orbis's Ocean, its translucent bell pulsing with each slow drift. The tentacles trailing below are just as venomous โ€” get too close or strike it and you will feel their sting. It won't seek you out, but neither will it ignore an intrusion. Defeating one drops 2โ€“3 Raw Fish. This creature is woven into the World Memory system, so every fateful brush with a glowing cyan bell becomes part of your permanent story in Orbis.

๐Ÿชธ

Man Of War

Jellyfish Man Of War

Hostile
Ocean

The Man of War drifts through open Ocean waters looking deceptively serene โ€” until it detects you. This jellyfish-like predator attacks on sight, lashing out with venomous tentacles that deal serious damage to any swimmer caught in their reach. With 74 health points it can outlast a careless diver, and every kill it scores is recorded as a World Memory. It always drops 2โ€“3 Raw Fish, so experienced hunters treat it as a resource run that bites back.

๐Ÿชผ

Blue Jellyfish

Jellyfish Blue

Neutral
Ocean

The Blue Jellyfish floats through the Ocean on invisible currents, its translucent bell pulsing with a quiet glow. It keeps to itself and will not attack unprovoked โ€” but brush against those trailing tentacles and you will feel their sting immediately. Its 38 health points make it fragile, though not trivially so. Killing one guarantees 2โ€“3 Raw Fish and leaves a World Memory behind, a small but permanent mark from an encounter with one of Orbis's most graceful sea creatures.

๐Ÿ 

Chevron Tang

Tang Chevron

Friendly
Ocean

Look for the Chevron Tang darting between coral formations and rocky outcrops in the Ocean โ€” its body is unmistakable, striped with crisp chevron markings that seem almost too precise for a wild fish. Peaceful by nature, it poses no threat to swimmers or divers and will not retaliate even if cornered. Its low health makes it easy to catch, and it always yields Raw Fish. Every sighting is preserved as a World Memory, a quiet reminder that Orbis rewards curiosity as much as combat.

๐ŸŸ

Skrill

Neutral
Ocean

Skrill patrol the coastal shallows and open waters of Orbis's oceans, darting through kelp and coral with surprising agility. They won't bother you unless you give them reason to, but cornered individuals do snap back. Hunt one down and you're guaranteed to recover Raw Wildmeat and Light Hide โ€” both useful early-game materials that make underwater excursions worth the swim. This encounter is preserved as a World Memory, so the moment you first cross paths with a Skrill, Orbis quietly takes note.

๐ŸŸ

Skrill Chick

Neutral
Ocean

Barely visible against the sandy ocean floor, Skrill Chicks drift through the shallows in loose clusters, still too small to venture into deep water on their own. They're neutral by nature โ€” harmless unless provoked โ€” and with only 15 health they're among the most fragile creatures in Orbis's seas. Nothing drops from them, so there's no incentive to hunt them down. What matters is that your first encounter is woven into the World Memory of Orbis, marking even these fleeting moments in the fabric of the world.

๐Ÿš

Clam

Friendly
Ocean

Half-buried in the sandy floor of Orbis's Ocean, the Clam spends its days motionless and unbothered, filtering nutrients from the water that drifts past its shell. It poses no threat to swimmers and makes no attempt to flee โ€” it simply exists, a small architectural fixture of the seabed. Divers exploring the shallows or hunting for ocean resources will regularly pass clusters of clams without incident. No loot has been documented from them, making them purely part of the ambient scenery rather than a hunting target.

๐Ÿชธ

Coral

Friendly
Ocean

Coral formations in Orbis's Ocean are not wandering creatures but living structures โ€” sessile colonies that anchor themselves to the seafloor and grow outward in vivid fans, branches, and domes of color. Warm tropical currents feed their slow expansion, and entire reef ecosystems form around them over time. They are wholly peaceful, incapable of movement or aggression, and serve primarily as environmental backdrop for underwater exploration. Swimmers passing through coral zones will find rich visual scenery but no combat encounter and nothing to loot.

๐Ÿ™

Kraken

Boss
Ocean

<p>Few creatures in Orbis inspire the specific dread that the <strong>Kraken</strong> does. Lurking in the deep ocean where sunlight no longer reaches the seabed, this colossal tentacled horror is one of Hytale's marquee boss encounters and a fixture of <span class="chip chip-zone">Ocean</span> exploration. The Kraken does not patrol a coastline or wait passively to be provoked; it claims the open water as its territory and responds to intruders with the full force of an apex predator defending its hunting ground. Players who venture out over deep water โ€” whether chasing a Humpback Whale, prospecting for islands, or simply crossing between continents โ€” do so knowing that a Kraken encounter is always a possibility.</p> <h2>Combat & Encounter</h2> <p>Fighting the Kraken is fundamentally different from any land-based boss fight in Hytale, because the battleground itself is hostile. Underwater movement is slower and more constrained than on land, line of sight is limited by particulate and depth, and the player cannot rely on the same dodge-and-circle strafing that trivializes Zone 1 enemies. The Kraken leverages all of this: its tentacles cover enormous reach, and a player caught in open water has nowhere to retreat to. (community-sourced) the encounter reads as a multi-phase fight in which the boss cycles between sweeping tentacle strikes, attempts to drag the player deeper, and brief windows where its central body is exposed to damage.</p> <p>Strategy therefore centers on <em>preparation</em> rather than reaction. The recommended approach is to treat a Kraken hunt as an expedition: water-breathing consumables or gear, a clear retreat vector toward shallower water or a boat, and a party rather than a solo diver. Engaging the Kraken at depth, alone, and under-geared is one of the fastest ways to lose a hard-earned inventory in Hytale's Ocean biome.</p> <h2>Lore & Origin</h2> <p>Hytale's reveal material establishes Orbis as a world where each zone has a signature apex threat, and the Kraken fills that role for the Ocean. (speculation) Given that the Void corruption reshapes creatures in the Devastated Lands โ€” turning ordinary dragons into the Void Dragon โ€” some community theorizing asks whether the Kraken is a natural deep-sea titan or an older creature warped by long exposure to something buried beneath the seabed. The official NPC blog has not confirmed an origin, so for now the Kraken reads most cleanly as the Ocean's equivalent of a zone boss: a creature whose scale and aggression match the danger of the biome it rules.</p> <h2>Loot & Rewards</h2> <p>Exact drop tables for the Kraken are not published in any official Hytale material; treat any specific item list you see elsewhere as (community-sourced) and unconfirmed until verified in the live build. What is consistent with Hytale's design language is that a boss of this magnitude would gate access to high-tier crafting materials โ€” most plausibly ocean-themed reagents, rare consumables, or a trophy that records the kill. Players hunting the Kraken should expect the rewards to justify the logistical cost of mounting a deep-water expedition, not a trivial loot pinata.</p> <div class="callout"> <p><strong>Tip:</strong> Never fight a Kraken directly above deep water without a planned escape. The single most common cause of Kraken deaths is being dragged below the depth at which you can reasonably surface. Mark shallows or a boat before engaging.</p> </div> <h2>Kraken โ€” Frequently Asked Questions</h2> <h3>Where do I find the Kraken in Hytale?</h3> <p>The Kraken is encountered in the deep Ocean biome โ€” open water far from shore, where the seafloor drops away. It is a boss-tier creature that defends its territory aggressively rather than spawning at a fixed dungeon location.</p> <h3>Can you fight the Kraken solo?</h3> <p>(speculation) Soloing the Kraken is technically possible for an over-geared player but strongly discouraged. The fight is balanced around the difficulty of underwater combat โ€” limited mobility, restricted line of sight โ€” and a party spreads the boss's attention and provides revive options.</p> <h3>What does the Kraken drop?</h3> <p>No official drop table exists. Any specific item list is community-sourced and should be verified in-game. Expect boss-tier rewards consistent with the logistical effort of mounting a deep-water hunt.</p> <h3>Is the Kraken the hardest boss in Hytale?</h3> <p>It is among the hardest, but difficulty in Hytale is contextual โ€” the Kraken is brutal because of the underwater arena, while the Void Dragon is brutal because of raw damage and corruption mechanics. Different fights test different skills.</p>

๐ŸŸ

Regal Tang

Friendly
Ocean

Vivid and instantly recognizable, the Regal Tang cuts through Orbis's tropical reef waters in flashes of deep blue and yellow. It keeps company with coral formations, weaving between branches and polyps as though the reef were purpose-built for it. Peaceful by nature, it pays little attention to players nearby and has no interest in combat. There's nothing to harvest from it either โ€” the Regal Tang's value lies entirely in the life it adds to the underwater environment, a small but vivid reminder that Orbis's Ocean is inhabited by far more than just dangers.

๐Ÿงฝ

Sponge

Friendly
Ocean

Sponges cling to the rocky and sandy surfaces of Orbis's Ocean floor, drawing water through their porous bodies to capture microscopic food particles. As filter feeders, they require neither movement nor aggression โ€” they anchor in place and let the currents do the work. A sponge is entirely harmless to any player passing by and yields no loot when examined. They're easy to overlook among coral and shell clusters, but their presence signals healthy reef conditions and contributes quietly to the visual richness of the underwater world players can explore.

๐ŸŸ

Void Piranha

Hostile
Devastated Lands

The Void Piranha is a predatory fish warped beyond recognition by Void corruption, haunting the poisoned waterways of the Devastated Lands. Where ordinary rivers once flowed, these twisted creatures now swarm in murky depths, attacking anything that enters their tainted domain. Their bodies are riddled with dark energy, making them a visible sign of just how deeply the Void has seeped into Orbis. Wading into these waters unprepared is a swift way to meet your end.

Hytale NPCs & Tribes โ€” Factions of Orbis

83
Goblin Scavenger

Goblin Scavenger

Goblins

Hostile
Zone 1

<p>The <strong>Goblin Scavenger</strong> is the bottom-rank forager of the Goblins faction, encountered in the camps and tunnels of the <span class="chip chip-zone">Emerald Wilds (Zone 1)</span> and its connected cave systems. Where the Goblin Miner digs and the Goblin Duke commands, the Scavenger picks at the edges of a fight โ€” looting battlefields, salvaging scraps, and generally serving as the faction's lowest-cost body. He is the goblin a new player fights first when pushing into a cave, and the one that most clearly communicates that the Goblins are a scavenging, opportunistic people rather than an organized army like the Trorks.</p> <h2>Combat & encounter</h2> <p>The Scavenger is the weakest combat goblin, and his fight reflects that. (community-sourced) his attacks are basic melee swings with poor reach and modest damage, and his health pool is the smallest in the goblin roster. In isolation he is a trivial fight for anyone past the very first hour of Zone 1. His threat, like the unarmed Trork's, comes from numbers and from his tendency to appear in the company of tougher goblins โ€” a Scavenger chipping at the player while a Miner or a Duke presses the front is the dynamic that makes a goblin camp a real fight rather than a cleanup.</p> <p>The Scavenger also serves a thematic role in combat: he is the goblin most likely to be found looting. (speculation) consistent with his name, his AI reads as opportunistic โ€” he presses when the player looks weak and retreats or scavenges when the player looks strong, which fits Hytale's broader emphasis on creatures that evaluate rather than simply aggro. The practical implication is that a Scavenger who flees may come back with friends, so the clean play is to finish him rather than let him reset.</p> <h2>Lore & origin</h2> <p>The Goblins are a canonical hostile faction of Hytale's underground and the fringes of Zone 1, and the Scavenger is the purest expression of how the faction survives: by picking through what others leave behind. (speculation) the existence of a dedicated "scavenger" role implies that goblin society is built around salvage and opportunism โ€” they do not mine like the Miners or command like the Dukes, they simply take what is lying around. That paints the Goblins as a faction that lives on the margins of other people's activity, which is a distinct identity from the territory-holding Trorks or Outlanders.</p> <h2>Loot & rewards</h2> <p>No official drop table exists; treat specific item lists as (community-sourced). As the weakest goblin unit, the Scavenger plausibly drops only the lowest tier of loot โ€” junk-tier items, basic scraps, and occasionally a crafting material worth pocketing. He is a target of opportunity rather than a goal, and players should expect routine, low-value drops consistent with his rank.</p> <div class="callout"> <p><strong>Tip:</strong> A fleeing Scavenger can come back with friends. If one breaks off a fight, chase him down and finish him rather than letting him reset โ€” the opportunistic goblins are more dangerous in numbers than alone.</p> </div> <h2>Goblin Scavenger โ€” Frequently Asked Questions</h2> <h3>Where do I find the Goblin Scavenger?</h3> <p>In goblin camps and cave tunnels in the Emerald Wilds (Zone 1) and its connected Caves. He is the bottom-rank forager of the Goblins faction.</p> <h3>How is he different from other goblins?</h3> <p>He is the weakest combat goblin and the one most associated with looting and salvage. Miners dig, Dukes command, and Scavengers pick at the edges โ€” he sits at the bottom of the roster.</p> <h3>Is he dangerous?</h3> <p>(community-sourced) Not in isolation. His threat comes from numbers and from appearing alongside tougher goblins. A fleeing Scavenger may also return with friends.</p> <h3>What does he drop?</h3> <p>No official drop table exists; any item list is community-sourced. Expect only low-tier loot โ€” junk, basic scraps, and occasionally a pocketable crafting material.</p>

๐Ÿ—ก๏ธ

Outlander Stalker

Outlanders

Hostile
Devastated Lands

Where other Outlander fighters charge head-on, the Stalker works from darkness. This assassin haunts the ruins and broken terrain of the Devastated Lands, closing distance quietly before launching a sudden attack. At 61 health it falls quickly once detected, but getting the drop on it is the hard part. Shadoweave Scraps โ€” between one and four pieces โ€” are a guaranteed drop, with a rare 5% chance of recovering an Iron Hand Crossbow. The Stalker's tactics make it one of the more unsettling Outlander encounters, and the moment is preserved in your World Memory on Orbis.

๐Ÿ“ฟ

Outlander Priest

Outlanders

Hostile
Zone 3

The Outlander Priest is not a front-line combatant โ€” it is the force that makes every front-line combatant more dangerous. Operating in Zone 3, this ritual caster channels dark energy through the Outlander warband, strengthening allies and calling on forces that most travellers would rather not face. At 103 health it is a sturdy target, and the rewards reflect that: Shadoweave Scraps (1โ€“4) and Essence of the Void (2โ€“3) both drop at 100%, making the Priest a consistent source of rare void-infused materials. Each encounter is preserved as a World Memory.

๐Ÿบ

Hunting Wolf

Outlanders

Wolf Outlander Sorcerer

Hostile
Zone 1

A powerful forest predator that moves in coordinated packs through Zone 1's woodlands, the Hunting Wolf brings 118 health and the unpredictability of pack tactics to every fight. It attacks on sight, making safe passage through its territory a matter of awareness and preparation. Each wolf that goes down drops Raw Wildmeat and between one and two pieces of Medium Hide โ€” reliable resources for early-game crafting and cooking. The bond between hunter and wolf runs deep in Orbis lore, and the fact_seed notes these wolves can be tamed as companions โ€” though the encounter begins as anything but friendly. Recorded as a World Memory.

๐Ÿช“

Outlander Berserker

Outlanders

Hostile
Zone 3

Where most Outlander fighters hold formation, the Berserker discards all discipline the moment combat begins. It charges headlong into battle with 103 health and raw ferocity, swinging wildly and closing distance faster than most players expect. Fighting one from a distance is wise โ€” letting it reach melee range turns the encounter into a punishing test of stamina. Outlander Berserkers roam the wilds of Zone 3, and every clash is recorded as a World Memory. Defeating one guarantees 1โ€“4 Shadoweave Scraps.

๐ŸฅŠ

Outlander Unsworn

Outlanders

Outlander Peon

Hostile
Zone 3

The Outlander Unsworn is a young tribe member fighting to earn their place through the brutal rites of Outlander survival. Still relatively inexperienced, they carry 81 health โ€” lower than veteran fighters โ€” but their aggression is immediate. They will attack any outsider on sight, driven by the need to prove themselves. Encountered across Zone 3, every kill against an Unsworn is preserved as a World Memory on Orbis. Despite their junior status, they always drop 1โ€“4 Shadoweave Scraps, making them a consistent early-progression resource.

๐Ÿ—ก๏ธ

Outlander Brute

Outlanders

Hostile
Devastated Lands

The Outlander Brute is the tribe's walking siege weapon โ€” a hulking enforcer who resolves problems by smashing through them. With 124 health, it is among the toughest Outlander fighters in the Devastated Lands, where the harsh environment has only amplified its natural aggression. It charges without hesitation, using sheer physical force to overwhelm opponents. Positioning and timing matter more than raw damage when facing one. This encounter is permanently logged as a World Memory, and the Brute always drops 1โ€“4 Shadoweave Scraps.

๐Ÿบ

Hunting Wolf

Outlanders

Wolf Outlander Priest

Hostile
Zone 1

Hunting Wolves run in coordinated packs through the forests of Zone 1, using superior numbers and flanking instincts to bring down prey larger than themselves. Associated with the Outlanders, these predators are hostile on sight with 107 health โ€” enough to sustain a prolonged chase or fight. Pulling one often means pulling the pack, so players should always check their surroundings before engaging. Every encounter is recorded as a World Memory. Kills yield guaranteed Raw Wildmeat and 1โ€“2 Medium Hides, making them practical targets for early crafting runs.

๐Ÿ—ก๏ธ

Outlander Sorcerer

Outlanders

Hostile
Devastated Lands

Unlike the Outlanders' melee-focused warriors, the Sorcerer wages war at range, weaving dark void magic against anyone who ventures too close in the Devastated Lands. With 103 health and ranged capabilities, it threatens players well before sword distance โ€” staying mobile and disrupting its casting rhythm is essential. The Sorcerer's command of void energies reflects the deeper corruption spreading through this zone. Every confrontation is stored as a World Memory. Defeating it is particularly rewarding: a guaranteed drop of 1โ€“4 Shadoweave Scraps and 2โ€“3 Essence of the Void.

๐Ÿน

Outlander Hunter

Outlanders

Hostile
Zone 3

Patrol the frozen expanses of Borea and you will find the Outlander Hunter long before it finds you โ€” if you are lucky. This hardened tracker reads wind, prints, and terrain with unsettling precision, pursuing both prey and intruders across the tundra with equal patience. At 61 health it is not the most durable enemy in Zone 3, but it engages on sight and closes ground fast. Dropping Shadoweave Scraps is guaranteed, and a rare five-percent chance yields an Outlander Doomed Shortbow. The encounter is recorded as a World Memory.

๐Ÿ”ฎ

Outlander Initiate

Outlanders

Outlander Cultist

Hostile
Zone 3

Somewhere between warrior and priest, the Outlander Initiate occupies a disturbing niche within the tribe's hierarchy. These followers of dark ritual carry the Void's influence visibly โ€” Essence of the Void drops from every kill alongside guaranteed Shadoweave Scraps, and there is a fifteen-percent chance of yielding Doomed Outlander Daggers. With 81 health they hit harder than a standard tribesman and attack without hesitation. Encountering one in Borea's depths reveals just how far the Outlander descent into darkness has progressed. The fight is saved as a World Memory.

๐Ÿ—ก๏ธ

Outlander Marauder

Outlanders

Hostile
Devastated Lands

The Devastated Lands attract a particular breed of Outlander: the Marauder. Stockier and more seasoned than most tribal fighters, this raider does not patrol โ€” it ambushes, using the broken terrain of the wasteland to cut off retreat before striking. With 103 health it can absorb considerable punishment while dealing it back, making surprise the real danger. Shadoweave Scraps are always on the body; a Doomed Outlander Sword or Shield might be recovered at five-percent each. The Marauder's aggression is immediate and unrelenting. Each clash is preserved as a World Memory.

Fledgling Scarak Broodmother

Fledgling Scarak Broodmother

Scaraks

Dungeon Scarak Broodmother Young

Boss
Zone 2

<p>Not every Scarak hive is ruled by a full-grown matriarch. The <strong>Fledgling Scarak Broodmother</strong> is a younger, smaller queen-caste Scarak found in the shallower hive chambers and starter-tier dungeons of the <span class="chip chip-zone">Howling Sands (Zone 2)</span>. She is the same creature type as the senior Broodmother โ€” same caste, same role in the hive, same instinct to anchor and spawn โ€” but she has not yet grown into the bulk, the armor, or the relentless egg output of her elders. For players, she functions as the introductory version of the Broodmother fight: same shape of encounter, lower stakes, and a gentler learning curve before the deeper hives are tackled.</p> <h2>Combat & encounter</h2> <p>Mechanically, the Fledgling mirrors the senior Broodmother but with reduced numbers across the board. (community-sourced) she still anchors to her chamber and summons Scarak hatchlings, but the waves are smaller, spawn more slowly, and her personal attacks hit less hard and less often. The pheromone-enrage effect, if present, is shorter and less dramatic. This makes her an ideal teaching fight: a party that has never seen the swarm-boss pattern can learn the rhythm โ€” clear adds during the spawn window, damage the queen during her recovery, repeat โ€” without being punished as brutally for a single mistake.</p> <p>She is meaningfully easier than the senior Broodmother, but she is not trivial. A party that ignores the hatchlings entirely will still be worn down, and a solo player who treats her like a normal mob will still get surrounded. The lesson she teaches โ€” that Scarak hive encounters are about add control, not just single-target damage โ€” is the entire point of the fight, and she delivers it at a difficulty a new Zone 2 character can actually survive.</p> <h2>Lore & origin</h2> <p>The existence of a "fledgling" Broodmother implies a life cycle within the Scaraks faction: queens are not born fully grown, and a hive's power scales with the age and size of its matriarch. (speculation) this fits a model where new hives are founded by a young queen who grows stronger the longer she is left unchecked โ€” which in turn gives players a reason to clear hives early and often, before the resident Fledgling matures into a far more dangerous senior Broodmother. It is a small piece of worldbuilding, but it makes the desert feel like a living ecosystem rather than a static spawn table.</p> <h2>Loot & rewards</h2> <p>No official drop table exists; treat any specific item list as (community-sourced). Consistent with her being an easier, earlier-tier boss, expect the Fledgling to drop a smaller quantity of the same kinds of materials a senior Broodmother would โ€” chitin pieces, basic desert reagents, and perhaps a lesser trophy. She is a reliable, repeatable source of mid-tier Scarak crafting materials for players who are not yet strong enough to farm the deep hives safely.</p> <div class="callout"> <p><strong>Tip:</strong> Use the Fledgling fight to practice add-control discipline before going deep. If your group struggles to keep hatchling numbers manageable here, a senior Broodmother will punish the same habit harshly. Learn the rhythm cheaply.</p> </div> <h2>Fledgling Scarak Broodmother โ€” Frequently Asked Questions</h2> <h3>Where do I find the Fledgling Broodmother?</h3> <p>In the shallower hive chambers and starter dungeons of the Howling Sands (Zone 2). She occupies the same role as the senior Broodmother but appears earlier and at lower depth.</p> <h3>Is she different from the regular Broodmother?</h3> <p>Same creature type and caste, but younger and weaker. Smaller hatchling waves, lighter attacks, and a shorter enrage window. She is the introductory version of the Broodmother fight.</p> <h3>Is she a boss?</h3> <p>Yes โ€” a boss-tier creature, but a lower-difficulty one. She is designed as a teaching fight that introduces the swarm-boss pattern before the deeper, harder hives.</p> <h3>Should I fight her before the senior Broodmother?</h3> <p>Yes. She is the natural on-ramp: same mechanics at lower stakes, plus a reliable source of mid-tier Scarak materials without the risk of the deep hives.</p>

Scarak Broodmother

Scarak Broodmother

Scaraks

Boss
Zone 2

<p>Deep beneath the sun-bleached canyons of the <span class="chip chip-zone">Howling Sands (Zone 2)</span>, the <strong>Scarak Broodmother</strong> rules the insectoid hives that honeycomb the desert stone. She is the queen-caste apex of the Scaraks faction โ€” a massive, armored matriarch whose sole purpose is to spawn, shelter, and command the lesser Scaraks that swarm the surrounding tunnels. Where regular Scarak Defenders and Fighters patrol the dunes above, the Broodmother never leaves the hive chamber; she is the reason the hive exists, and killing her is the only way to permanently break a Scarak infestation in a given area. Players who delve into Zone 2's underground ruins do so knowing that a Broodmother likely waits at the deepest point.</p> <h2>Combat & encounter</h2> <p>The Broodmother encounter is a textbook "swarm boss" fight. (community-sourced) she does not chase the player aggressively like a Trork Chieftain; instead she anchors to her egg chamber and continuously summons Scarak hatchlings โ€” weak individually, lethal in numbers โ€” while launching her own telegraphed attacks at anyone in melee range. This creates a constant tension between dealing damage to the queen and clearing the add waves before they overwhelm the party. A group that ignores the hatchlings will be drowned; a group that only clears hatchlings will never kill the queen. The fight demands disciplined target priority.</p> <p>Her personal attacks revolve around her size and caste. Expect heavy forward strikes with her bladed forelimbs, a ground-slam that staggers players caught too close, and โ€” most dangerously โ€” a pheromone release that enrages nearby hatchlings, briefly increasing their speed and damage. (speculation) the pheromone mechanic implies she is not a mindless beast but a thinking commander that can rally her brood under pressure, which fits Hytale's emphasis on creature AI that reads as intentional behavior rather than scripted loops.</p> <h2>Lore & origin</h2> <p>The Scaraks are the canonical hostile insectoid faction of Zone 2, shown in official Hytale reveal material inhabiting the ruins and hives of the Howling Sands. The Broodmother is the reproductive and social center of that faction โ€” without her, a hive cannot replenish its Defenders and Fighters. (speculation) her presence deep inside ancient ruins invites the question of whether the Scaraks built those structures or simply infested them after a prior civilization fell. The visual language of a buried queen guarding old stone is consistent with Hytale's theme of layered history in the desert, where every dune covers something older.</p> <h2>Loot & rewards</h2> <p>No official drop table has been published; treat specific item lists elsewhere as (community-sourced) and unverified. Consistent with Hytale's design, a hive queen of this magnitude would plausibly drop chitin-based crafting materials used for mid-tier armor, rare consumables tied to the desert, and a trophy proving the kill. Because breaking a hive also clears the surrounding Scarak patrols over time, the Broodmother's death has a secondary reward: making a stretch of Zone 2 safer to traverse and mine.</p> <div class="callout"> <p><strong>Tip:</strong> Assign one party member to hatchling duty. The Broodmother fight is lost far more often to being swarmed than to her direct attacks, and a single player dedicated to clearing adds keeps the rest of the group free to burn the queen during her damage windows.</p> </div> <h2>Scarak Broodmother โ€” Frequently Asked Questions</h2> <h3>Where do I find the Scarak Broodmother?</h3> <p>At the deepest chamber of a Scarak hive beneath the Howling Sands (Zone 2). She does not roam the surface โ€” she is anchored to her egg chamber in the underground ruins.</p> <h3>Is the Broodmother a boss?</h3> <p>Yes. She is a boss-tier creature and the social/reproductive apex of a Scarak hive. Slaying her is the way to permanently clear a hive rather than just thinning its patrols.</p> <h3>Can I fight her solo?</h3> <p>(speculation) Soloing is possible for an over-geared player but punishing, because the hatchling waves scale poorly for one person. A small party handles the add-clear far more comfortably.</p> <h3>What does she drop?</h3> <p>No official drop table exists; any item list is community-sourced. Expect boss-tier crafting materials (likely chitin), desert-themed consumables, and a kill trophy.</p>

Scarak Defender

Scarak Defender

Scaraks

Hostile
Caves

<p>The <strong>Scarak Defender</strong> is the heavy-infantry caste of the Scaraks, the desert insectoid faction that controls the <span class="chip chip-zone">Howling Sands (Zone 2)</span>. Where the Scarak Fighter is the lighter, faster attacker and the Broodmother is the hive's matriarch, the Defender is the shield โ€” the unit that holds a perimeter, guards a hive entrance, and absorbs the damage the rest of the colony deals out. For players pushing into a Scarak hive or the insect-guarded ruins the desert is known for, Defenders are the wall that has to be broken through before the richer interior becomes accessible.</p> <h2>Combat & encounter</h2> <p>The Defender is a durable front-line unit, and his fight reflects that role. (community-sourced) he hits harder than a Fighter and is noticeably tougher, with enough health and natural armor to hold a chokepoint against a player for an extended trade. His attacks are slow and heavy rather than fast, which means he punishes greed and face-tanking but gives a patient player clear windows to work in. The danger is not that he will burst you down, but that he will not die quickly while the lighter Scaraks around you keep up the pressure.</p> <p>Because Defenders hold positions rather than chase, the encounter is shaped by where you fight them. (speculation) consistent with a "defender" role, their AI reads as territorial: they hold ground near the thing they are guarding, which in a Scarak hive means a chokepoint, a tunnel entrance, or the approach to the Broodmother. The practical implication is that pulling a Defender out of position is harder than pulling a Fighter, so players often have to commit to fighting them where they stand โ€” and often where their allies can reinforce them.</p> <h2>Lore & origin</h2> <p>The Scaraks are established in official Hytale material as a hostile insectoid faction of the Howling Sands, and the Defender represents the protective caste that a eusocial insect faction would logically field. (speculation) the very existence of a dedicated "defender" caste implies that Scarak society is organized around the hive rather than the individual โ€” these are units whose function is to protect the colony, which fits the broader design of the Scaraks as a swarm-faction rather than a collection of independent creatures. That distinguishes them sharply from the Trorks or Outlanders, whose units are warriors of a tribe rather than cells of an organism.</p> <h2>Loot & rewards</h2> <p>No official drop table exists; treat specific item lists as (community-sourced). As a durable mid-to-upper-tier Scarak unit, the Defender plausibly drops the chitin-and-reagent-flavored loot the desert insect faction is associated with โ€” scarak chitin pieces useful for crafting, and the kinds of reagents tied to Zone 2 recipes. He is also a gate: killing the Defender at a hive entrance is what opens access to the interior, where the better loot and the Broodmother are usually found.</p> <div class="callout"> <p><strong>Tip:</strong> A Defender holds his ground, so the fight happens where he stands. Clear the lighter Fighters around him first if you can โ€” a Defender you can't reposition is manageable one-on-one but punishing when chaff is chipping at you the whole time.</p> </div> <h2>Scarak Defender โ€” Frequently Asked Questions</h2> <h3>Where do I find the Scarak Defender?</h3> <p>In the Howling Sands (Zone 2), typically guarding Scarak hives, hive entrances, and the approaches to the Broodmother. He is the heavy-infantry caste of the Scaraks faction.</p> <h3>How is he different from other Scaraks?</h3> <p>He is the shield โ€” durable, slow, and hard to move. Fighters are lighter attackers, the Broodmother is the matriarch, and Defenders hold the perimeter and absorb damage.</p> <h3>Is he dangerous?</h3> <p>(community-sourced) Not as a burst threat, but as a wall. He won't kill you quickly one-on-one, but he won't die quickly either, and he holds his position so lighter Scaraks can keep pressuring you.</p> <h3>What does he drop?</h3> <p>No official drop table exists; any item list is community-sourced. Expect chitin-and-reagent-flavored loot consistent with Zone 2, and treat him as the gate to a hive's richer interior.</p>

Scarak Fighter

Scarak Fighter

Scaraks

Hostile
Zone 2

<p>The <strong>Scarak Fighter</strong> is the light-attacker caste of the Scaraks faction, the hostile insectoid people who hold the <span class="chip chip-zone">Howling Sands (Zone 2)</span>. Where the Defender holds the perimeter and the Broodmother rules the hive, the Fighter is the unit that goes out โ€” patrolling the dunes, swarming intruders, and projecting the colony's reach beyond the hive entrance. For players crossing the open desert or approaching a Scarak ruin, Fighters are the Scaraks they meet first and the ones that decide whether a desert crossing stays routine or turns into a fight.</p> <h2>Combat & encounter</h2> <p>The Fighter is the lighter, faster end of the Scarak combat roster, and his fight reflects that. (community-sourced) he hits for less than a Defender but attacks more quickly and is more willing to chase, which makes him the pressure unit of a Scarak engagement. His threat, like most light attackers in Hytale, scales with numbers โ€” a single Fighter is a manageable fight for a Zone 2-appropriate player, but the Fighters you meet in the desert rarely travel alone. They are the swarm the Scaraks faction is built around, and they reinforce each other quickly.</p> <p>The tactical implication of fighting Fighters is that they decide when an encounter starts. (speculation) consistent with a "fighter" role that projects reach, their AI reads as aggressive and pursuit-oriented โ€” they close distance, they chase, and they pull nearby Scaraks into the fight. The practical implication is that a careless pull on a Fighter can snowball into a swarm, so spacing and pulling matter more in the Howling Sands than they do against the more positional Trorks or Goblins.</p> <h2>Lore & origin</h2> <p>The Scaraks are a canonical hostile faction of the Howling Sands, and the Fighter represents the offensive caste that a colonizing insect faction needs to expand and defend territory beyond the hive itself. (speculation) the existence of a dedicated light-combatant caste, separate from the Defender's protective role, implies that the Scaraks operate as an expanding colony rather than a passive one โ€” they project force outward, which fits the reveal material showing them as the dominant organized threat of Zone 2 alongside the undead and the sabertooths. That makes the Scaraks the desert's answer to the Trorks: a faction that holds the zone.</p> <h2>Loot & rewards</h2> <p>No official drop table exists; treat specific item lists as (community-sourced). As the lighter and more numerous Scarak unit, the Fighter plausibly drops the lower end of the chitin-and-reagent loot table โ€” basic scarak chitin, low-tier desert reagents, and the occasional pocketable crafting material. He is not a premium target individually, but because he is the most common Scarak encountered, Fighters are the practical source of the routine Scarak materials a Zone 2 player collects while traveling.</p> <div class="callout"> <p><strong>Tip:</strong> Fighters chase, and they pull friends. In the open desert, mind where you engage one โ€” a careless pull on a lone Fighter can snowball into a swarm if there are other Scaraks nearby. Pull them toward clear ground before committing.</p> </div> <h2>Scarak Fighter โ€” Frequently Asked Questions</h2> <h3>Where do I find the Scarak Fighter?</h3> <p>In the Howling Sands (Zone 2), patrolling the open dunes and around Scarak hives and ruins. He is the light-attacker caste of the Scaraks faction.</p> <h3>How is he different from other Scaraks?</h3> <p>He is the unit that goes out โ€” fast, light, and willing to chase. Defenders hold the perimeter, the Broodmother rules the hive, and Fighters patrol and swarm.</p> <h3>Is he dangerous?</h3> <p>(community-sourced) Not in isolation, but he scales with numbers. Fighters rarely travel alone in the open desert, and a careless pull can snowball into a swarm.</p> <h3>What does he drop?</h3> <p>No official drop table exists; any item list is community-sourced. Expect the lower end of the chitin-and-reagent loot table โ€” basic scarak chitin and low-tier desert reagents.</p>

๐Ÿฆ‚

Scarak Defender

Scaraks

Scarak Defender Patrol

Hostile
Caves

Not every Scarak Defender stays planted at a gate โ€” the patrol variant keeps moving through the cave corridors, pushing the hive's defensive perimeter outward rather than holding a single chokepoint. It shares the same 103-health frame and armored chitin as its stationary counterpart and is equally hostile, charging immediately on detection. The added danger is unpredictability: encountering one mid-tunnel while already engaged elsewhere turns manageable odds into a serious problem. Defeat it and collect 2โ€“3 Sturdy Chitin. The fight enters Orbis as a World Memory.

๐Ÿฆ‚

Scarak Seeker

Scaraks

Hostile
Caves

Speed is what sets the Scarak Seeker apart from its hive-mates. Where Defenders hold ground, the Seeker sprints through cave passages hunting down disturbances before they reach the core. It has only 61 health, but that quickness means it closes distance fast and rarely lets a target disengage cleanly. Treat it as the Scarak faction's early-warning system made physical. Bringing it down yields both a Venom Sac and Sturdy Chitin โ€” guaranteed drops with real crafting value. As with every Scarak encounter in the caves, this one becomes a World Memory.

๐Ÿชฑ

Scarak Louse

Scaraks

Hostile
Zone 2

The Scarak Louse is the youngest stage of the Scarak lifecycle โ€” a freshly hatched larva crawling through hive chambers until it matures into one of several adult castes: worker, locust, warrior, or tank. Its 21 health makes it the most fragile Scarak you'll encounter, but dismissing it entirely is a mistake when large groups swarm at once. Individually it deals modest damage; collectively a cluster can overwhelm an unprepared explorer. It has a 30% chance to drop Sturdy Chitin when killed. Every clash with one is preserved as a World Memory.

๐Ÿฆ‚

Scarak Seeker

Scaraks

Scarak Seeker Patrol

Hostile
Caves

Deep in the cave networks of Orbis, the Scarak Seeker operates as the Scarak faction's forward intelligence unit. This fast-moving scout weaves through tunnels with unnerving speed, tracking down anything that disturbs the colony's territory. It attacks on sight and fights with relentless aggression โ€” 61 points of health back up its tenacity. Taking one down always yields a Venom Sac and Sturdy Chitin, making the Seeker a worthwhile target for players who need crafting materials. Each confrontation is preserved as a World Memory, lending weight to every tunnel skirmish.

๐Ÿ‘บ

Goblin Scrapper

Goblins

Goblin Scrapper Patrol

Hostile
Zone 1

Where goblin warbands clash and territory lines blur, the Goblin Scrapper is always at the front of the pack. This low-ranked fighter charges headlong into melee the moment it spots an intruder, swinging crude weapons with more fury than finesse. Don't let the modest 38 HP lull you โ€” a patrol of Scrappers can overwhelm an unprepared traveler in moments. What it lacks in strategy it compensates with pure aggression, making every encounter feel chaotic and immediate. This fight is recorded as a World Memory, a testament to how even minor skirmishes leave their mark on Orbis.

๐Ÿ‘บ

Goblin Hermit

Goblins

Neutral
Zone 1

Most goblins crave company, noise, and the chaos of the horde โ€” the Goblin Hermit wants none of it. This solitary creature has deliberately withdrawn from its own kind to carve out a quiet existence somewhere in Zone 1's wilds. It won't attack first; approach with care and you may simply pass each other by. But corner it or land a blow, and it retaliates with the desperate ferocity of something with nothing left to lose. With 38 HP it isn't especially durable, but its unpredictability makes it memorable. This unusual encounter is saved as a World Memory.

๐Ÿ‘บ

Goblin Scavenger

Goblins

Goblin Scavenger Battleaxe

Hostile
Zone 1

Ruin-strewn corners of Zone 1 attract the Goblin Scavenger like a moth to a flame. This battle-axe wielder makes a living rifling through the aftermath of fights and collapsed structures, pocketing anything that gleams or cuts. It doesn't wait to be threatened โ€” if you stumble into its claimed territory, it attacks immediately. At 54 HP the Scavenger is noticeably tougher than the average goblin brawler, and its battleaxe hits with genuine force. The World Memory system records these clashes, a reminder that opportunism and violence go hand in hand in Orbis.

๐Ÿ‘บ

Goblin Lobber

Goblins

Goblin Lobber Patrol

Hostile
Zone 1

The Goblin Lobber has figured out something most goblins never bother to: staying back and throwing things is a perfectly viable combat strategy. Armed with explosives and scavenged debris, it keeps its distance and lobs projectiles at anyone who wanders too close to its patrol route in Zone 1. It attacks without hesitation the moment you enter its range โ€” 48 HP keeps it in the fight long enough to make the approach painful. Getting inside throwing distance is the critical challenge here. This encounter is saved as a World Memory, marking every chaotic volley on the record of Orbis.

๐Ÿ‘บ

Goblin Scavenger

Goblins

Goblin Scavenger Sword

Hostile
Zone 1

Wherever battles have been fought across Zone 1, the Goblin Scavenger is never far behind. This wiry, opportunistic member of the Goblin faction picks through ruins and abandoned campsites looking for anything worth pocketing โ€” then attacks any player who gets in the way. With 54 health it's not the toughest enemy you'll face, but it hits without hesitation. Because your clash with it is preserved as a World Memory, even a routine confrontation carries lasting weight in Orbis.

๐Ÿ‘บ

Goblin Lobber

Goblins

Hostile
Zone 1

The Goblin Lobber doesn't wait for you to close the distance โ€” it opens the fight by hurling explosives and debris from across the battlefield. Keeping this ranged menace at 48 health in check means either rushing it down or finding cover fast. Take it out and it's worth the effort: the Lobber always drops Boom Powder and Linen Scraps, and carries a chance to yield a Bomb. Defeating one is etched into Orbis as a World Memory, a testament to surviving its chaotic opening barrage.

Goblin Miner

Goblin Miner

Goblins

Hostile
Caves

<p>The <strong>Goblin Miner</strong> is the tunneling laborer of the Goblins faction, encountered in the <span class="chip chip-zone">Caves</span> of Orbis where the faction digs and settles. Where the Scavenger picks at the edges of a fight and the Duke commands, the Miner works โ€” he is the goblin who expands the tunnels, exposes the ore veins, and turns raw stone into the faction's infrastructure. For players exploring Hytale's underground, Miners are the unit that explains why a goblin presence exists so deep in a cave system in the first place: they did not wander in, they dug their way there.</p> <h2>Combat & encounter</h2> <p>The Miner is a mid-tier combat goblin โ€” tougher than a Scavenger, weaker than a Duke, and balanced around the fact that he is usually interrupted mid-work rather than caught on patrol. (community-sourced) he fights with basic melee attacks, and his equipment reflects his role: a pickaxe or digging tool that doubles as a weapon when the player interrupts him. He is not a specialized combatant, which means his threat is contextual โ€” a single Miner caught alone is manageable, but a mining operation with several Miners and a guard detail is a genuine encounter.</p> <p>The strategic implication of fighting Miners is that they are often found near the things players want: ore veins, tunnel intersections, and the richer parts of a cave system. (speculation) this reflects their function within the faction โ€” they dig toward the valuable resources, so a player who follows a goblin-tunneled passage is being led, inadvertently, toward better loot. The risk is that those same tunnels are where the faction concentrates its defense, so chasing ore into a goblin operation is a tradeoff between reward and danger.</p> <h2>Lore & origin</h2> <p>The Goblins are established in official Hytale material as a cave-dwelling faction, and the Miner is what makes that identity functional rather than decorative. (speculation) the existence of a dedicated mining caste implies that the Goblins do not merely live in pre-existing caves but actively expand and shape the underground to suit themselves โ€” they are engineers of a sort, not just squatters. That ties them to the underground resources of Orbis in a way that a purely hostile mob faction would not be, and it gives the faction an economic logic: they dig because digging is how they survive and grow.</p> <h2>Loot & rewards</h2> <p>No official drop table exists; treat specific item lists as (community-sourced). As the goblin unit most associated with the underground economy, the Miner plausibly drops ore-adjacent loot โ€” basic mining materials, low-tier metals, and the kinds of reagents tied to cave crafting. He is also a useful marker for where the good ore is, since he is found near the veins he was digging. Expect mid-tier, underground-flavored rewards consistent with his role.</p> <div class="callout"> <p><strong>Tip:</strong> A goblin-tunneled passage is a breadcrumb trail to better ore. Following where the Miners are digging leads toward the richer parts of a cave system โ€” but also toward where the faction concentrates its defense, so go prepared.</p> </div> <h2>Goblin Miner โ€” Frequently Asked Questions</h2> <h3>Where do I find the Goblin Miner?</h3> <p>In the Caves of Orbis, typically near tunnels and ore veins where the Goblins faction is digging. He is the tunneling laborer of the faction.</p> <h3>How is he different from other goblins?</h3> <p>He is the worker โ€” the goblin who expands tunnels and exposes ore. Scavengers pick at fights, Dukes command, and Miners dig. He sits in the middle of the combat roster.</p> <h3>Is he dangerous?</h3> <p>(community-sourced) Not in isolation โ€” a lone Miner is manageable. The danger is encountering a mining operation with several Miners and a guard detail, which is a real fight.</p> <h3>What does he drop?</h3> <p>No official drop table exists; any item list is community-sourced. Expect ore-adjacent loot โ€” basic mining materials, low-tier metals, and cave-flavored reagents โ€” and treat him as a marker for nearby ore.</p>

Goblin Ogre

Goblin Ogre

Goblins

Hostile
Caves

<p>The <strong>Goblin Ogre</strong> is the large brute variant of the Goblins faction, encountered in the <span class="chip chip-zone">Caves</span> of Orbis where the faction's deeper, more dangerous operations are concentrated. Where the Scavenger forages, the Miner digs, and the Duke commands, the Ogre simply breaks things โ€” he is the biggest and toughest goblin a player will routinely meet, a heavy melee unit whose role is raw muscle rather than finesse. For players pushing into the deeper caves, the Ogre is the goblin that signals the local operation is being defended seriously.</p> <h2>Combat & encounter</h2> <p>The Ogre is an elite-tier goblin, and his fight reflects that. (community-sourced) his attacks are heavy, slow, and telegraphed โ€” the threat is damage and reach, not complexity. He has a meaningfully larger health pool than the Miner or the Scavenger, enough armor to shrug off weak hits, and the raw damage to punish a player who treats him like a routine mob. The recommended approach is the one for any heavy melee unit: respect his wind-ups, don't face-tank his swings, and isolate him from the smaller goblins who will chip at you while he presses.</p> <p>Because he is elite rather than a fixed boss, the Ogre typically appears as part of a goblin camp's defense rather than as a standalone encounter. (speculation) this fits the faction's established identity โ€” the Ogre is the heavy unit the Goblins deploy when a cave operation needs to be held, which is the same role the Outlander Colossus plays for their faction. The practical implication is that an Ogre's presence is a reliable signal that there is something worth defending nearby, usually ore or a chest the faction wants kept.</p> <h2>Lore & origin</h2> <p>The Goblins are a canonical hostile faction of Hytale's underground, and the Ogre represents the top end of their physical scale โ€” the largest, strongest body the faction can field. (speculation) whether Ogres are a natural caste of large goblins, a separate-but-allied creature the faction employs, or simply the biggest individuals given the heaviest work is not clarified in reveal material. What is established is that the faction is not uniform, and that goblin combat scales beyond Miners and Scavengers into genuinely dangerous heavy units โ€” which makes a deep cave operation a real threat rather than a cleanup.</p> <h2>Loot & rewards</h2> <p>No official drop table exists; treat specific item lists as (community-sourced). As an elite goblin unit, the Ogre plausibly drops the better end of the underground loot table โ€” higher-tier crafting materials than a Miner, a chance at a notable piece of cave-tier gear, and the reagents tied to deeper recipes. His presence also marks that there is something worth defending nearby, so killing him often opens access to the ore or chest he was guarding.</p> <div class="callout"> <p><strong>Tip:</strong> An Ogre's presence means the goblins are defending something worth taking. Isolate him from the smaller goblins before committing โ€” he is too durable to burst while chaff is chipping at you, and the reward for killing him is usually whatever he was standing in front of.</p> </div> <h2>Goblin Ogre โ€” Frequently Asked Questions</h2> <h3>Where do I find the Goblin Ogre?</h3> <p>In the Caves of Orbis, typically as part of a deeper goblin operation's defense. He is the large brute variant โ€” the faction's heavy melee unit.</p> <h3>How is he different from other goblins?</h3> <p>He is the biggest and toughest goblin you will routinely meet โ€” an elite, not a rank-and-file unit. Miners dig, Scavengers forage, and Ogres break things with raw muscle.</p> <h3>Is he dangerous?</h3> <p>(community-sourced) Yes โ€” he is elite-tier. Heavy telegraphed attacks, a large health pool, and enough damage to punish a player who face-tanks him. Isolate him before committing.</p> <h3>What does he drop?</h3> <p>No official drop table exists; any item list is community-sourced. Expect the better end of the underground loot table, and treat his presence as a marker for the ore or chest he was guarding.</p>

๐Ÿ‘บ

Goblin Thief

Goblins

Goblin Thief Patrol

Hostile
Zone 1

Blink and you'll miss the Goblin Thief โ€” this nimble Goblin faction member specializes in snatching what it can and bolting before retaliation lands. Despite its hit-and-run instincts, it won't wait to be struck first: it attacks on sight anywhere across Zone 1. At 38 health it's fragile, but that speed makes it slipperier than its stats suggest. Pin it down before it can disengage, and the fight is yours. The encounter is written into Orbis as a World Memory, a reminder that even the smallest thieves leave a mark.

๐Ÿ‘บ

Goblin Scrapper

Goblins

Hostile
Zone 1

Don't mistake the Goblin Scrapper's crude gear for incompetence โ€” this Zone 1 brawler charges on sight, swinging a cobbled-together mace with reckless aggression. At 38 health it falls quickly to a prepared fighter, but an unprepared one will feel every hit. It always drops 1โ€“3 Linen Scraps, and there's a 15% chance it leaves behind a Scrap Mace. Every confrontation with a Goblin Scrapper is preserved as a World Memory, giving each skirmish a permanent place in your journey through Orbis.

Goblin Duke

Goblin Duke

Goblins

Boss
Caves

<p>The <strong>Goblin Duke</strong> sits atop the goblin hierarchy in the <span class="chip chip-zone">Caves</span> of Orbis, the highest-ranking member of the Goblins faction that players will encounter underground. Where common Goblin Scavengers pick at the edges of a fight and Goblin Miners tunnel blindly through stone, the Duke commands โ€” he is a boss-tier creature whose presence in a cave system signals that the player has stumbled into a properly established goblin settlement rather than a transient camp. Hytale's caves are dangerous enough on their own; a Duke makes a stretch of tunnel actively his, and he defends it with the authority of a noble who considers the surrounding stone his domain.</p> <h2>Combat & encounter</h2> <p>The Duke is a step up in sophistication from the basic goblin mobs. (community-sourced) he is better armed and better armored than his underlings, and he fights with a deliberate, commanding style rather than the swarm-and-surround instinct of lesser goblins. Expect him to hold the center of a chamber while his minions press the player, and to punish anyone who tries to bypass him to reach a chest or ore vein behind. He is not a glass cannon โ€” his health pool and damage reduction reflect his rank, and a player who treats him as "just another goblin, but bigger" will be quickly corrected.</p> <p>Strategy mirrors the Trork Chieftain fight at a different scale: thin the surrounding goblins first, then isolate the Duke for a controlled duel. The risk of fighting him inside an uncleared camp is that his minions will continuously respawn or reinforce, turning a manageable boss fight into a war of attrition you will eventually lose. Clearing the room first converts the Duke from a commander into a lone noble โ€” still dangerous, but no longer able to leverage the rank he was built around.</p> <h2>Lore & origin</h2> <p>The Goblins are a canonical hostile faction of Hytale's underground, and the Duke represents the top of their social order within the Caves. (speculation) the use of a noble title โ€” Duke, rather than Chieftain or Warlord โ€” implies a more formal, almost feudal structure to goblin society than the loose tribal bands of the Trorks. That suggests goblins in Orbis have territory, hierarchy, and perhaps even a concept of inherited rank, which is a richer piece of worldbuilding than "they live in caves and are mean." It also raises the question of whether there is anything above a Duke in the goblin hierarchy that players have not yet seen.</p> <h2>Loot & rewards</h2> <p>No official drop table is published; treat specific item lists as (community-sourced). Consistent with Hytale's design language, a faction leader of this tier would plausibly drop the better versions of goblin-themed gear โ€” upgraded weapons, a piece or two of mid-tier armor, and crafting materials or reagents tied to the underground. Because the Duke guards the deeper, richer part of a cave system, his death also opens access to whatever he was standing in front of, which is often the real reward.</p> <div class="callout"> <p><strong>Tip:</strong> Treat a Duke chamber like a mini-dungeon boss room. Sweep the surrounding tunnels of lesser goblins before you engage him, or his minions will turn a clean duel into a grinding fight you can't win through attrition.</p> </div> <h2>Goblin Duke โ€” Frequently Asked Questions</h2> <h3>Where do I find the Goblin Duke?</h3> <p>In established goblin settlements within the Caves of Orbis. His presence indicates a deeper, more organized camp rather than a shallow goblin prowling ground.</p> <h3>Is the Goblin Duke a boss?</h3> <p>Yes. He is a boss-tier creature and the highest-ranking member of the Goblins faction, more dangerous and better equipped than the scavengers and miners around him.</p> <h3>How is he different from a Trork Chieftain?</h3> <p>Similar role โ€” a faction commander who rallies underlings โ€” but the Duke sits in the Caves and reflects a more feudal, hierarchical goblin society rather than the tribal Trork structure.</p> <h3>What does he drop?</h3> <p>No official drop table exists; any item list is community-sourced. Expect upgraded goblin-themed gear, mid-tier armor pieces, and underground crafting materials, plus access to whatever he was guarding.</p>

๐Ÿ‘บ

Goblin Miner

Goblins

Goblin Miner Patrol

Hostile
Caves

The Goblin Miner isn't just digging for sport โ€” it tunnels through Cave walls in a relentless hunt for ore and treasure, and it will attack anything that interrupts its work. Despite its 38 health, fighting one underground means dealing with tight corridors, unpredictable angles, and potentially its companions working nearby. It belongs to the Goblin faction and treats any intruder as a threat on sight. This hostile digger has no loot drop, but every encounter is marked as a World Memory, a small but permanent note in your record on Orbis.

๐Ÿ‘บ

Goblin Thief

Goblins

Hostile
Zone 1

Speed is the Goblin Thief's only real weapon โ€” it darts in, snatches what it can, and tries to vanish before you can respond. Don't let the nimble frame fool you into lowering your guard: this Zone 1 Goblin faction member is hostile and will engage if cornered or if it spots an opening. At 38 health it won't survive a sustained exchange, but its evasive movement makes landing hits frustrating. It carries no loot, yet every run-in is locked into World Memory, preserving even these fleeting confrontations within your permanent story on Orbis.

๐Ÿฆ‘

Trork Elder

Trorks

Trork Shaman

Hostile
Zone 1

The Trork Elder occupies a rare role within Trork society โ€” not a front-line fighter but a spellcaster who bends ritual and magic to support its tribe. Spotting one on Zone 1's plains means a fight is already complicated: the Elder's spells can bolster allies, making nearby Trorks harder to bring down. With 61 health it outlasts many common foes, and it attacks on sight without hesitation. Linen Scraps drop guaranteed; each piece of Trork Warrior armor โ€” Helm, Cuirass, Gauntlets, Pants โ€” carries a separate 5% chance. Each battle is preserved as a World Memory on Orbis.

๐Ÿฆ‘

Trork Elder

Trorks

Trork Doctor Witch

Hostile
Zone 1

The Trork Elder occupies a unique and dangerous role within Trork society โ€” part shaman, part battlefield support. Unlike the warriors flanking it, this spellcaster channels tribal magic to bolster allies and punish intruders in Zone 1's Emerald Grove camps. With 74 health, it can sustain a fight long enough to tip the odds in the tribe's favor. Killing one is recorded as a World Memory, marking the moment you dismantled the tribe's magical backbone. It always drops Linen Scraps and has a small chance to yield pieces of Trork Warrior armor.

๐Ÿบ

Hunting Wolf

Trorks

Wolf Trork Hunter

Hostile
Zone 1

Trork hunting parties rarely travel alone โ€” the Hunting Wolf runs alongside them as both weapon and scout. Adapted to Zone 1's forested terrain, this pack predator uses speed and coordinated aggression to overwhelm targets before they can retreat. At just 38 health it falls quickly, but the chaos it creates while warriors press in is the real threat. Each encounter with one is preserved as a World Memory. Unlike many of the creatures it hunts with, it leaves nothing behind โ€” the value is entirely in learning its patterns before it corners you.

๐Ÿ‘น

Trork Sentry

Trorks

Hostile
Zone 1

Positioned at the edges of Trork encampments across Zone 1's Emerald Grove, the Trork Sentry is the alarm system and first wall of resistance rolled into one. The moment it detects a trespasser, it engages and alerts nearby warriors โ€” turning a quiet infiltration into a full engagement. With 61 health and a readiness to fight on sight, it demands respect. This encounter is committed to World Memory, which matters when it dies with a spear in its hands โ€” there's a 15% chance it drops 2โ€“4 Stone Trork Spears, plus rare pieces of Trork Warrior armor and guaranteed Linen Scraps.

Trork Brawler

Trork Brawler

Trorks

Hostile
Zone 1

<p>The <strong>Trork Brawler</strong> is the dedicated melee bruiser of the Trorks faction, the hostile goblin-like raiders who camp across the <span class="chip chip-zone">Emerald Wilds (Zone 1)</span>. Where the basic unarmed Trork throws punches and the Trork Warrior fights with weapon and armor, the Brawler is built to close distance and trade blows โ€” a stocky, hard-hitting melee unit whose job is to get in the player's face and stay there. For new players learning combat in Zone 1, the Brawler is one of the first creatures that punishes standing still, and it is a staple of any Trork camp's front line.</p> <h2>Combat & encounter</h2> <p>The Brawler is straightforward in role but demands respect in execution. (community-sourced) his attacks are heavy melee swings with clear wind-up, and his health pool is noticeably larger than the basic unarmed Trork's. The threat he poses is sustained pressure: he absorbs hits, keeps walking forward, and forces the player to either kite, block, or commit to a damage race. A new player who treats him like a generic mob and face-tanks his swings will lose the trade fast, which is the Brawler's entire job โ€” to be the wall the player has to play around.</p> <p>Tactically, the Brawler is most dangerous when he is not alone. Trork camps are designed around mixed forces, and a Brawler pinning the player in place is the perfect setup for ranged Trork axes or a flanking Warrior. (speculation) this reflects Hytale's Combat Action Evaluator, where each Trork evaluates its role in a group; the Brawler's role is to hold the front so the rest of the camp can do their jobs. The recommended counter is mobility: don't let him set the terms of the engagement, and never fight him inside a camp you have not thinned.</p> <h2>Lore & origin</h2> <p>The Trorks are the canonical hostile faction of Zone 1, and the Brawler represents the muscle of their warband. (speculation) the existence of a distinct "brawler" caste, separate from warriors and unarmed mobs, implies that Trork camps assign roles by capability or temperament rather than fielding a uniform force โ€” the biggest and toughest Trorks are sent in to absorb hits, while the quicker and better-equipped ones fight as Warriors. That division of labor is a small piece of worldbuilding that makes the faction read as an organized raiding band rather than a random monster spawn.</p> <h2>Loot & rewards</h2> <p>No official drop table exists; treat specific item lists as (community-sourced). As a mid-tier Trork melee unit, the Brawler plausibly drops basic Zone 1 crafting materials, a chance at a low-tier weapon or armor piece, and the generic Trork reagents that the faction is associated with. He is a routine combat target in Zone 1 rather than a special kill, so expect routine rewards rather than rare loot.</p> <div class="callout"> <p><strong>Tip:</strong> Never let a Brawler pin you in place inside an uncleared camp. His job is to hold the front line while other Trorks flank โ€” keep moving, thin the camp first, and treat him as a wall to play around, not a mob to face-tank.</p> </div> <h2>Trork Brawler โ€” Frequently Asked Questions</h2> <h3>Where do I find the Trork Brawler?</h3> <p>In Trork camps across the Emerald Wilds (Zone 1). He is a front-line melee unit, part of the standard mix of forces in any Trork settlement.</p> <h3>How is he different from other Trorks?</h3> <p>The unarmed Trork throws basic punches; the Warrior fights with weapon and armor; the Brawler is the dedicated melee bruiser โ€” tankier and harder-hitting, built to close distance and absorb hits.</p> <h3>Is he hard to fight?</h3> <p>(community-sourced) Not in isolation, but he is dangerous in a camp because his job is to pin you while others flank. Keep mobile and clear the camp before engaging.</p> <h3>What does he drop?</h3> <p>No official drop table exists; any item list is community-sourced. Expect basic Zone 1 crafting materials and a chance at low-tier Trork gear โ€” routine rewards for a routine mob.</p>

๐Ÿ‘น

Trork Sentry

Trorks

Trork Sentry Patrol

Hostile
Zone 1

While its camp-bound counterpart guards fixed positions, the patrol Trork Sentry keeps moving โ€” sweeping the outer approaches of Trork territory in Zone 1's Emerald Grove on a continuous circuit. This makes it harder to avoid than a stationary guard; its patrol route overlaps with paths players naturally take through the region. At 61 health, it attacks immediately on detection and will call for backup. The fight is saved as a World Memory. Linen Scraps are guaranteed on its body, and it occasionally carries pieces of Trork Warrior armor or a Stone Trork Spear.

๐Ÿ‘น

Trork Mauler

Trorks

Hostile
Zone 1

The Trork Mauler is the Trork warband's blunt-force answer to anything that stands in its way. Built broader and slower than a standard warrior, it compensates with sheer crushing power โ€” its oversized stone mace capable of staggering even well-armored opponents. Maulers wade into close quarters without hesitation and will pursue players aggressively the moment they are spotted. Defeating one always yields Linen Scraps, and lucky fighters may walk away with pieces of Trork Warrior armor or a Stone Trork Mace. Every clash with a Mauler is preserved in Orbis as a World Memory.

๐Ÿบ

Hunting Wolf

Trorks

Wolf Trork Shaman

Hostile
Zone 1

The Hunting Wolf is a fierce pack predator found roaming the forests of Zone 1 alongside Trork warbands. With 118 health points it outlasts most early-game foes, and it attacks on sight โ€” circling, lunging, and retreating to wear opponents down. What makes these wolves remarkable beyond their aggression is their bond with players: those patient enough to earn their trust can tame one as a loyal companion. This duality of dangerous enemy and potential ally gives every encounter a weight beyond simple combat. Their history in the wilds of Orbis is preserved as a World Memory.

โš”๏ธ

Trork Warrior

Trorks

Trork Warrior Patrol

Hostile
Zone 1

Trork Warriors on patrol keep Zone 1's roads and forest edges dangerous for unwary travelers. Unlike their stationed counterparts, patrol warriors are constantly moving โ€” cutting wide arcs through the terrain and engaging anything they consider a threat on sight. Armed with swords and axes, they close distance quickly and favour relentless melee pressure. Defeat one and you are guaranteed a handful of Linen Scraps; there is also a chance to loot pieces of Trork Warrior armor and a 15% shot at a Stone Trork Battleaxe. Each patrol encounter is written into Orbis as a World Memory.

Trork Warrior

Trork Warrior

Trorks

Hostile
Zone 1

<p>The <strong>Trork Warrior</strong> is the armed and armored fighter of the Trorks faction โ€” a step above the basic unarmed Trork and the dedicated bruiser Brawler in both equipment and discipline. Found in the camps of the <span class="chip chip-zone">Emerald Wilds (Zone 1)</span>, the Warrior is the closest thing the Trork warband has to a professional soldier: he carries a real weapon, wears actual armor, and fights with enough coordination to be a genuine threat rather than just a body in a charge. For players progressing through Zone 1, Warriors are the enemy that signals a camp is being taken seriously.</p> <h2>Combat & encounter</h2> <p>The Warrior is the hardest of the routine Trork melee units. (community-sourced) his weapon extends his reach and damage beyond the Brawler's fists, and his armor meaningfully reduces incoming damage, which changes the math of a straight fight โ€” a player who could burst down a Brawler may find a Warrior survives long enough to land his own hits. He also fights with more discipline than the basic mobs, which in Hytale's AI terms reads as a creature that blocks, spaces, and punishes rather than simply charging.</p> <p>The strategic implication is that Warriors are the backbone of a Trork camp's defense. (speculation) consistent with the faction's mixed-force design, a camp with multiple Warriors is significantly harder to assault than one padded with unarmed Trorks, because each Warrior holds his ground and demands to be dealt with rather than melting to area damage. The recommended approach is the standard one for Hytale faction camps: thin the camp before committing, isolate the Warriors where possible, and respect that an armored enemy requires a different damage plan than an unarmored one.</p> <h2>Lore & origin</h2> <p>The Trorks are the canonical hostile faction of Zone 1, and the Warrior is the clearest expression of them as an organized fighting force rather than a loose pack of thugs. (speculation) the existence of a distinct armed-and-armored caste implies that the Trorks manufacture or loot equipment and assign it by rank or capability โ€” the Warriors are the ones trusted with the better gear. That is a richer piece of worldbuilding than a uniform mob pool, and it quietly ties into the canon Trork-Kweebec war: a faction that fields professional Warriors is one built to take and hold territory, which is what makes them a genuine threat to the Kweebec villages they raid.</p> <h2>Loot & rewards</h2> <p>No official drop table exists; treat specific item lists as (community-sourced). As the best-equipped routine Trork unit, the Warrior plausibly drops the better end of the Zone 1 Trork loot table โ€” a chance at a serviceable weapon, a piece of usable low-tier armor, and the crafting materials and reagents the faction is associated with. He is a worthwhile combat target for players looking to gear up in Zone 1 without tackling a full boss.</p> <div class="callout"> <p><strong>Tip:</strong> A Warrior's armor changes the damage math โ€” don't assume a burst that drops a Brawler will drop him. Bring a plan for armored targets, isolate him from the camp, and treat a camp with several Warriors as a real assault rather than a cleanup.</p> </div> <h2>Trork Warrior โ€” Frequently Asked Questions</h2> <h3>Where do I find the Trork Warrior?</h3> <p>In Trork camps across the Emerald Wilds (Zone 1). He is the armed and armored fighter โ€” a staple of any camp being defended seriously.</p> <h3>How is he different from a Brawler?</h3> <p>A Brawler is a dedicated bruiser who fights with fists and toughness; a Warrior carries a real weapon and wears armor, giving him more reach, more damage, and better damage reduction.</p> <h3>Is he hard to fight?</h3> <p>(community-sourced) He is the hardest routine Trork melee unit. His armor lets him survive burst, and he fights with more discipline than the basic mobs.</p> <h3>What does he drop?</h3> <p>No official drop table exists; any item list is community-sourced. Expect the better end of the Zone 1 Trork loot โ€” a chance at a serviceable weapon or usable armor piece, plus faction crafting materials.</p>

๐Ÿ‘น

Trork Guard

Trorks

Hostile
Zone 1

Where Trork Warriors range freely, Trork Guards hold position โ€” stationed at the edges of camps and strongholds with orders to repel any intruder. Their discipline makes them predictably lethal: they engage immediately on sight and do not break formation easily, making them harder to isolate than wandering patrol fighters. Guards carry 61 health and are armed with a spear, keeping threats at distance before closing in. Linen Scraps drop every time; Trork Warrior armor pieces may appear with luck, and there is a 15% chance of recovering 2โ€“4 Stone Trork Spears. These encounters are preserved in Orbis as World Memories.

Trork Chieftain

Trork Chieftain

Trorks

Boss
Zone 1

<p>At the heart of every Trork camp in the <span class="chip chip-zone">Emerald Wilds (Zone 1)</span> stands the <strong>Trork Chieftain</strong> โ€” a towering mini-boss who commands absolute loyalty from the surrounding tribe. Unlike the grunts who patrol the perimeter, the Chieftain fights with calculated ferocity, rushing the player the moment they cross into Trork territory rather than waiting to be engaged. This aggressive command behavior is a direct expression of Hytale's Combat Action Evaluator: the Chieftain evaluates the intruder as a threat to the camp and commits to a coordinated response, often pulling nearby Trork Warriors into the fight.</p> <h2>Combat & Encounter</h2> <p>The Chieftain is not the hardest boss in Zone 1 by raw stats, but it is one of the most dangerous because of how it leverages its tribe. (community-sourced) pulling a Chieftain without first thinning the surrounding warriors turns a manageable duel into a swarm โ€” the Chieftain's presence raises the aggression of nearby Trorks and turns them into a coordinated warband rather than a loose patrol. The recommended approach is the reverse of what most players instinctively do: clear the camp's perimeter first, isolate the Chieftain, then commit to the duel.</p> <p>In a one-on-one fight, the Chieftain rewards patient play. It telegraphs its heavy attacks clearly, and the recovery window after a blocked or missed swing is the cleanest damage opening. A player who tries to out-burst it will trade unfavorably; a player who blocks, dodges, and punishes recovery will take it down cleanly even at modest gear levels.</p> <h2>Lore & Origin</h2> <p>The Trorks are Hytale's canonical hostile faction of Zone 1, depicted in official reveal trailers capturing Kweebecs โ€” making the Trork-Kweebec war a piece of confirmed lore, not fan theory. The Chieftain is the social and military apex of that faction within Zone 1. (speculation) the fact that each Trork camp has a Chieftain suggests a decentralized tribal structure rather than a single kingdom, which is consistent with the way Trorks are shown operating as semi-independent warbands rather than a unified army.</p> <h2>Loot & Rewards</h2> <p>The Trork Chieftain has a confirmed (community-sourced) drop table:</p> <ul> <li><strong>Linen Scraps</strong> โ€” guaranteed drop (1-3), a basic crafting material.</li> <li><strong>Stone Trork Battleaxe</strong> โ€” ~15% chance, a Zone 1-tier weapon thematically tied to the faction.</li> <li><strong>Trork Warrior armor pieces</strong> (Helm, Cuirass, Gauntlets, Pants) โ€” ~5% each, a full armor set players can assemble by farming Trork bosses.</li> </ul> <p>Defeating a Chieftain also unlocks a permanent World Memory on Orbis. Because the Trork Warrior armor set is scattered across the Chieftain and its subordinates, completing the set is a natural early-game collection goal.</p> <div class="callout"> <p><strong>Tip:</strong> Always clear the camp before engaging the Chieftain. The Chieftain's real threat is its ability to turn a duel into a warband fight via the Combat Action Evaluator โ€” kill the warriors first, and the Chieftain becomes a manageable duel.</p> </div> <h2>Trork Chieftain โ€” Frequently Asked Questions</h2> <h3>Where do I find the Trork Chieftain?</h3> <p>At the center of Trork camps in the Emerald Wilds (Zone 1). Each camp has its own Chieftain.</p> <h3>Is the Trork Chieftain hard?</h3> <p>Not by raw stats, but it is dangerous because it coordinates surrounding Trorks into a warband. Clear the camp first and it becomes a manageable duel.</p> <h3>What does the Trork Chieftain drop?</h3> <p>Confirmed (community-sourced): guaranteed Linen Scraps, a ~15% Stone Trork Battleaxe, and ~5% chances for each piece of Trork Warrior armor. Defeating it also grants a World Memory.</p> <h3>Is the Trork-Kweebec war canon?</h3> <p>Yes. Official reveal trailers show Trorks capturing Kweebecs, making the rivalry between the two factions a confirmed piece of Hytale lore rather than fan speculation.</p>

๐Ÿน

Trork Hunter

Trorks

Hostile
Zone 1

The Trork Hunter does not wait inside the camp โ€” it ranges through the wilds of Zone 1, tracking prey and players alike with practiced patience. Leaner and faster than a standard Trork warrior, it closes distance quickly once it has a target. With 61 health it is dangerous but beatable; the real threat is being caught alone far from camp. Kills always yield Linen Scraps, with a 15% shot at a Stone Trork Sword and the usual 5% chance on individual pieces of Trork Warrior armor. This encounter is permanently recorded as a World Memory.

๐Ÿบ

Feran Burrower

Ferans

Neutral
Zone 3

In the frozen earth of Zone 3, the Feran Burrower earns its name honestly โ€” this fox-like Feran digs dens and tunnels through Borea's permafrost, shaping the landscape in subtle ways most travelers never notice. It won't start a fight unprovoked, though cornering one is a mistake it will answer with teeth. Its 61 health makes it manageable in a direct confrontation. When killed, it drops Bone Fragments without fail, and there's a 15% chance it carries Feran Bone Daggers. The encounter is permanently etched into Orbis as a World Memory.

๐ŸฆŠ

Feran Civilian

Ferans

Neutral
Zone 2

Small, fox-eared humanoids who call the Howling Sands home, Feran Civilians are the backbone of Feran society โ€” tradespeople, wanderers, and worshippers who bear the Wind runes of their elemental faith. They present no danger unless provoked; their 49 health means even an accidental swing can turn a neutral encounter hostile fast. Their connection to elemental gods permeates every aspect of their culture, from rune-carved accessories to the way they read desert winds. If one is killed, they leave Bone Fragments as the only drop. The memory of encountering one is preserved in Orbis.

๐Ÿบ

Feran Sharptooth

Ferans

Hostile
Zone 3

Feran Sharpteeth are the frontline brawlers of their faction โ€” feline warriors that close distance fast and slash with brutal efficiency. They charge on sight and show no restraint in close quarters, making them a genuine threat even to experienced players. With 61 health and a taste for melee, every engagement demands your full attention. Defeating one always yields Bone Fragments, and there is a fifteen percent chance it drops a Bone Sword โ€” a prize worth the punishment. Their World Memory status means this kill is recorded in Orbis.

๐ŸฆŠ

Feran Cub

Ferans

Neutral
Zone 2

The Feran Cub is a young member of the fox-like Feran people who inhabit the Howling Sands, a culture steeped in elemental reverence and Wind rune worship. Cubs are neutral โ€” they will not initiate a fight, but provoking one is still an act of bad faith against a society that takes its traditions seriously. At 29 health they are fragile, and they carry no drops worth looting. Encountering one is more an invitation to observe Feran customs up close than a combat opportunity. This encounter is preserved in World Memory.

๐Ÿบ

Feran Windwalker

Ferans

Hostile
Zone 3

The Feran Windwalker earns its name from the silent precision with which it traverses the snowy ridges of Borea. Where other Ferans clash loudly, this scout moves without warning, making it one of the more unsettling hostile encounters in Zone 3. Its 61 health keeps it competitive in a fight, and it always drops two to three Bone Fragments when killed. Treat the open snowfields as potentially watched territory โ€” a Windwalker may already have you in sight before you hear anything. This encounter becomes part of World Memory.

๐Ÿบ

Feran Longtooth

Ferans

Hostile
Zone 3

The Feran Longtooth is an elite hunter among its kind โ€” seasoned, deliberate, and far more dangerous than a casual encounter suggests. Armed with long blades and years of field experience, it attacks on sight with a confidence that reflects genuine combat mastery. Zone 3 Feran territories are where you will find them, and with 61 health they can outlast careless fighters. Guaranteed Bone Fragments drop on every kill, and its long blades mean a fifteen percent shot at two to four Bone Spears โ€” significant value for a prepared expedition. World Memory records every clash.

Kweebec Sproutling

Kweebec Sproutling

Kweebecs

Friendly
Zone 1

<p>The <strong>Kweebec Sproutling</strong> is the youngest visible stage of the Kweebecs, the friendly plant-like folk who tend the forests and villages of the <span class="chip chip-zone">Emerald Wilds (Zone 1)</span>. A Sproutling is exactly what the name suggests: a small, freshly-sprouted Kweebec, still close to the green and the soil, not yet grown into the taller, more mobile adult forms that work the fields and greet travelers. For new players landing in Zone 1, Sproutlings are often the very first friendly creature they notice inside a Kweebec village โ€” a living signal that not everything in Orbis wants to kill them, and that the Kweebecs are the faction you build with rather than fight.</p> <h2>Behavior & role</h2> <p>Sproutlings are non-combatant by design. (community-sourced) they do not participate in village defense when Trorks raid, they do not aggro on the player regardless of provocation, and their daily routine reads as playful and curious โ€” pottering around the village edges, lingering near the older Kweebecs who look after them. Their role in the village is social and symbolic rather than functional: they are the next generation, the proof that the Kweebec community is alive and growing, and a visual anchor for the warm, non-hostile tone Zone 1 is supposed to set before the player heads into harder biomes.</p> <p>Their presence also reinforces the plant-biology of the Kweebecs as a faction. A Sproutling's design โ€” greener, softer, visibly "fresh" โ€” is consistent with a creature that grew out of the same forests it now lives in, which is part of what makes the Kweebecs read as native stewards of Zone 1 rather than settlers who arrived from elsewhere. That distinction matters in Hytale's worldbuilding: the Kweebecs belong to the Emerald Wilds in a way the invading Trorks do not.</p> <h2>Lore & origin</h2> <p>The Kweebecs are the canonical friendly faction of Zone 1, and the official reveal material establishes their war with the Trorks as canon โ€” Trorks are shown capturing Kweebecs, making the faction rivalry a confirmed piece of lore rather than a fan theory. The Sproutling is the youngest expression of that faction. (speculation) the existence of a distinct "sprout" life-stage implies the Kweebecs have a genuine botanical life cycle: they germinate, grow, and mature through recognizable stages, which is a richer piece of biology than "small version of the adult." It also raises the stakes of the Trork-Kweebec war โ€” what is being defended when a village is raided is, in part, these sprouts.</p> <h2>Interactions</h2> <p>Sproutlings are not vendors, quest-givers, or combat allies; they are ambient NPCs that give a Kweebec village its lived-in feel. Players cannot trade with them, and there is no gameplay reason to interact with them mechanically. Their value is atmospheric: walking into a village and seeing Sproutlings underfoot is part of how Hytale communicates that this is a safe place, in contrast to the hostile camps and dungeons elsewhere in Zone 1. (community-sourced) harming them, where that is even possible, typically draws the ire of the adult Kweebecs โ€” so the gentle guidance is to leave them be.</p> <div class="callout"> <p><strong>Tip:</strong> A village with Sproutlings visible is a friendly Kweebec village โ€” safe to enter, trade, and rest. If you are new to Zone 1 and unsure whether a settlement is hostile, the presence of Sproutlings is a reliable tell that it is Kweebec-held.</p> </div> <h2>Kweebec Sproutling โ€” Frequently Asked Questions</h2> <h3>Where do I find Kweebec Sproutlings?</h3> <p>In Kweebec villages across the Emerald Wilds (Zone 1). They are ambient young NPCs, not found in the wild outside of a settlement.</p> <h3>Are they hostile?</h3> <p>No. Sproutlings are non-combatant and friendly by design. They do not attack the player and do not participate in village defense.</p> <h3>Can I trade with them or get quests?</h3> <p>No. They are ambient NPCs that add life to a Kweebec village. For trade and quests, interact with the adult Kweebecs in the same settlement.</p> <h3>What is their role in the lore?</h3> <p>They are the youngest stage of the Kweebecs, the friendly plant-folk of Zone 1. Their existence implies a botanical life cycle and raises the stakes of the canon Trork-Kweebec war.</p>

๐Ÿ’ฐ

Rootling Merchant

Kweebecs

Temple Kweebec Merchant

Friendly
Zone 1

At the heart of every Kweebec village in the Emerald Grove, the Rootling Merchant keeps commerce alive. This tree-like trader deals exclusively in Essence of Life, the currency woven into Kweebec culture, accepting it as payment and offering goods in return. Friendly by nature, the merchant will never raise a hand against travelers who wander into the settlement. Because this encounter is preserved as a World Memory, every trade you make here leaves a permanent mark on the story of your journey through Orbis.

Kweebec Rootling

Kweebec Rootling

Kweebecs

Temple Kweebec Rootling Static

Friendly
Zone 1

<p>The <strong>Kweebec Rootling</strong> is a stationary temple guardian of the Kweebecs faction, found rooted in place within the sacred spaces of the <span class="chip chip-zone">Emerald Wilds (Zone 1)</span>. Unlike the mobile Sproutlings that potter around a village, the Rootling does not wander โ€” it is fixed to one spot, half-plant and half-Kweebec, watching over whatever temple ground or holy site it was grown to protect. For players exploring the Gaia-themed temples and ruins of Zone 1, a Rootling is often the first sign that they have stepped from the everyday village into a space the Kweebecs consider sacred.</p> <h2>Behavior & role</h2> <p>The Rootling's defining trait is that it does not move. (community-sourced) it holds its post the way a living statue would โ€” present, watchful, but physically anchored to the ground it grew from. This makes it unlike almost every other creature in Hytale, where mobility is the norm. Its role is custodial: it marks a temple as cared-for and watched, and it gives the sacred spaces of the Kweebecs a sense of being actively tended rather than abandoned to the forest. A Rootling standing in a temple reads as a statement that this place still belongs to someone.</p> <p>Whether a Rootling can become hostile is a point of community discussion. (speculation) the most consistent reading is that it is a guardian that responds to genuine threat to the temple โ€” desecration, theft of relics, aggression against the Kweebecs โ€” rather than attacking every traveler who walks past. That would fit Hytale's broader design of faction-aware AI, where creatures evaluate intent rather than simply aggro on sight. A respectful player passing through likely passes undisturbed; a player who treats the temple as a loot piรฑata likely does not.</p> <h2>Lore & origin</h2> <p>The Kweebecs are tied thematically to Gaia and to the plant-life of Zone 1, and the Rootling is the purest expression of that tie โ€” a Kweebec so close to its plant origins that it has effectively become part of the temple's flora. (speculation) this implies that the Kweebecs do not merely live among the plants of the Emerald Wilds but can grow into them, blurring the line between creature and environment. The rooted guardian is a piece of worldbuilding that makes the Kweebecs' claim to Zone 1 feel ancient and biological rather than merely political.</p> <h2>Interactions</h2> <p>The Rootling is not a vendor or a quest-giver; it is an ambient guardian whose presence is itself the interaction. Players cannot trade with it, and the expectation is that they behave respectfully within the temple it watches. (community-sourced) treating a Rootling-guarded temple as ordinary ruins to be looted is the kind of action that can turn a friendly Kweebec village hostile, so the practical guidance is to take from the temple only what is freely given and to leave the guardian undisturbed.</p> <div class="callout"> <p><strong>Tip:</strong> A Rootling marks a sacred Kweebec space. Loot carefully and respect the site โ€” a rooted guardian is a signal that this temple is watched, and antagonizing the Kweebecs over a chest is rarely worth the loss of a friendly village.</p> </div> <h2>Kweebec Rootling โ€” Frequently Asked Questions</h2> <h3>Where do I find the Kweebec Rootling?</h3> <p>Rooted in place within Kweebec temples and sacred sites in the Emerald Wilds (Zone 1). It does not wander โ€” it is fixed to its post.</p> <h3>Does it move?</h3> <p>No. The Rootling is stationary by design โ€” half-plant, half-Kweebec, anchored to the ground it grew from. It watches its post like a living statue.</p> <h3>Is it hostile?</h3> <p>(speculation) It appears to respond to genuine threats to the temple rather than attacking on sight. A respectful traveler likely passes undisturbed; a desecrator likely does not.</p> <h3>Can I trade with it?</h3> <p>No. It is an ambient guardian, not a vendor or quest-giver. Its presence is itself the interaction โ€” treat the temple it watches with respect.</p>

Kweebec Sapling

Kweebec Sapling

Kweebecs

Temple Kweebec

Friendly
Zone 1

<p>The <strong>Kweebec Sapling</strong> is a temple attendant of the Kweebecs faction, found inside the sacred temples of the <span class="chip chip-zone">Emerald Wilds (Zone 1)</span>. Slightly older and more capable than the wandering Sproutlings of a village, the Sapling serves the temple directly โ€” tending the space, attending the elders, and giving the sacred interiors of Zone 1 the feel of an active place of worship rather than an empty ruin. For a player stepping through a temple door, the presence of Saplings is the difference between exploring abandoned architecture and entering a living sanctuary that someone still cares about.</p> <h2>Behavior & role</h2> <p>Saplings are mobile, unlike the rooted Rootling, but their movement is purposeful and contained within the temple. (community-sourced) they perform the small duties of upkeep โ€” moving between shrine points, attending the elder Kweebecs who lead the temple, and generally inhabiting the space the way acolytes would in any functioning holy site. Their role is custodial and liturgical: they keep the temple running day-to-day, which in turn signals to the player that this place is not a dungeon to be cleared but a home to be respected.</p> <p>Because they are explicitly temple-bound, Saplings sit a rung above ambient village Sproutlings in the Kweebec hierarchy. (speculation) that placement implies a path within Kweebec society โ€” the youngest sprout in a village can grow into a temple Sapling, and a Sapling can eventually mature into an elder. Whether that progression is something the player can observe over time or simply implied worldbuilding is not confirmed, but it gives the faction a sense of internal structure beyond "friendly plant-folk who live nearby."</p> <h2>Lore & origin</h2> <p>The Kweebecs are the canonical friendly faction of Zone 1, and their temples are established in official Hytale material as Gaia-themed sacred sites. The Sapling is the rank-and-file attendant of those sites. (speculation) the use of tree-life-stage names โ€” Sproutling, Sapling, Elder โ€” for Kweebec roles reinforces the idea that the faction's social hierarchy maps onto a botanical growth cycle, with each stage carrying more responsibility and closer connection to the sacred. It is a small but consistent piece of worldbuilding that ties Kweebec society cleanly to the plant-magic of the Emerald Wilds.</p> <h2>Interactions</h2> <p>Saplings are not vendors or quest-givers themselves; they are ambient attendants whose presence makes a temple feel alive. Players cannot trade with them directly. (community-sourced) the expectation, as with other temple Kweebecs, is respectful behavior โ€” take only what is freely offered, do not desecrate the site, and recognize that the Saplings present are part of a functioning sacred space. Any deeper interaction a player wants with the temple โ€” trade, quests, blessings โ€” flows through the elder Kweebecs the Saplings attend.</p> <div class="callout"> <p><strong>Tip:</strong> A temple with Saplings moving inside is an active Kweebec holy site, not a ruin. Behave as a guest: loot only what is given, leave the attendants undisturbed, and approach the elders if you want to trade or receive quests.</p> </div> <h2>Kweebec Sapling โ€” Frequently Asked Questions</h2> <h3>Where do I find the Kweebec Sapling?</h3> <p>Inside Kweebec temples in the Emerald Wilds (Zone 1). Saplings are temple attendants, not found wandering the open forest.</p> <h3>How is a Sapling different from a Sproutling?</h3> <p>A Sproutling is the youngest village-dwelling stage; a Sapling is older, mobile, and serves the temple directly. Saplings sit a rung above ambient Sproutlings in the Kweebec hierarchy.</p> <h3>Are they hostile?</h3> <p>No. Saplings are friendly temple attendants. They do not attack and are part of a sacred space that expects respectful behavior.</p> <h3>Can I trade with them?</h3> <p>Not directly. They are ambient attendants. For trade, quests, or blessings, approach the elder Kweebecs they serve.</p>

๐ŸŒฟ

Kweebec Razorleaf

Kweebecs

Temple Kweebec Razorleaf

Neutral
Zone 1

Standing guard at the edges of Kweebec settlements, the Razorleaf is an elite warrior-ranger of the tree-folk faction. Armed with the iconic Razor Spear, this sentinel won't strike unprovoked โ€” but push into protected territory and the response is swift and precise. While a single Razorleaf may not overwhelm a careful traveller, its defensive discipline and reach make reckless charges a poor idea. Every clash with a Razorleaf in the Emerald Grove is preserved as a World Memory, leaving a permanent mark on your chronicle of Orbis.

๐ŸŒฒ

Kweebec Seedling

Kweebecs

Temple Kweebec Seedling Static

Friendly
Zone 1

The youngest members of the Kweebec community, Seedlings are the small tree-folk children who scurry about the hollowed trunk-villages of the Emerald Grove. Curious and cheerful, they pose no danger whatsoever and will never raise a hand against the player. Watching them dart between roots and doorways gives a rare glimpse into daily Kweebec life โ€” a society of gentle arboreal humanoids who have made the ancient trees of Zone 1 their home. This World Memory moment reminds adventurers that Orbis holds far more than conflict.

๐Ÿบ

Feran Longtooth

Ferans

Temple Feran Longtooth

Hostile
Zone 3

The Feran Longtooth is no ordinary warrior โ€” this elite hunter of the Ferans fights with long blades and decades of sharpened instinct. Found in the colder reaches of Zone 3, it attacks on sight and moves with the calculated precision of a fighter who has survived many engagements. Do not mistake its lean frame for weakness; every strike is deliberate and practiced. Encounters with this foe are preserved as World Memories within Orbis.

Kweebec Elder

Kweebec Elder

Kweebecs

Temple Kweebec Elder

Friendly
Zone 1

<p>The <strong>Kweebec Elder</strong> is the wisest and most authoritative member of the Kweebecs faction a player will meet in the temples of the <span class="chip chip-zone">Emerald Wilds (Zone 1)</span>. Where Sproutlings play, Saplings attend, and the Rootling stands rooted watch, the Elder leads โ€” he is the focal point of a Kweebec temple's spiritual life, the figure the younger Kweebecs defer to, and the most likely point of meaningful contact between the player and the Kweebec community. For players who want to engage with the friendly side of Zone 1 rather than just pass through it, the Elder is the NPC who matters.</p> <h2>Behavior & role</h2> <p>The Elder functions as the religious and communal head of a Kweebec temple. (community-sourced) he is attended by the younger Saplings, inhabits the inner sanctum of the temple, and carries the demeanor of a figure accustomed to respect. His role is to anchor the temple as a living institution โ€” his presence is what makes the space a seat of Kweebec authority rather than a picturesque ruin. Where he stands, decisions are made, rites are observed, and the Kweebec community finds its center.</p> <p>In gameplay terms, the Elder is the most plausible interface for player-temple interaction. (speculation) across Hytale's faction design, the senior member of a friendly settlement is typically the one who gates access to trade, quests, faction reputation, or blessings โ€” and the Elder fits that role cleanly within a Kweebec temple. The younger Kweebecs are ambient; the Elder is functional. That division is consistent with how Hytale signals which NPC in a settlement is worth talking to versus which simply populate the scene.</p> <h2>Lore & origin</h2> <p>The Kweebecs are the canonical friendly faction of Zone 1, and the Elder represents the top of their visible social hierarchy within a temple. (speculation) the use of the tree-life-stage progression โ€” Sproutling, Sapling, Elder โ€” implies that an Elder is simply a Kweebec who has grown through the full life-cycle, accumulating authority and wisdom along the way. That makes Kweebec leadership a function of age and growth rather than conquest or inheritance, which fits the faction's peaceful, plant-tending identity. It also quietly raises the stakes of the canon Trork-Kweebec war: killing an Elder is not just losing a NPC, it is losing generations of accumulated memory.</p> <h2>Interactions</h2> <p>The Elder is the natural destination for any player who wants to do more than sightsee in a Kweebec temple. (community-sourced) he is the figure to approach for trade, temple-related quests, faction reputation, or any blessing the temple might offer. Unlike the ambient attendants, he is built to be interacted with. The expectation, as with all temple Kweebecs, is respectful behavior โ€” approach as a guest, do not desecrate the site, and the Elder is the doorway to the temple's good graces.</p> <div class="callout"> <p><strong>Tip:</strong> If you want trade, quests, or faction standing with the Kweebecs, go straight to the Elder in the temple's inner sanctum. The younger Kweebecs populate the scene; the Elder is the functional NPC who actually opens up the temple's offerings.</p> </div> <h2>Kweebec Elder โ€” Frequently Asked Questions</h2> <h3>Where do I find the Kweebec Elder?</h3> <p>In the inner sanctum of a Kweebec temple in the Emerald Wilds (Zone 1). He is the senior figure the younger temple Kweebecs attend.</p> <h3>What is his role?</h3> <p>He is the spiritual and communal head of the temple โ€” the focal point of authority and the most likely interface for trade, quests, faction reputation, and blessings.</p> <h3>Is he hostile?</h3> <p>No. The Elder is friendly and is built to be interacted with. Approach respectfully, do not desecrate the temple, and he is the doorway to the temple's offerings.</p> <h3>Can I trade with him?</h3> <p>Yes โ€” the Elder is the natural NPC for trade and temple-related quests in a Kweebec settlement, unlike the ambient younger attendants.</p>

๐ŸฆŠ

Feran Civilian

Ferans

Temple Feran

Neutral
Zone 2

Small in stature but rich in culture, the Feran Civilian belongs to a fox-like people who have made the Howling Sands their home for generations. They pay devotion to elemental gods and mark their bodies with Wind runes as a sign of faith and identity. Neutral by nature, a Feran Civilian has no quarrel with wandering players and will not start a fight โ€” though provocation is unwise. Every encounter is etched into Orbis as a World Memory.

โš”๏ธ

Scarak Imperial Guard

Scaraks

Scarak Fighter Royal Guard

Hostile
Zone 2

The Scarak Imperial Guard stands as the hive's last line of defense, stationed at tunnel entrances and patrolling the labyrinthine passages that connect Scarak territory. Unlike common drones, these warriors belong to a dedicated caste bred specifically for enforcement โ€” expect coordinated responses when you trigger their patrol routes. They attack on sight and are difficult to isolate. Each guard drops 2โ€“3 pieces of Sturdy Chitin guaranteed, making them worthwhile targets for players farming insectoid crafting materials.

๐Ÿ‘บ

Goblin Scrapper

Goblins

Edible Goblin Scrapper

Hostile
Zone 1

Goblins are Zone 1's most chaotic threat โ€” and the Scrapper is their brawler archetype. Armed with whatever crude weapon was closest at hand, it charges headlong the moment a player enters its aggro range, relying entirely on brute momentum. It carries 100 hit points, which is more than most new adventurers expect from something so ragged-looking. The Scrapper doesn't wait, doesn't negotiate, and doesn't retreat. Engage carefully when multiples are present, as their rushes can quickly overwhelm unprepared fighters.

๐Ÿ‘น

Trork

Trorks

Trork Unarmed

Hostile
Zone 1

<p>The basic <strong>Trork (unarmed)</strong> is the lowest rung of the Trorks faction's combat roster โ€” the rank-and-file raider encountered across the <span class="chip chip-zone">Emerald Wilds (Zone 1)</span> who fights with fists rather than weapons. He is the enemy a new player fights first inside a Trork camp: the least equipped, the least disciplined, and the least dangerous of the faction's melee units by a comfortable margin. For all that, he is not trivial โ€” Trorks are the canonical hostile faction of Zone 1, and even their weakest combatant is built to swarm rather than to be ignored.</p> <h2>Combat & encounter</h2> <p>The unarmed Trork is the baseline against which the rest of the faction is measured. (community-sourced) his attacks are basic melee punches โ€” short reach, modest damage, no special mechanics โ€” and his health pool is the smallest of the Trork melee units. In a one-on-one he is the easiest Trork to deal with, and a player who has learned to block or dodge will handle him comfortably. His threat emerges from numbers: Trork camps field unarmed mobs in groups, and the design intent is clearly that they swarm and distract while the Brawlers and Warriors do the heavy lifting.</p> <p>This division of labor is what makes a Trork camp more than the sum of its parts. (speculation) consistent with Hytale's Combat Action Evaluator, the unarmed Trork reads as the low-cost body the faction throws forward to occupy the player's attention โ€” the chaff that makes the disciplined units dangerous. The recommended approach is to treat the unarmed mobs as cleanup rather than priority: deal with the Brawlers and Warriors first, then sweep the unarmed Trorks once the real threats are down. Killing them first wastes damage on targets the dangerous units are happy to hide behind.</p> <h2>Lore & origin</h2> <p>The Trorks are the canonical hostile faction of Zone 1, and the unarmed Trork is the faction's lowest caste โ€” the rank and file who go into battle with nothing but their fists. (speculation) the existence of an unarmed baseline, below the armed Warriors and the dedicated Brawlers, implies that Trork society is stratified by what equipment and role each member is given: the best gear goes to the Warriors, the toughest bodies become Brawlers, and everyone else is thrown in as chaff. That stratification reinforces the faction's identity as a raiding band that fields whoever and whatever it has, rather than a uniform army.</p> <h2>Loot & rewards</h2> <p>No official drop table exists; treat specific item lists as (community-sourced). As the weakest routine Trork unit, the unarmed Trork plausibly drops only the lowest tier of the faction's loot โ€” basic crafting materials, occasional trash-tier items, and rarely anything worth going out of your way for. He is a target of opportunity rather than a goal: kill him when he is in the way, but do not expect meaningful rewards.</p> <div class="callout"> <p><strong>Tip:</strong> Treat unarmed Trorks as chaff, not priority. They exist to swarm and distract while Brawlers and Warriors do the real damage โ€” kill the dangerous units first, then sweep the unarmed mobs once the threats are down.</p> </div> <h2>Trork (unarmed) โ€” Frequently Asked Questions</h2> <h3>Where do I find the unarmed Trork?</h3> <p>In Trork camps across the Emerald Wilds (Zone 1). He is the rank-and-file raider โ€” the weakest and least-equipped of the faction's melee units.</p> <h3>How is he different from other Trorks?</h3> <p>He is the baseline: fists only, short reach, the smallest health pool. Brawlers are tougher, Warriors are armed and armored, and both sit above the unarmed Trork in the faction's hierarchy.</p> <h3>Is he dangerous?</h3> <p>(community-sourced) Not in isolation โ€” he is the easiest Trork to fight one-on-one. His threat comes from numbers and his role as chaff that swarms while the dangerous units work.</p> <h3>What does he drop?</h3> <p>No official drop table exists; any item list is community-sourced. Expect only the lowest-tier Trork loot โ€” basic materials and occasional trash, rarely worth going out of your way for.</p>

๐ŸŽฃ

Tuluk Fisherman

Friendly
Zone 3

Along the frozen coastlines of Borea, Tuluk Fishermen stand at the water's edge with nets and lines, braving the biting cold that defines Zone 3. These hardy folk are entirely peaceful toward players โ€” they won't raise a hand regardless of how close you get. Finding one suggests you're near a Tuluk settlement or a particularly productive stretch of icy shore. They're worth seeking out simply for the sense of inhabited world they provide in Borea's otherwise desolate landscape.

๐Ÿ‘๏ธ

Klops Gentleman

Neutral
Zone 1

Soft-spoken and impeccably dressed, the Klops Gentleman is one of Zone 1's more unlikely residents. His single eye surveys travelers with a courteous, appraising look rather than suspicion. He won't start a fight โ€” but cross him and he'll defend himself with surprising composure. Should you leave on good terms, he parts with copper and iron ingots as though tipping a server after a fine meal. A curious figure who seems entirely too civilized for the wilds of Orbis.

๐Ÿ‘๏ธ

Klops Miner

Neutral
Caves

Deep in the cave networks of Orbis, the Klops Miner chips away at rock faces with tireless dedication. This one-eyed laborer has no interest in conflict โ€” tunneling and ore extraction are the only things on its mind. Stumble into its workspace and it'll tolerate you, but swing first and it will swing back. Defeat it and you'll walk away with copper and iron ore, the same raw materials it was working so hard to unearth. It is, in the truest sense, a working creature.

โ„๏ธ

Borea

Borea

Neutral
Zone 3

The Borea are the indigenous people of the frozen northern expanse known as the Whisperfrost Frontiers, a land of biting cold and long, lightless winters. Hardy and self-sufficient, they have carved out a way of life within one of Orbis's most punishing environments. They will not strike first, but travelers who disrespect Borea territory or customs quickly learn that these people are more than capable of defending their homeland. Understanding their culture is the first step toward surviving the north.

๐Ÿง

Elf

Elf

Friendly
Zone 1

Among the oldest civilized races of Orbis, Elves dwell in the forested heartlands of Zone 1, keepers of ancient lore that stretches back further than most written records. Graceful and perceptive, they move through the woodland with an ease that speaks to generations of deep connection with the natural world. Elves are peaceful and will not threaten those who approach respectfully. Their settlements and knowledge make them invaluable contacts for any explorer hoping to understand the deeper history of this world.

๐Ÿ

Faun

Faun

Neutral
Zone 1

Fauns are goat-legged woodland dwellers native to the temperate wilds of Zone 1, closely bound to the rhythms of the forest and the creatures that share it with them. They carry themselves with a certain rustic confidence born from living at the edge of civilization. A Faun left undisturbed will go about its business without any quarrel, but it will defend itself without hesitation if provoked. Travelers passing through Faun-frequented glades would do well to move carefully and avoid giving offense.

๐ŸŒฌ๏ธ

Feran Shaman

Ferans

Neutral
Zone 2

<p>The <strong>Feran Shaman</strong> is the spellcasting variant of the Ferans, the neutral desert-dwelling faction that the player encounters across the dunes and canyons of the <span class="chip chip-zone">Howling Sands (Zone 2)</span>. Where the rank-and-file Feran fighters and hunters express the faction's martial side, the Shaman represents its spiritual and magical one โ€” a support caster who stands behind the line and bends the desert's harsh environment to the Ferans' will. Encountering a Feran Shaman inside a Feran camp is the clearest sign that the player is dealing with an organized people rather than a loose band of raiders: the Shaman implies ritual, hierarchy, and a culture deep enough to produce magic of its own.</p> <h2>Combat & encounter</h2> <p>The Feran Shaman is not a frontline brawler. (community-sourced) its role in a Feran group is to buff, heal, or otherwise enable the faction's fighters โ€” the kind of caster that is dangerous less for its own damage than for how much harder it makes every other Feran in the camp. The recommended target priority is therefore obvious but easy to forget in the chaos of a camp fight: kill the Shaman early, before its support turns a manageable skirmish into a losing one. The trap is treating the Shaman like a routine mob and chasing the fighters first, which is exactly the fight the Shaman is built to win.</p> <p>The encounter is shaped by the Ferans' neutral stance, which is the single most important thing to understand about the faction. (speculation) consistent with Hytale's faction design, Ferans do not attack the player on sight the way Trorks or Scarak do; they become hostile only when provoked โ€” typically by the player attacking them, raiding their camp, or otherwise crossing them. That means a Feran Shaman encounter is, in principle, optional: a player who respects the faction's territory can pass by without a fight. A player who chooses to raid the camp gets the full package, Shaman included, and should plan accordingly.</p> <h2>Lore & origin</h2> <p>The Ferans are established in official Hytale material as one of the intelligent peoples of the Howling Sands, a neutral faction that lives in and around the desert's ruins and oases. The Shaman's existence fills out what that means culturally: a people with shamans has religion, ritual, and a magical tradition tied to the desert they inhabit, not just survival skills. (speculation) the cleanest read is that the Feran Shaman's magic draws on the Howling Sands itself โ€” wind, sand, and the desert's spirits โ€” which would make the faction feel native to the zone in a way that imported or generic magic would not. That places the Ferans alongside the Kweebecs and Outlanders as one of Hytale's zone-native civilized peoples, each with a magical or spiritual tradition shaped by their home biome.</p> <h2>Loot & rewards</h2> <p>No official drop table exists; treat any specific item list you see elsewhere as (community-sourced) and unconfirmed. What is consistent with the Shaman's role is that it would drop reagents tied to desert magic and Feran culture โ€” spell components, ritual materials, or curiosities that hint at the faction's spiritual life. Because Feran Shamans are tied to Feran camps rather than spawning freely across the desert, they are not a mob to be ground on a loop; they are a targeted kill for players who choose to engage the Feran faction, whether for loot, reputation, or simply because the camp stood between them and where they were going.</p> <div class="callout"> <p><strong>Tip:</strong> In a Feran camp fight, the Shaman is your first target, not your last. Its job is to make every other Feran in the camp harder to kill, so leaving it alive turns a winnable skirmish into a slow loss. Break off the fighters, burst the Shaman, then clean up โ€” the camp is much easier once the support is gone.</p> </div> <h2>Feran Shaman โ€” Frequently Asked Questions</h2> <h3>Are Feran Shamans hostile on sight?</h3> <p>No. The Ferans are a neutral faction of the Howling Sands. (speculation) they become hostile only when provoked โ€” typically by the player attacking them, raiding their camp, or otherwise crossing them. A player who respects their territory can pass without a fight.</p> <h3>How dangerous is a Feran Shaman?</h3> <p>(community-sourced) Dangerous less for its own damage than for the support it provides. The Shaman buffs and enables the faction's fighters, so its real threat is how much harder it makes every other Feran in the camp. Kill it early in a camp fight.</p> <h3>Where do I find Feran Shamans?</h3> <p>In Feran camps across the Howling Sands (Zone 2) โ€” the desert's dunes, canyons, and oases. They are tied to Feran settlements rather than spawning freely across the desert, so encountering one usually means you have found a camp.</p> <h3>What does a Feran Shaman drop?</h3> <p>No official drop table exists; any specific item list is community-sourced. Expect reagents tied to desert magic and Feran culture โ€” spell components, ritual materials, and curiosities that hint at the faction's spiritual life โ€” rather than generic loot.</p>

โš”๏ธ

Feran Warrior

Ferans

Neutral
Zone 2

Posted at the edges of Feran desert settlements in the Howling Sands, the Feran Warrior is a young adult fighter tasked with protecting the tribe from outside threats. Visitors who respect tribal boundaries have nothing to fear โ€” these guardians hold their ground but won't strike first. Push past the perimeter uninvited, however, and they react swiftly. Their desert upbringing makes them capable combatants who know the terrain far better than any wandering outsider does.

๐Ÿง‘

Human

Human

Friendly
All Zones

<p>The <strong>Human</strong> is the player's own race and, in the broader sense, the family of passive and friendly human NPCs that the player encounters across almost every zone of Orbis. Where most entries in the creature encyclopedia describe something to fight, flee, or farm, this one describes the opposite: the people who give Hytale's world its social texture, who run the settlements the player takes shelter in, and whose presence is what separates a lived-in world from a wilderness of mobs. Humans in this neutral-NPC sense are not confined to a single biome; (speculation) consistent with Hytale's settlement and village design, friendly human NPCs appear across the safer zones of Orbis, from the villages of the <span class="chip chip-zone">Emerald Wilds</span> to the frontier camps of the colder regions, and they form the backbone of the game's trading, questing, and shelter economy.</p> <h2>Behavior & role</h2> <p>The defining trait of friendly human NPCs is that they are passive rather than hostile. (community-sourced) they go about their routines โ€” working at crafting stations, tending fields, guarding a palisade, or simply populating a village โ€” and they do not attack the player on sight. Their function in the world is economic and social: they are the population behind the shops, the quest-givers, the ambient life that makes a settlement feel occupied rather than decorative. A village of friendly humans is a safe harbor where a player can repair, restock, sort an inventory, and plan the next expedition, and the presence of those NPCs is the visual cue that tells a player they have reached a less dangerous part of the map.</p> <p>The player themselves is, of course, also human, and that is worth stating plainly because it shapes how the race functions as a creature entry. The player character is the one human in Orbis who roams, builds, fights, and progresses rather than staying rooted to a settlement role. (speculation) this is why friendly human NPCs read as "people like the player, but who have chosen a different life" โ€” merchants, farmers, guards โ€” and why the player can move freely among them where they cannot move freely among, say, Trorks or Scarak. The shared race is the unstated premise that makes the friendly settlements feel like home rather than just another faction.</p> <h2>Lore & origin</h2> <p>Hytale positions Orbis as a world with distinct intelligent peoples โ€” the Kweebecs of the forests, the Trorks of the wilds, the Ferans of the desert, the Outlanders of the frozen north โ€” and Humans sit alongside them as one of the setting's civilized races. (speculation) unlike the zone-bound Kweebecs or Ferans, humans are portrayed as adaptable enough to spread across multiple biomes, which is what allows their settlements to appear wherever the player travels. This adaptability mirrors the player's own experience: the human player can build and thrive in any zone, and the friendly human NPCs are the worldbuilding reflection of that same versatility. The lore implication is that humanity in Orbis is the connective tissue between the more specialized, zone-locked factions.</p> <h2>Interactions</h2> <p>Because friendly human NPCs are passive, the "interaction" loop is trading, questing, and shelter rather than combat. (community-sourced) settlements of humans plausibly offer the services players need between expeditions โ€” vendors to buy and sell, crafting stations to process gathered materials, beds or resting points to reset between trips, and quest hooks that point the player toward nearby points of interest. Treat any specific NPC roster or shop inventory as community-sourced and unconfirmed until verified in the live build; what is consistent with Hytale's design language is that human settlements function as the player's home base network, the recurring safe points that make long-form exploration sustainable.</p> <div class="callout"> <p><strong>Tip:</strong> A friendly human settlement is not just scenery โ€” it is your resupply point. When you find one, note its location relative to where you are heading. Most avoidable deaths in Hytale come from pushing on with a full inventory and low supplies instead of doubling back to the nearest human village to restock and offload.</p> </div> <h2>Human โ€” Frequently Asked Questions</h2> <h3>Is the Human a creature you fight in Hytale?</h3> <p>No. In the friendly-NPC sense, humans are passive or friendly NPCs that populate settlements across Orbis. They are the people behind the shops, quest-givers, and ambient village life, not combat targets.</p> <h3>Are all humans friendly?</h3> <p>The passive settlement NPCs are friendly. (speculation) note that some human-aligned groups โ€” the Outlanders of the frozen Zone 3, for example โ€” are a hostile human faction, so "human" and "friendly" are not automatically the same thing across every zone of Orbis.</p> <h3>Where do I find human settlements?</h3> <p>(community-sourced) Across the safer zones of Orbis, starting with the villages of the Emerald Wilds. Because humans are portrayed as adaptable, their settlements appear in multiple biomes rather than being locked to one.</p> <h3>Can I trade with human NPCs?</h3> <p>Yes โ€” trading, questing, and shelter are the core interactions with friendly human settlements, not combat. Treat specific vendor inventories as community-sourced until confirmed in-game; functionally, these settlements act as the player's home-base network for resupply between expeditions.</p>

๐ŸŒณ

Kweebec Avatar

Kweebecs

Friendly
Zone 1

<p>The <strong>Kweebec Avatar</strong> is a special, significant form within the Kweebecs faction of the <span class="chip chip-zone">Emerald Wilds (Zone 1)</span> โ€” a Kweebec elevated or manifested into something more than the ordinary ranks of Sproutling, Sapling, and Elder. Where the Elder leads a single temple, the Avatar reads as something faction-wide: a being that embodies the Kweebecs as a people rather than administering one settlement. Encountering the Avatar is treated by the community as a rare, meaningful event rather than an ambient spawn, and it sits at the top of the Kweebec hierarchy in the way a champion or figurehead would.</p> <h2>Behavior & role</h2> <p>The Avatar's role is symbolic and exceptional. (community-sourced) it is not a routine NPC the way the temple attendants are; it appears in specific, significant contexts โ€” tied to major Kweebec narrative beats, sacred sites of unusual importance, or faction-wide events โ€” rather than idling in every village. Its presence signals that the player has reached a part of the Kweebec storyline that matters, which is why encountering one feels different from walking past a Sproutling. The Avatar is a milestone, not furniture.</p> <p>What the Avatar does mechanically is less clear, and intentionally so. (speculation) consistent with how Hytale treats the apex of a friendly faction, the Avatar is plausibly a quest-giver or blessing-source of unusual weight โ€” the kind of NPC that grants faction-wide reputation, unlocks a special recipe or ability, or advances the Kweebec narrative in a way the per-temple Elders cannot. The common thread is that interacting with the Avatar has consequences that reach beyond a single settlement.</p> <h2>Lore & origin</h2> <p>The Kweebecs are the canonical friendly faction of Zone 1, deeply tied to Gaia and the plant-life of the Emerald Wilds. The Avatar is the purest expression of that tie. (speculation) the very word "avatar" โ€” an embodiment or manifestation of something greater โ€” implies that this Kweebec is a vessel for the faction's collective spirit or for the plant-magic of Zone 1 itself, which would explain why it is treated as significant rather than as just another elder. Whether the Avatar is born, chosen, or manifested through ritual is not established in reveal material, and that ambiguity is part of what gives the encounter its weight.</p> <h2>Interactions</h2> <p>Interacting with the Avatar should be treated as a rare opportunity, not routine commerce. (community-sourced) where a temple Elder handles day-to-day trade and quests, the Avatar is the figure tied to consequential faction moments โ€” major questlines, special blessings, or unlocks that affect the player's standing with the Kweebecs as a whole. The practical guidance is to engage fully when an Avatar appears: complete what it offers, because the window in which an Avatar is accessible is likely limited to that narrative beat.</p> <div class="callout"> <p><strong>Tip:</strong> An Avatar appearance is a milestone in the Kweebec storyline, not an ambient NPC. When you encounter one, treat it as significant โ€” finish its quests and accept its blessings, because Avatars are not present in every village and their offerings reach beyond a single temple.</p> </div> <h2>Kweebec Avatar โ€” Frequently Asked Questions</h2> <h3>Where do I find the Kweebec Avatar?</h3> <p>The Avatar appears in specific, significant contexts within the Emerald Wilds (Zone 1) โ€” tied to major Kweebec narrative beats or sacred sites of unusual importance. It is not an ambient spawn in every village.</p> <h3>How is it different from an Elder?</h3> <p>An Elder leads a single temple; the Avatar embodies the Kweebecs as a faction. It is rarer, more significant, and tied to faction-wide narrative and rewards rather than per-temple administration.</p> <h3>What does it do?</h3> <p>(speculation) Consistent with Hytale's treatment of friendly-faction apexes, the Avatar likely gives consequential quests, special blessings, or unlocks that affect standing with the Kweebecs as a whole.</p> <h3>Can I fight it?</h3> <p>No. The Avatar is a friendly, significant NPC of the Kweebecs faction, not a hostile creature. It is meant to be engaged with, not slain.</p>

๐ŸŽต

Kweebec Treesinger

Kweebecs

Friendly
Zone 1

<p>The <strong>Kweebec Treesinger</strong> is a mystical-role member of the Kweebecs faction, found among the sacred groves and temples of the <span class="chip chip-zone">Emerald Wilds (Zone 1)</span>. Where the Elder administers a temple and the Avatar embodies the faction, the Treesinger occupies a specialized ritual role โ€” a Kweebec whose connection to the plant-life of Zone 1 expresses itself through song, growth, or magic rather than through governance. The name itself signals a creature whose function is mystical rather than political, and encountering one suggests the player has reached a part of Kweebec life where the faction's bond with the forest becomes tangible rather than just decorative.</p> <h2>Behavior & role</h2> <p>The Treesinger's role is ritual and magical. (community-sourced) the creature reads as a specialist โ€” the Kweebec who tends the sacred groves, sings to the growing things, or performs the rites that keep the Emerald Wilds' plant-life healthy and aligned with Gaia. This is distinct from the administrative role of the Elder and the symbolic role of the Avatar: where those govern and embody, the Treesinger does. The practical work of keeping a plant-faction's magic alive falls to figures like this, and their presence in a grove or temple is the sign that the space is magically active rather than merely sacred in name.</p> <p>What the Treesinger offers the player is less clearly defined, and that ambiguity is thematic. (speculation) consistent with a mystical specialist in a friendly faction, the Treesinger is plausibly a source of plant-themed blessings, growth-related buffs, unique recipes tied to the forest, or quests that engage the player with the magical side of the Emerald Wilds. The common thread is that interacting with a Treesinger is about the Kweebecs' magic specifically, not generic temple commerce.</p> <h2>Lore & origin</h2> <p>The Kweebecs are thematically bound to Gaia and to the living forest of Zone 1, and the Treesinger is where that binding becomes an active practice rather than just a label. (speculation) the role implies that the Kweebecs do not merely live among plants but actively cultivate and communicate with them โ€” that the Emerald Wilds' forests are, in part, sung into health and shape by figures like the Treesinger. That is a richer piece of worldbuilding than "plant people who happen to live in a forest," and it makes the Kweebecs' stewardship of Zone 1 feel like work they perform rather than a trait they happen to have.</p> <h2>Interactions</h2> <p>Interacting with a Treesinger is framed as engaging with the mystical side of the Kweebecs rather than with everyday village commerce. (community-sourced) the expectation is that a Treesinger offers something plant-magic-specific โ€” a blessing, a buff, a recipe, a quest tied to the forest โ€” that the more administrative Elder does not. Players interested in the magical or crafting systems tied to Zone 1's flora are pointed toward the Treesinger as the natural NPC for that thread of gameplay.</p> <div class="callout"> <p><strong>Tip:</strong> If you are chasing plant-themed recipes, growth buffs, or quests tied to the magic of the Emerald Wilds, look for a Treesinger in the sacred groves. The Elder handles temple administration; the Treesinger handles the Kweebecs' actual plant-magic.</p> </div> <h2>Kweebec Treesinger โ€” Frequently Asked Questions</h2> <h3>Where do I find the Kweebec Treesinger?</h3> <p>Among the sacred groves and temples of the Emerald Wilds (Zone 1). The Treesinger occupies a specialized mystical role rather than a routine village post.</p> <h3>How is it different from an Elder?</h3> <p>The Elder administers a temple; the Treesinger performs the Kweebecs' plant-magic โ€” tending groves, singing to growth, and keeping the faction's bond with the forest active.</p> <h3>What does it offer the player?</h3> <p>(speculation) Plausibly plant-themed blessings, growth buffs, unique forest recipes, or quests tied to the magical side of the Emerald Wilds โ€” distinct from a temple Elder's everyday commerce.</p> <h3>Is it hostile?</h3> <p>No. The Treesinger is a friendly, mystical NPC of the Kweebecs faction. It is meant to be engaged with for the faction's plant-magic, not fought.</p>

๐Ÿ‘‘

Outlander Chief

Outlanders

Boss
Zone 3

<p>Across the frozen expanse of the <span class="chip chip-zone">Whisperfrost Frontiers (Zone 3)</span>, the hostile Outlanders faction controls a network of surface villages that players can storm and capture. At the head of each such village sits the <strong>Outlander Chief</strong> โ€” the boss-tier leader who must be defeated before the settlement can be claimed as a player base. He is not a wandering elite; he anchors the village he rules, and his death is the formal gate between "this place belongs to the Outlanders" and "this place belongs to you." For players pushing into Zone 3, the Chief is the recurring boss who stands between them and a forward operating base in the frozen north.</p> <h2>Combat & encounter</h2> <p>The Chief is a commander, not a lone brawler, and the encounter is balanced around the village he defends. (community-sourced) he is flanked by Outlander guards and does not engage alone if he can help it โ€” pulling him cleanly requires first dealing with the patrols and watchmen posted around the settlement. Once isolated, he fights as a hardened melee fighter: heavy strikes, a respectably large health pool, and enough armor that a under-geared player will struggle to out-damage his mitigation. He is not designed to be burst down; he is designed to punish an unprepared assault.</p> <p>The strategic payoff for taking the village โ€” and therefore for killing the Chief โ€” is large. Capturable Outlander villages convert into forward bases for Zone 3 operations, which matters because Zone 3's blizzards deal damage-over-time and reduce visibility. Having a safe respawn, storage, and crafting point inside the zone transforms the difficulty of everything else you do there. The Chief is the price of admission.</p> <h2>Lore & origin</h2> <p>The Outlanders are the canonical hostile faction of Zone 3, shown in official Hytale material occupying fortified villages in the tundra. (speculation) the fact that their villages are capturable โ€” rather than simply destroyable โ€” implies the Outlanders are an established people with infrastructure, not a monster population; they build, they settle, they hold territory. The Chief is the local authority within that structure. Whether the Outlanders answer to any higher power beyond the village level is not established in reveal material, leaving room for the faction to expand in future content.</p> <h2>Loot & rewards</h2> <p>No official drop table is published; treat specific item lists as (community-sourced). The primary, guaranteed reward is the village itself: a captured base inside Zone 3. In addition, consistent with Hytale's design, the Chief plausibly drops Zone 3-tier crafting materials, cold-climate reagents, and a trophy recording the conquest. Expect the material rewards to be modest relative to the strategic value of the base โ€” the village is the real loot.</p> <div class="callout"> <p><strong>Tip:</strong> Clear the village perimeter before pulling the Chief. He is balanced to fight alongside his guards, and a coordinated Outlander defense will shred an unprepared assault. Kill the watchmen first, then isolate the Chief for the duel.</p> </div> <h2>Outlander Chief โ€” Frequently Asked Questions</h2> <h3>Where do I find the Outlander Chief?</h3> <p>Leading capturable Outlander villages on the surface of the Whisperfrost Frontiers (Zone 3). Each capturable village has its own Chief.</p> <h3>Why fight the Chief?</h3> <p>Defeating him is the gate to capturing the village as a player base. A forward base inside Zone 3 dramatically lowers the difficulty of operating in the frozen north.</p> <h3>Is he a boss?</h3> <p>Yes โ€” a boss-tier commander who anchors his village. He is harder than a guard and is balanced to fight alongside his defenders.</p> <h3>What does he drop?</h3> <p>No official drop table exists; any item list is community-sourced. Expect Zone 3-tier materials plus a trophy. The real reward is the captured village.</p>

๐Ÿ‘บ

Outlander Colossus

Outlanders

Boss
Zone 3

<p>If the Outlander Chief is the brain of a Zone 3 village, the <strong>Outlander Colossus</strong> is its muscle โ€” a massive elite of the Outlanders faction encountered in the <span class="chip chip-zone">Whisperfrost Frontiers (Zone 3)</span>. Where the Chief commands and the standard guards patrol, the Colossus is the unit you send when something simply needs to be broken. He is dramatically larger and harder-hitting than a rank-and-file Outlander, and running into one unprepared is one of the fastest ways for a Zone 3 player to lose a full inventory to the snow. He exists to make the frozen frontier feel genuinely threatening, not just cold.</p> <h2>Combat & encounter</h2> <p>The Colossus is an elite, not a puzzle boss, so his encounter is straightforward in shape but punishing in numbers. (community-sourced) his attacks are heavy, slow, and telegraphed โ€” the threat is damage and reach, not complexity. The danger comes from his health pool and his ability to two-or-three-shot a player in mid-tier gear, which means a careless pull while other Outlanders are nearby turns a survivable elite fight into a guaranteed death. Discipline matters more than mechanical skill: pull him to clear ground, keep his friends out of the fight, and respect his wind-ups.</p> <p>Because he is elite rather than a fixed dungeon boss, the Colossus can appear as part of village defense when players assault an Outlander settlement. (speculation) this implies he is the Outlanders' answer to a siege engine โ€” the heavy unit deployed to break an attacking force โ€” which fits the faction's established identity as organized, territory-holding people rather than feral monsters.</p> <h2>Lore & origin</h2> <p>The Outlanders are depicted in official Hytale material as a martial society occupying fortified villages in the tundra of Zone 3. The Colossus represents the top end of their military โ€” the largest, strongest warrior they can field. (speculation) whether his size is natural to a caste of large Outlanders, the result of training and equipment, or something more supernatural is not clarified in reveal material. His existence does establish that the faction is not uniform, and that Zone 3 combat scales beyond standard guards into genuinely dangerous elites.</p> <h2>Loot & rewards</h2> <p>No official drop table exists; treat specific item lists as (community-sourced). As an elite of this tier, the Colossus plausibly drops higher-tier crafting materials than standard Outlanders, a chance at a notable piece of Zone 3 gear, and the kinds of reagents tied to cold-region recipes. He is a worthwhile target when encountered, though he is not the gate to anything structural the way the Chief is โ€” killing him thins the village's defenses rather than transferring ownership.</p> <div class="callout"> <p><strong>Tip:</strong> Never pull a Colossus into a group of his allies. His damage is manageable when you fight him alone; it becomes lethal when a guard squad is chipping you at the same time. Isolate him before committing.</p> </div> <h2>Outlander Colossus โ€” Frequently Asked Questions</h2> <h3>Where do I find the Outlander Colossus?</h3> <p>In the Whisperfrost Frontiers (Zone 3), often as part of an Outlander village's garrison. He is an elite, not a fixed dungeon boss, so he can appear wherever the Outlanders mass their forces.</p> <h3>Is he a boss?</h3> <p>He is an elite โ€” tougher than a guard, not quite a fixed dungeon boss. Think of him as a heavy unit rather than the village's commander.</p> <h3>How dangerous is he?</h3> <p>(community-sourced) his attacks are heavy and telegraphed, and he can drop a mid-geared player in a few hits. He is manageable when isolated but lethal when other Outlanders join the fight.</p> <h3>What does he drop?</h3> <p>No official drop table exists; any item list is community-sourced. Expect higher-tier Zone 3 materials and a chance at notable gear, but no structural reward like capturing a village.</p>

๐Ÿน

Outlander Ranger

Outlanders

Hostile
Zone 3

The Outlander Ranger is a patient and deadly hunter who turns the pine forests of Zone 3 into a killing ground. Rather than closing the distance, this skilled archer keeps to the tree line, loosing arrows at intruders who stray too deep into Outlander territory. Players who charge forward without thinking will find themselves pinned down and taking constant fire. Closing the gap quickly or using terrain for cover are the most reliable ways to deal with a Ranger before its arrows find their mark. Do not underestimate the reach these sentinels command over open ground.

โš”๏ธ

Outlander Warrior

Outlanders

Hostile
Zone 3

The Outlander Warrior is the backbone of Outlander raiding parties across Zone 3's frozen wilds. Trained from youth to defend the tribe and punish those who trespass, these fighters engage intruders head-on without hesitation. Their combat style is direct and aggressive โ€” they close distance fast and hit hard, giving little room to breathe once the fight begins. Traveling through Outlander-held terrain almost guarantees an encounter with one, often alongside other Outlander fighters. Dealing with groups efficiently and managing positioning are key skills for surviving repeated run-ins in this hostile zone.

๐Ÿฆ—

Scarak Locust

Scaraks

Hostile
Zone 2

Defending the airspace above Scarak hive clusters in Zone 2, the Scarak Locust is a winged caste built for aerial patrol and threat interception. Where most Scarak forces press forward on the ground, Locusts operate from above โ€” diving on intruders who venture too close to the hive or attempt to bypass surface defenses by moving at elevation. Their presence turns what might seem like a manageable approach into a multi-front engagement. Players exploring Zone 2 should scan the sky before advancing; a Locust spotted early can mean the difference between a controlled fight and being overwhelmed from an unexpected angle.

๐Ÿ›ก๏ธ

Scarak Tank

Scaraks

Hostile
Zone 2

Built like a living siege engine, the Scarak Tank is the hive's frontline answer to serious threats. This heavily armored caste soaks up punishment that would fell lighter Scarak warriors, anchoring defensive lines and drawing aggro so that other hive members can operate freely. Facing one head-to-head in Zone 2 is a slow, grinding engagement; its carapace is designed to outlast attackers who expect a quick kill. The smart approach is to flank, exploit any gaps in its armoring, or wear it down from a distance. Ignoring a Tank while fighting other Scaraks is a mistake โ€” it will wade into the fight and turn the tide.

๐Ÿœ

Scarak Worker

Scaraks

Hostile
Zone 2

Not every Scarak fights โ€” some build. The Scarak Worker belongs to a specialized labor caste within the hive hierarchy, responsible for construction, excavation, and structural maintenance of Scarak colonies in Zone 2. Despite its utilitarian role, the Worker is fully hostile and will attack any intruder it detects on sight. Its tunneling claws and hardened carapace make it dangerous in the cramped corridors it helps carve. Venturing into Scarak territory means contending with Workers before ever reaching the colony's more aggressive defenders.

๐Ÿฆฅ

Slothian

Slothians

Neutral
Devastated Lands

Beneath the scorched surface of the Devastated Lands, a hidden world thrives. The Slothians are a sloth-like people who make their home in the underground Tropical Jungle caves running beneath that blasted region. Unhurried and deliberate in everything they do, they have carved out a quiet existence far from the chaos above. They are neutral โ€” willing to coexist with travelers who approach without aggression, but not ones to tolerate provocation. Their underground realm hints at a rich culture developed in isolation, shaped by the strange luminescent ecosystems of the deep caves.

Hytale Monsters & Bosses โ€” Hostile Mobs of Orbis

101
๐ŸŠ

Snapjaw

Hostile
Zone 1

The Snapjaw is one of Zone 1's most dangerous ambush predators โ€” a vicious reptile that conceals itself along swampy banks and river margins, waiting for prey to step too close. It attacks on sight and hits hard; at 81 hit points it is far tougher than the region's wildlife suggests. Killing one rewards a generous haul of two to four Raw Fish, a rare consolation for a fight you probably didn't see coming. The World Memory of Orbis records every Snapjaw encounter, ensuring these swamp ambushes are never forgotten.

๐Ÿ’€

Frost Skeleton Scout

Skeleton Frost Scout

Hostile
Zone 3

The cold of Borea does more than slow the living โ€” it resurrects the dead. Frost Skeleton Scouts are undead warriors risen from the frozen wastes, their bones locked in a shell of ice that makes them both eerie and immediately dangerous. They attack on sight, patrolling Borea's bleached expanses with grim purpose. Bringing one down guarantees Bone Fragments, Linen Scraps, and Essence of Ice, with a one-in-four chance of recovering fifteen Crude Arrows. The Essence of Ice alone makes these scouts worth targeting. As World Memory enemies, every clash with them is permanently woven into your record of Borea.

๐Ÿ’€

Frost Skeleton Ranger

Skeleton Frost Ranger

Hostile
Zone 3

Where the Frost Skeleton Scout stalks in close, the Frost Skeleton Ranger keeps its distance and makes you pay for it. Armed and aggressive, this ranged undead variant patrols Borea's frozen wastes and attacks any living target it spots โ€” there is no waiting it out. Kills yield guaranteed Bone Fragments, Linen Scraps, and Essence of Ice, with a one-in-four shot at fifteen Crude Arrows. Experienced players will also watch for the two percent chance of an Ancient Steel Hand Crossbow, a weapon drop that makes hunting these enemies genuinely rewarding. Like all Borea undead, it is preserved as a World Memory.

๐Ÿ’€

Frost Skeleton Fighter

Skeleton Frost Fighter

Hostile
Zone 3

Borea's killing cold doesn't just claim the living โ€” it reanimates the dead. The Frost Skeleton Fighter is an undead warrior locked inside a shell of glacial ice, rising from ancient battlefields scattered across Zone 3. It charges aggressively on sight and strikes with surprising force for a creature that has long since stopped breathing. Defeating one always yields Bone Fragments, Linen Scraps, and Essence of Ice. The encounter is recorded as a World Memory, leaving a permanent mark on Orbis's history.

๐Ÿ’€

Frost Skeleton Archer

Skeleton Frost Archer

Hostile
Zone 3

Where most undead close the distance, the Frost Skeleton Archer keeps it. Perched on frozen ridges throughout Borea's Zone 3, it looses frost-chilled volleys at anyone who wanders into its sightline โ€” closing the gap rarely works in your favor. With only 61 health it falls faster than its melee kin, but a careless approach lets it whittle you down first. It drops Bone Fragments, Linen Scraps, and Essence of Ice every time, with a 25% chance to leave behind a bundle of Crude Arrows. The kill is marked as a World Memory.

๐Ÿ’€

Frost Skeleton Mage

Skeleton Frost Mage

Hostile
Zone 3

Of all the reanimated dead haunting Borea, the Frost Skeleton Mage is the one you least want at range. Risen from Zone 3's frozen wastes, it channels residual magical cold into offensive spells, attacking from a distance the moment it spots you. Its 61 health disguises how much punishment it dishes out before you close in. Defeat it and you're guaranteed Bone Fragments, Linen Scraps, 15โ€“30 Blue Crystal Shards, and 2โ€“3 Essence of Ice โ€” a notably richer magical yield than other frost undead. The battle is inscribed as a World Memory.

๐Ÿ’€

Frost Skeleton Soldier

Skeleton Frost Soldier

Hostile
Zone 3

Not every skeleton in Borea rose from the same forgotten conflict, but the Frost Skeleton Soldier carries itself like one that did. Encased in ice that serves as improvised armor, it patrols Zone 3's glacial corridors and attacks on sight with the disciplined aggression of a former rank-and-file warrior. At 74 health it absorbs more punishment than the lighter skeletal variants. Bone Fragments, Linen Scraps, and Essence of Ice drop in guaranteed quantities upon defeat. The engagement is preserved as a World Memory in Orbis.

๐Ÿ’€

Frost Skeleton Knight

Skeleton Frost Knight

Hostile
Zone 3

The Frost Skeleton Knight stands apart from its lesser kin through sheer bearing โ€” ice has formed over what was clearly once a knightly frame, and it moves through Borea's Zone 3 with a purposeful hostility that lesser skeletons lack. It attacks on sight and at 74 health can trade blows for longer than most encounter-starters expect. The remains of its former station mean nothing in death: it still drops the same Bone Fragments, Linen Scraps, and Essence of Ice guaranteed upon any frost skeleton kill. Defeating it leaves a World Memory on Orbis.

๐Ÿ’€

Frost Skeleton Archmage

Skeleton Frost Archmage

Hostile
Zone 3

Deep in the frozen reaches of Borea, the Frost Skeleton Archmage stands as one of the most dangerous undead casters you'll face in Zone 3. Ice encases its ancient bones, and it attacks on sight without hesitation. With 61 health it isn't the mightiest monster around, but its magical arsenal demands respect. Defeat it and it reliably drops Bone Fragments, Linen Scraps, a generous haul of Blue Crystal Shards (15โ€“30), and 2โ€“3 Essence of Ice โ€” valuable materials for crafting cold-affinity gear. This encounter is recorded as a World Memory.

๐Ÿ’€

Incandescent Skeleton Mage

Skeleton Incandescent Mage

Hostile
Volcanic Cave

Volcanic Caves are no place for the unprepared, and the Incandescent Skeleton Mage is a prime reason why. Molten energy pulses through its skeletal frame, making it glow with an eerie light even in the deepest tunnels. At 103 health it hits hard and targets adventurers on sight. The magic it channels in life โ€” or rather, in undeath โ€” has left residual heat baked into its remains: it always drops 1โ€“3 Cindercloth Scraps and 2โ€“3 Essence of Fire. Both are prized by crafters working with fire-affinity recipes. Defeating it leaves a mark in the World Memory.

๐Ÿ’€

Incandescent Skeleton Footman

Skeleton Incandescent Footman

Hostile
Volcanic Cave

Where the Incandescent Skeleton Mage favors spells, the Incandescent Skeleton Footman closes the distance and fights toe to toe. Found in the same Volcanic Cave network, this 103-health melee undead radiates molten heat from within its glowing bones. It charges hostile the moment it senses a player, making crowded tunnel encounters genuinely dangerous when these footmen appear alongside spellcasters. It always drops 1โ€“3 Cindercloth Scraps and 1โ€“2 Essence of Fire โ€” slightly less fire essence than its mage counterpart, but the material is just as useful for fire-affinity crafting. The World Memory records every victory here.

๐Ÿ’€

Incandescent Skeleton Head

Skeleton Incandescent Head

Hostile
Volcanic Cave

The Incandescent Skeleton Head is an unsettling sight in the Volcanic Caves โ€” a disembodied, glowing skull propelled by the same molten energy that animates its more intact brethren. Don't let the absence of a body fool you: at 81 health it is more than capable of threatening an unwary explorer, and it is hostile from the moment it spots you. Like other incandescent undead, it burns with fire-affinity essence, and defeating one always yields 1โ€“3 Cindercloth Scraps and 2โ€“3 Essence of Fire. This strange encounter is saved as a World Memory on Orbis.

๐Ÿ’€

Incandescent Skeleton Fighter

Skeleton Incandescent Fighter

Hostile
Volcanic Cave

Sharing the same Volcanic Cave habitat as its incandescent kin, the Incandescent Skeleton Fighter is a seasoned melee combatant risen from the deep heat. At 103 health it matches the toughness of other elite cave undead, and it will rush players the instant they enter its range. The distinction between it and the Footman lies in how it fights โ€” the Fighter tends to press aggressively and pursue farther before disengaging. Defeat it and you'll reliably collect 1โ€“3 Cindercloth Scraps and 1โ€“2 Essence of Fire, useful for fire-affinity crafting projects. Every fight here is etched into the World Memory.

๐Ÿ’€

Sandswept Skeleton Archmage

Skeleton Sand Archmage

Hostile
Zone 2

Bleached pale by centuries under the Howling Sands sun, the Sandswept Skeleton Archmage presides over the deepest desert tombs as their most dangerous undead custodian. It attacks on sight, hurling arcane force with enough ferocity to demand your full attention. With 38 health it falls faster than its heavier kin, but getting close enough to exploit that weakness is the real challenge. Defeating one guarantees Bone Fragments, Linen Scraps, and a generous haul of 15โ€“30 Cyan Crystal Shards โ€” and the kill is permanently marked in Orbis as a World Memory.

๐Ÿ’€

Sandswept Skeleton Assassin

Skeleton Sand Assassin

Hostile
Zone 2

Where other Sandswept Skeletons guard openly, the Sandswept Skeleton Assassin hunts. Sun-bleached and swift, it lurks at the edges of tomb complexes in the Howling Sands, closing distance with unsettling speed before launching a relentless assault. It attacks without hesitation the moment it spots you, and its 61 health makes it a durability threat on top of the pressure. Every clash is logged as a World Memory in Orbis. Bone Fragments and Linen Scraps are guaranteed drops โ€” a modest but reliable reward for a fight that rarely feels casual.

๐Ÿ’€

Sandswept Skeleton Scout

Skeleton Sand Scout

Hostile
Zone 2

Speed is the Sandswept Skeleton Scout's defining trait. Patrol routes in the Howling Sands' ancient tomb complexes rely on these agile undead to detect intruders early and engage immediately โ€” they attack on sight with no warning. At 29 health they're the most fragile of the Sandswept family, but their ranged capability demands you close the gap fast. Bone Fragments and Linen Scraps drop guaranteed; a 25% chance yields 15 Crude Arrows, and there's a 10% chance the Scout drops its Rusty Iron Shortbow. Every encounter writes itself into Orbis as a World Memory.

๐Ÿ’€

Sandswept Skeleton Soldier

Skeleton Sand Soldier

Hostile
Zone 2

The Sandswept Skeleton Soldier forms the backbone of tomb defence across the Howling Sands. Sun-bleached and relentless, it attacks the moment a living being enters its sightline, trading clever tactics for sheer persistence. At 61 health it can absorb considerable punishment, making it a war of attrition for the unprepared. It reliably drops Bone Fragments and Linen Scraps, with a 25% chance to yield 15 Crude Arrows โ€” useful salvage if you're running low on ranged ammunition. Defeating one is permanently recorded in Orbis as a World Memory.

๐Ÿ’€

Sandswept Skeleton Archer

Skeleton Sand Archer

Hostile
Zone 2

The Sandswept Skeleton Archer takes up position at range and opens fire the instant it spots you โ€” no hesitation, no warning, just arrows. It's the most frustrating variant to approach in confined tomb corridors of the Howling Sands, where its 61 health lets it weather counter-attacks while you're still closing distance. Bone Fragments and Linen Scraps are guaranteed drops; there's a 25% chance of recovering 15 Crude Arrows and a 10% chance the Rusty Iron Shortbow itself survives the fight as loot. The encounter is permanently etched into Orbis as a World Memory.

๐Ÿ’€

Sandswept Skeleton Ranger

Skeleton Sand Ranger

Hostile
Zone 2

Bleached pale by centuries under the Howling Sands sun, the Sandswept Skeleton Ranger haunts desert tombs with a crossbow it hasn't set down since death. It attacks any living thing that crosses its patrol route without warning. Bringing it down guarantees bone fragments, linen scraps, and a chance at fifteen crude arrows or even an iron hand crossbow โ€” useful salvage from a dangerous source. Every confrontation is recorded as a World Memory, marking your journey through Zone 2's unforgiving ruins.

๐Ÿ’€

Sandswept Skeleton Guard

Skeleton Sand Guard

Hostile
Zone 2

Where the Sandswept Skeleton Ranger keeps its distance, the Skeleton Guard closes in. This melee enforcer of Zone 2's desert tombs packs considerably more health than its ranged counterpart and charges the moment it detects an intruder. Its purpose is straightforward: hold the burial chamber at any cost. Bone fragments and linen scraps are its only consistent drops. Because this encounter is preserved as a World Memory, every narrow escape โ€” and every death โ€” becomes part of your permanent record on Orbis.

๐Ÿ’€

Sandswept Skeleton Mage

Skeleton Sand Mage

Hostile
Zone 2

Not every guardian of the Howling Sands tombs relies on brute force. The Sandswept Skeleton Mage channels desert magic from behind the front line, making it a priority target that many travelers overlook until it's too late. It attacks on sight and is hostile throughout Zone 2's ruins. When defeated it guarantees bone fragments, linen scraps, and a notably generous haul of cyan crystal shards โ€” fifteen to thirty per kill โ€” making it a sought-after resource target despite the risk. The encounter is saved as a World Memory.

๐Ÿดโ€โ˜ ๏ธ

Skeleton Pirate Captain

Hostile
Ocean

Sunken ships beneath Orbis's oceans didn't stay quiet for long. The Skeleton Pirate Captain still commands what remains of its drowned crew, prowling wrecks and coastal ruins with the certainty of someone who never accepted that the voyage ended. It is fully hostile and attacks anyone bold enough to board its territory. With 61 health it isn't fragile, and a captain's instincts make it a more calculated threat than its subordinates. This encounter leaves its mark as a World Memory, a ghost ship story written in your own blood.

๐Ÿดโ€โ˜ ๏ธ

Skeleton Pirate Striker

Hostile
Ocean

The undead crew of Orbis's sunken ships produced many types of threat, but the Skeleton Pirate Striker is the most physically dangerous among them. Boasting 103 health โ€” more than any other Sandswept or pirate variant โ€” this frontline brawler hits hard and absorbs punishment that would fell lighter enemies in moments. It's aggressive on sight throughout Ocean zones, making underwater ruins treacherous to explore without preparation. No loot falls from this enemy, but the World Memory it creates ensures the fight won't be forgotten on your personal record.

๐Ÿดโ€โ˜ ๏ธ

Skeleton Pirate Gunner

Hostile
Ocean

Somewhere beneath Orbis's ocean waves, sunken galleons still hold their crews โ€” undead sailors with pistols at their hips and cutlasses in their grips. The Skeleton Pirate Gunner opens fire on sight, making it one of the more dangerous threats in aquatic ruins and shipwreck zones. Fighting one at range won't save you; these undead marksmen close the distance quickly once provoked. Every clash with a Skeleton Pirate Gunner is recorded as a World Memory, weaving your naval encounter into the living history of Orbis.

๐Ÿ’€

Burnt Skeleton Alchemist

Skeleton Burnt Alchemist

Hostile
Volcanic Cave

The Burnt Skeleton Alchemist is a charred remnant of someone who once studied fire โ€” and paid for it. Found in the volcanic depths of Orbis, it still smolders with residual heat and attacks anyone who ventures too close. With 103 health points and a hostile disposition, it's no pushover even for experienced explorers. Defeating one guarantees Cindercloth Scraps and Essence of Fire, with a small chance of an Antidote or a piece of Ancient Steel armor. Every kill is preserved as a World Memory.

๐Ÿ’€

Burnt Skeleton Praetorian

Skeleton Burnt Praetorian

Hostile
Volcanic Cave

Among the charred undead of Orbis's volcanic caves, the Burnt Skeleton Praetorian stands apart โ€” this is a elite guard reduced to smoldering bone, still fulfilling its duty at 226 health points. It hits hard and takes a lot of punishment, making it one of the toughest foes in the volcanic depths. Bring it down and you are rewarded generously: Thorium Ingots, Cobalt Ingots, and a substantial haul of Essence of Fire are guaranteed. There is a fifty-fifty chance of the coveted Grimoire: Rekindle Embers dropping alongside a pile of skulls. Each victory over this ancient sentinel is recorded as a World Memory.

๐Ÿ’€

Burnt Skeleton Knight

Skeleton Burnt Knight

Hostile
Volcanic Cave

Where volcanic heat once killed and now sustains its victims in undeath, the Burnt Skeleton Knight patrols cave passages as a blackened remnant of a warrior from some forgotten age. It has 103 health points and will close in aggressively the moment it spots you. Bringing it down guarantees Cindercloth Scraps and Essence of Fire. There is also a chance to find a Rusty Steel Sword or Rusty Shield among its remains โ€” relics of its living days โ€” alongside a small possibility of Ancient Steel armor pieces. This encounter is etched into Orbis's World Memory.

๐Ÿ’€

Burnt Skeleton Gunner

Skeleton Burnt Gunner

Hostile
Volcanic Cave

Not every threat in Orbis's volcanic caves charges with a blade. The Burnt Skeleton Gunner keeps its distance, picking off intruders from afar with its charred frame still radiating heat from the deep. At 81 health points it is lighter than its armored kin, but the ranged pressure it applies demands you deal with it quickly rather than ignoring it mid-fight. Cindercloth Scraps and Essence of Fire are guaranteed drops, with a small chance of Ancient Steel armor pieces rounding out the reward. As with all volcanic undead, facing one leaves its mark in Orbis's World Memory.

๐Ÿ’€

Burnt Skeleton Wizard

Skeleton Burnt Wizard

Hostile
Volcanic Cave

Deep within Orbis's Volcanic Caves, the Burnt Skeleton Wizard is a charred remnant of a spellcaster that refused to stay dead, still smoldering with trapped heat long after the flames consumed it. It attacks on sight, wielding whatever dark arts survived its immolation. Defeating one always yields Cindercloth Scraps and Essence of Fire, and there is a small chance it drops a piece of Ancient Steel armor โ€” helmet, cuirass, gauntlets, or greaves. Every clash is recorded as a World Memory, marking your descent into these hellish depths.

๐Ÿ’€

Burnt Skeleton Archer

Skeleton Burnt Archer

Hostile
Volcanic Cave

The Burnt Skeleton Archer patrols the scorching tunnels of Orbis's Volcanic Caves, its blackened bones still radiating warmth as it draws a bead on any intruder it spots. Unlike its melee-focused kin, this undead marksman engages from a distance, making careful positioning essential. Kills guarantee Cindercloth Scraps and Essence of Fire. There is also a 25% chance to recover a bundle of Crude Arrows, and rare 5% odds to find an Ancient Steel Hand Crossbow or a piece of Ancient Steel armor. Encounters here are preserved as World Memories.

๐Ÿ’€

Burnt Skeleton Lancer

Skeleton Burnt Lancer

Hostile
Volcanic Cave

Heavier and more durable than the other burnt dead, the Burnt Skeleton Lancer charges through the Volcanic Caves of Orbis with a Rusty Steel Halberd that can catch unprepared explorers off guard. It is aggressive on sight, and its 103 health points mean a prolonged fight in brutal terrain. Cindercloth Scraps and Essence of Fire drop every time; there is a 10% chance the halberd itself stays intact as loot, and a 5% chance each for individual pieces of Ancient Steel armor. The World Memory system logs every one of these harrowing duels.

๐Ÿ’€

Burnt Skeleton Soldier

Skeleton Burnt Soldier

Hostile
Volcanic Cave

The most formidable of the volcanic undead variants, the Burnt Skeleton Soldier guards the deepest reaches of Orbis's Volcanic Caves with 124 health points and relentless aggression. Its charred frame smolders with residual heat, and it will engage any player who enters its territory without hesitation. Cindercloth Scraps and Essence of Fire are certain drops; pieces of Ancient Steel armor โ€” helm, cuirass, gauntlets, greaves โ€” each carry a 5% drop chance worth lingering for. The World Memory system ensures this confrontation becomes part of your permanent story on Orbis.

๐Ÿ’€

Skeleton Scout

Hostile
Devastated Lands

Skeleton Scouts are swift undead sentinels that roam the corrupted stretches of the Devastated Lands, attacking anyone foolish enough to wander within range. Lightly framed compared to heavily armored undead variants, they compensate with ranged capability โ€” a 10% chance they carry a Crude Shortbow, and a 25% chance they drop 15 Crude Arrows. Every kill yields Bone Fragments and Linen Scraps. Their presence in dungeons and corrupted terrain makes them a constant hazard for any expedition into Orbis's darker regions. Encounters are recorded as World Memories.

๐Ÿ’€

Skeleton Soldier

Hostile
Devastated Lands

The Skeleton Soldier is a front-line undead fighter found throughout the Devastated Lands โ€” in corrupted open terrain, cave entrances, and dungeon corridors alike. It charges on sight and swings with a worn axe, relying on aggression over finesse. With 61 health it can absorb a surprising amount of punishment before going down. Defeating one always yields bone fragments and linen scraps, and roughly one in ten carries a rusty iron axe. This encounter is recorded in Orbis as a World Memory.

๐Ÿ’€

Skeleton Knight

Hostile
Devastated Lands

The Skeleton Knight represents a tougher tier of undead soldier haunting the Devastated Lands. Clad in remnants of armor and wielding both sword and shield, it holds its ground with a deliberate blocking stance before pressing the attack. At 74 health it outlasts most of its undead kin. Bone fragments and linen scraps are guaranteed drops; there is also a 10% chance to recover either a rusty steel sword or a rusty shield โ€” useful salvage for early adventurers. The duel is preserved as a World Memory in Orbis.

๐Ÿ’€

Skeleton Ranger

Hostile
Devastated Lands

The Skeleton Ranger is a mid-range undead skirmisher that haunts the corrupted terrain of the Devastated Lands. Rather than closing in, it keeps its distance and looses arrows steadily, making it dangerous in open areas where cover is scarce. Its 49 health makes it more fragile than armored undead, but being caught in the open under a barrage of arrows quickly changes the math. It drops bone fragments and linen scraps on death, and has a 25% chance to leave behind 15 crude arrows. This encounter is a World Memory.

๐Ÿ’€

Skeleton Archer

Hostile
Devastated Lands

The Skeleton Archer is the lightest ranged combatant among the undead of the Devastated Lands โ€” fragile at 36 health, but capable of harassing players from a distance before they can close the gap. It opens fire the moment it spots prey, making cave and dungeon approaches unexpectedly punishing. Bone fragments always drop on death; linen scraps fall half the time, and crude arrows drop with a 25% chance. The rarest reward is a rusty iron shortbow at just 5%. Each encounter is etched into Orbis as a World Memory.

๐Ÿ’€

Skeleton Archmage

Hostile
Devastated Lands

The Skeleton Archmage stands apart from every other undead in the Devastated Lands. Where lesser skeletons rely on rusted iron and bone, this ancient spellcaster channels something far more unsettling โ€” the very corruption saturating Orbis's darkest reaches. At 88 health it is the sturdiest of the skeleton variants, and it attacks on sight with ranged magic. It always drops bone fragments and a guaranteed haul of 15โ€“30 green crystal shards โ€” a rare resource worth seeking out specifically. Linen scraps fall half the time. Every duel with one is preserved as a World Memory.

๐Ÿ’€

Skeleton Fighter

Hostile
Devastated Lands

The Skeleton Fighter is one of the more common threats lurking in the corrupted corridors and dungeon depths of the Devastated Lands. With 36 health it won't outlast a well-equipped adventurer, but these undead warriors attack on sight and press forward without hesitation. Every confrontation is recorded as a World Memory on Orbis. Defeat one and you'll collect Bone Fragments and Linen Scraps guaranteed, with a slim 10% chance to claim a Scrap Sword worth keeping for spare parts.

๐Ÿ’€

Skeleton Mage

Hostile
Devastated Lands

Unlike its sword-swinging kin, the Skeleton Mage channels arcane power from beyond the grave, making it a distinctly more dangerous presence in the Devastated Lands. It boasts 49 health and engages from range, prioritizing spellcraft over melee. These encounters are permanently woven into Orbis as World Memories. Taking one down is reliably rewarding: Bone Fragments, Linen Scraps, and a substantial haul of 15โ€“30 Green Crystal Shards all drop guaranteed โ€” valuable components for anyone delving into magical crafting.

๐Ÿ’€

Skeleton Fighter

Skeleton Fighter Wander

Hostile
Devastated Lands

This wandering variant of the Skeleton Fighter doesn't confine itself to dungeon interiors โ€” it roams the blighted open terrain of the Devastated Lands, ambushing travelers who stray too far from safety. With 36 health it's not the hardiest opponent, but it attacks on sight without warning. Its restlessness makes it harder to avoid than its dungeon-bound counterpart, and defeating it is remembered as a World Memory on Orbis. Expect Bone Fragments and Linen Scraps as sure drops, with a 10% chance of a Scrap Sword.

๐ŸงŸ

Sandswept Zombie

Zombie Sand

Hostile
Zone 2

The Howling Sands conceal a grim secret beneath their drifting dunes: desiccated corpses that claw back to life when travelers draw near. The Sandswept Zombie bursts upward from the sand to ambush the unwary, packing 49 health into its parched frame. It attacks on sight and is deceptively resilient for something so desiccated. This encounter is preserved as a World Memory on Orbis. Strip it down and you'll find at least 1โ€“2 Linen Scraps beneath the sun-bleached wrappings โ€” sparse reward for a nasty surprise.

๐ŸงŸ

Zombie

Hostile
Devastated Lands

A shambling relic of the Devastated Lands' darkest age, the Zombie lurches toward anything living with single-minded aggression. It carries 49 health and won't stop once it locks onto a target โ€” distance is your best first option. Unlike more exotic undead, it fights purely through relentless pressure rather than any special ability. Killing one leaves a World Memory on Orbis, a small mark that this shambling corpse once crossed your path. The only guarantee is 1โ€“2 Linen Scraps: modest, but worth collecting during longer expeditions.

๐ŸงŸ

Frost Zombie

Zombie Frost

Hostile
Zone 3

The Frost Zombie haunts the snow-covered reaches of Orbis with a deliberate, grinding momentum โ€” its frozen limbs slow every step, yet it never stops pressing forward. Travelers who dismiss it as sluggish learn quickly that patience is its weapon: it closes ground relentlessly and attacks on sight. With 81 health points it can absorb several blows, and every encounter is recorded as a World Memory. It always drops 1โ€“2 Linen Scraps, making it worth dispatching even during a rushed crossing of the frozen wastes.

Aberrant Zombie

Aberrant Zombie

Zombie Aberrant

Hostile
Devastated Lands

<p>The <strong>Aberrant Zombie</strong> is one of the signature undead creatures of Hytale, encountered in the tombs, ruins, and corruption-adjacent areas of <span class="chip chip-zone">Howling Sands (Zone 2)</span> and the deeper underground. Where skeletons are the disciplined, weapon-wielding undead and the Zone 4 Void-corrupted creatures are the endgame threat, the Aberrant Zombie is the feral, mutated end of undeath โ€” a body warped by whatever process raised it, with the strength and aggression that implies. For players exploring the older parts of Orbis, the Aberrant Zombie is the undead that signals the local ruin is not just picked-over but actively dangerous.</p> <h2>Combat & encounter</h2> <p>The Aberrant Zombie is a mid-tier undead combatant, and his fight reflects that. (community-sourced) he hits harder and is noticeably more aggressive than a basic skeleton, with attacks that read as heavy and grasping rather than disciplined. His threat is not the burst damage of an elite or the durability of a Defender, but relentlessness โ€” he closes distance, takes a hit, and keeps coming, which makes him punishing in numbers and in the confined spaces where ruins and tombs tend to place him.</p> <p>The encounter is shaped by where Aberrant Zombies are found. (speculation) consistent with their role as the undead of corrupted or ancient places, they typically spawn in groups inside ruins and tombs, which means the fight is usually about managing several at once in a confined space. The practical implication is that spacing matters more than raw damage output: a player who can funnel them through a doorway or pull them into open ground makes the fight manageable, while a player who charges into the middle of a tomb gets swarmed.</p> <h2>Lore & origin</h2> <p>Undeath is an established phenomenon in Hytale's Orbis โ€” the reveal material shows undead creatures across multiple zones, and the Sand Empress and her undead court sit at the top of the Zone 2 undead hierarchy. (speculation) the Aberrant Zombie represents the lower end of that hierarchy, but his very existence implies that undeath in Orbis is not a single clean category: there is a spectrum from disciplined skeletons to mutated aberrants, which suggests that whatever raises the dead does not produce uniform results. That nuance makes Hytale's undead feel like a real phenomenon rather than a monster type.</p> <h2>Loot & rewards</h2> <p>No official drop table exists; treat specific item lists as (community-sourced). As a mid-tier undead creature of ruins and tombs, the Aberrant Zombie plausibly drops the reagents and materials associated with undeath and the ancient places he haunts โ€” death-flavored crafting components, low-tier tomb loot, and the occasional piece of gear worth picking up. He is also a gate of sorts: ruins with Aberrant Zombies typically contain the better Zone 2 loot, so his presence is a reliable signal that the player is in a worthwhile location.</p> <div class="callout"> <p><strong>Tip:</strong> Aberrant Zombies spawn in groups inside ruins, so the fight is about spacing. Funnel them through a doorway or pull them into open ground rather than charging into the middle of a tomb โ€” his relentlessness is punishing when several close on you at once.</p> </div> <h2>Aberrant Zombie โ€” Frequently Asked Questions</h2> <h3>Where do I find the Aberrant Zombie?</h3> <p>In the tombs, ruins, and corruption-adjacent areas of the Howling Sands (Zone 2) and the deeper underground. He is a mid-tier undead creature, typically found in groups inside ruins.</p> <h3>How is he different from other undead?</h3> <p>He is the feral, mutated end of undeath โ€” heavier-hitting and more aggressive than a basic skeleton. Where skeletons are disciplined, the Aberrant Zombie is relentless.</p> <h3>Is he dangerous?</h3> <p>(community-sourced) Not as a single target, but he spawns in groups and in confined spaces. His threat is relentlessness in numbers, which makes spacing important.</p> <h3>What does he drop?</h3> <p>No official drop table exists; any item list is community-sourced. Expect death-flavored reagents and tomb loot, and treat his presence as a marker that the ruin is worth exploring.</p>

๐ŸงŸ

Small Aberrant Zombie

Zombie Aberrant Small

Hostile
Devastated Lands

Smaller than its kin but no less corrupted, the Small Aberrant Zombie is a creature of unstable void energy compressed into a compact, hostile frame. At 126 health points it falls faster than the larger variants, yet its unpredictability remains intact โ€” erratic movement patterns keep fighters from settling into easy rhythms. It attacks on sight throughout the Devastated Lands, and the chaos it carries within still makes it a genuine hazard rather than a trivial fight. Each encounter is recorded as a World Memory on Orbis.

๐ŸงŸ

Large Aberrant Zombie

Zombie Aberrant Big

Hostile
Devastated Lands

Where the Devastated Lands breed horrors, the Large Aberrant Zombie stands among its most punishing. This void-twisted undead carries 341 health points and an aggressive disposition that activates the instant it detects a player. Size amplifies the danger here โ€” its corrupted form translates into hits that carry real weight, and the same erratic behavior shared by its smaller kin becomes far more threatening on this scale. Prepare carefully before engaging, and know that Orbis will log the confrontation as a World Memory regardless of how it ends.

๐ŸงŸ

Burnt Zombie

Zombie Burnt

Hostile
Volcanic Cave

The Burnt Zombie is a relic of heat, a scorched corpse that shambles through volcanic tunnels wreathed in drifting smoke and ash. It attacks on sight and its 126 health points make it no pushover in the claustrophobic passages of the Volcanic Cave, where space to maneuver is scarce. Defeating it yields tangible rewards: 1โ€“3 Cindercloth Scraps and 1โ€“2 Essence of Fire drop guaranteed, making it a reliable source of fire-infused materials for crafters willing to brave the heat. Every encounter is logged as a World Memory.

๐Ÿ”

Undead Chicken

Chicken Undead

Hostile
Devastated Lands

What was once a common farmyard bird has been twisted by the corrupting energies that blanket the Devastated Lands. The Undead Chicken attacks on sight, making it a strange but genuine hazard for unprepared travelers. Its decayed feathers and hollow eyes betray a wrongness that unsettles even veteran adventurers. Bringing one down guarantees raw chicken and light hide โ€” modest rewards, but useful early on. This encounter is recorded as a World Memory, so every fight here leaves a mark on Orbis.

๐ŸงŸ

Ghoul

Hostile
Devastated Lands

Ghouls haunt the graveyards and blighted reaches of the Devastated Lands, driven by a hunger that death itself couldn't extinguish. With 193 health points, this rotting undead absorbs punishment before it finally drops โ€” close-quarters fighters will feel every exchanged blow. It always yields bone fragments and has a solid chance to surrender linen scraps as well, making it a worthwhile farm target for crafters. This creature's defeat is preserved as a World Memory, weaving your victories into the fabric of Orbis.

๐Ÿ„

Undead Cow

Cow Undead

Hostile
Devastated Lands

<p>The <strong>Undead Cow</strong> is one of the most quietly unsettling common mobs of the <span class="chip chip-zone">Devastated Lands (Zone 4)</span>, the corrupted remnant of what was once ordinary livestock now shambling across the ash and cinder of the endgame zone. Where the Wraith and the Void Dragon represent the dramatic, boss-scale face of Zone 4's corruption, the Undead Cow represents its everyday texture โ€” proof that the Void's influence does not only reshape dragons and heroes but reaches all the way down to the most mundane animal life. For players farming the Devastated Lands, the Undead Cow is a familiar, low-level hostile that pads out the zone's population and reminds them, every encounter, that this land used to be lived-in.</p> <h2>Combat & encounter</h2> <p>The Undead Cow is a common hostile, and its fight reflects that tier. (community-sourced) it is a slow, shambling melee mob โ€” not the kind of threat that punishes an endgame-geared player on its own. The danger comes from the same place all of Zone 4's danger comes from: context. An Undead Cow is rarely alone, the ground it shambles across is usually lava-adjacent or ash-choked, and the player who treats it as a trivial annoyance and stops paying attention is exactly the player who then walks into an Emberwolf pack or a Wraith while cleaning up. The recommended approach is to dispatch them efficiently โ€” they go down fast to endgame gear โ€” and keep moving rather than getting bogged down in a crowd.</p> <p>The encounter is shaped by what the Undead Cow implies about the zone. (speculation) consistent with the Devastated Lands being framed as a corrupted endgame zone, the presence of undead livestock implies that the land was once farmable, settled country โ€” that the volcanic hellscape the player now crosses used to be someone's pastures. The Undead Cow is, in that sense, ambient storytelling: a low-level mob whose very existence tells the player that the corruption of Zone 4 happened to a living, working landscape, not to an empty wasteland.</p> <h2>Lore & origin</h2> <p>Hytale's official material establishes the Devastated Lands as a volcanic endgame zone shaped by the Void's corruption, and the Undead Cow slots into the "corrupted former life" layer of that lore. (speculation) the cleanest read is that these are the reanimated remains of the livestock that once grazed the land before the corruption and the volcanism took it โ€” ordinary animals, caught up in the same forces that produced the zone's undead and Void-touched creatures. That ties the Undead Cow to the same family of corrupted-and-risen threats as the scorched skeletons and the Wraith, and it does the important worldbuilding work of making the Devastated Lands feel like a place with a before, not just an apocalyptic now.</p> <h2>Loot & rewards</h2> <p>No official drop table exists; treat any specific item list you see elsewhere as (community-sourced) and unconfirmed. What is consistent with the Undead Cow's place in the ecosystem is that it would drop low-to-mid-tier reagents tied to the undead and to animal-derived crafting โ€” leather, bone, corrupted meat, or components used in recipes that need a steady supply of basic materials. Because Undead Cows are common across the Devastated Lands, they function as renewable filler content for players who need bulk reagents while farming the zone for rarer drops. They are not a target for their own sake, but a background harvest that adds up over a long session.</p> <div class="callout"> <p><strong>Tip:</strong> Don't let a crowd of Undead Cows bog you down in the open. They go down fast to endgame gear, so dispatch them efficiently and keep moving โ€” the real threats in the Devastated Lands are the ones that show up while you are distracted cleaning up the common mobs. Treat them as loot on the way to something more important, not as a fight worth stopping for.</p> </div> <h2>Undead Cow โ€” Frequently Asked Questions</h2> <h3>Where do I find Undead Cows in Hytale?</h3> <p>In the Devastated Lands (Zone 4) โ€” the volcanic endgame zone. They are common hostile mobs encountered across the ash and cinder, padding out the zone's population alongside its rarer threats.</p> <h3>How dangerous is an Undead Cow?</h3> <p>(community-sourced) Not very, on its own โ€” it is a slow, shambling common melee mob that goes down fast to endgame gear. The danger is contextual: they are rarely alone, and the ground they shamble across is usually lava-adjacent or shared with the zone's real threats.</p> <h3>Why are there undead cows in the Devastated Lands?</h3> <p>(speculation) They are the reanimated remains of the livestock that once grazed the land before the Void's corruption and volcanism took it. Their existence is ambient storytelling โ€” proof that the corruption happened to a settled, farmable landscape, not an empty wasteland.</p> <h3>What does an Undead Cow drop?</h3> <p>No official drop table exists; any specific item list is community-sourced. Expect low-to-mid-tier reagents tied to the undead and animal-derived crafting โ€” leather, bone, corrupted meat โ€” a renewable filler harvest for bulk materials while farming the zone for rarer drops.</p>

๐ŸŽ

Armored Skeleton Horse

Horse Skeleton Armored

Hostile
Devastated Lands

Plated in remnants of corroded armor, the Armored Skeleton Horse charges at players without hesitation, a relic of some long-forgotten cavalry swallowed by the Devastated Lands. The barding slows it down no more than death has โ€” it closes distance quickly and hits hard enough to punish careless footwork. Bone fragments are the guaranteed drop after bringing it down. Like all Devastated Lands creatures, this encounter becomes part of Orbis's World Memory the moment it ends.

๐ŸŽ

Skeleton Horse

Horse Skeleton

Hostile
Devastated Lands

Stripped of flesh and stripped of fear, the Skeleton Horse roams the Devastated Lands as proof of how thoroughly corruption reshapes everything it touches. With 160 health it outlasts many early-game threats, and its aggression means there is no option to simply walk past. Fallen riders once urged these mounts across fields now long destroyed; today they serve no master but violence. After the fight, bone fragments are yours as a guaranteed drop. This encounter joins the World Memory of Orbis permanently.

๐Ÿ–

Undead Pig

Pig Undead

Hostile
Devastated Lands

What was once a common farmyard animal has been twisted beyond recognition by the corruption saturating the Devastated Lands. The Undead Pig charges on sight, driven by a mindless hunger that no living creature shares. With 103 health it can absorb a surprising amount of punishment before going down. Defeat one and you'll pull Raw Pork and Light Hide from the carcass โ€” grim mementos of what this creature used to be. Every encounter here is recorded as a World Memory, leaving a permanent mark on your journey through Orbis.

๐Ÿ‘ป

Wraith

Hostile
Devastated Lands

<p>The <strong>Wraith</strong> is the spectral undead that drifts through the corrupted ash and lava of the <span class="chip chip-zone">Devastated Lands (Zone 4)</span>, a hostile ghost rather than a creature of flesh. Where most of Zone 4's threats are physical โ€” the Cave Rex beneath, the Emberwolves and scorched skeletons above โ€” the Wraith represents the supernatural face of the endgame: the lingering echo of something that died in the corruption and refused to stop moving. Encountering one is a reminder that the Devastated Lands are not merely a volcanic hazard zone but a place where the dead do not rest, and that the Void's influence on Zone 4 does not stop at reshaping living creatures.</p> <h2>Combat & encounter</h2> <p>Wraiths are hostile on sight and built around the disorientation of fighting something that does not behave like a body. (community-sourced) the encounter reads as a fast, drifting pursuit โ€” a Wraith closes on the player through air rather than terrain, which means the usual trick of breaking line of sight behind cover works less reliably than it does against ground-bound mobs. The threat is less a single heavy hit than relentless pressure: the Wraith does not tire, does not path around obstacles the way a living creature must, and is happy to hover just out of comfortable melee reach while the player deals with the zone's other hazards. The recommended response is to commit to the fight rather than kite โ€” pin it down, burst it before it can reset, and never let it hover over you while you are already fighting something else.</p> <p>The encounter is amplified by where Wraiths live. (speculation) consistent with their framing as undead of a corrupted land, Wraiths plausibly appear in the ash wastes and around the ruins that litter Zone 4 โ€” places where, in worldbuilding terms, people once lived and died. The practical implication is that a Wraith is rarely the only thing in a fight: the same cursed ground that spawns them also hosts Emberwolves, scorched skeletons, and the occasional Voidspawn, and a player who ignores a Wraith to deal with a closer threat often takes steady damage from the ghost they left hovering behind them.</p> <h2>Lore & origin</h2> <p>Hytale's official material establishes the Devastated Lands as a volcanic endgame zone shaped by the Void's corruption, and the Wraith sits squarely inside that supernatural layer of the zone's identity. (speculation) the cleanest read is that a Wraith is what happens to a soul when it dies in a place as thoroughly corrupted as Zone 4 โ€” bound to the land rather than passing on, drifting through the ruins of whatever it once was. That ties the Wraith to the same Void-touched family as the Void Dragon and the Crawler, and it makes the Devastated Lands feel like a place with a history of death, not just a present-tense hazard. The lore implication is that the corruption of Zone 4 is old enough and deep enough to have already produced generations of these lingering dead.</p> <h2>Loot & rewards</h2> <p>No official drop table exists; treat any specific item list you see elsewhere as (community-sourced) and unconfirmed. What is consistent with the Wraith's place in the ecosystem is that it would drop reagents tied to the undead and to the Void โ€” spectral or soul-themed components used in higher-tier crafting, rare curiosities that hint at the deeper history of the Devastated Lands, or materials that gate access to endgame recipes. Because Wraiths are encountered throughout Zone 4 rather than locked behind a boss room, they function as a renewable source of those materials for players willing to farm the endgame zone. They are not a loot pinata, but a steady, dangerous harvest in a place where everything is dangerous.</p> <div class="callout"> <p><strong>Tip:</strong> Never leave a Wraith hovering behind you while you fight something else. It does not tire and does not path around cover the way a living mob does, so the damage it deals is steady and silent. Pin it, burst it, then move on โ€” or accept that you are now fighting two things at once in the most hostile zone in the game.</p> </div> <h2>Wraith โ€” Frequently Asked Questions</h2> <h3>Where do I find Wraiths in Hytale?</h3> <p>In the Devastated Lands (Zone 4) โ€” the volcanic endgame zone. They are spectral undead encountered throughout the zone, plausibly around the ash wastes and ruins where, in worldbuilding terms, people once lived and died.</p> <h3>Are Wraiths undead or Void creatures?</h3> <p>Both, in effect. (speculation) the cleanest read is that a Wraith is the lingering soul of something that died in the Void's corruption, which places it in the same Void-touched family as the Void Dragon and the Crawler โ€” supernatural, not a natural creature of Zone 4.</p> <h3>How do I fight a Wraith?</h3> <p>(community-sourced) Commit to the fight rather than kite. A Wraith drifts through air and does not path around cover like a ground-bound mob, so breaking line of sight is unreliable. Pin it down and burst it before it can reset, and never let one hover behind you while you fight another threat.</p> <h3>What does a Wraith drop?</h3> <p>No official drop table exists; any specific item list is community-sourced. Expect spectral or soul-themed crafting components tied to the undead and the Void, plus lore curiosities โ€” a renewable harvest for players farming the endgame zone, not a single boss payoff.</p>

Shadow Knight

Shadow Knight

Hostile
Devastated Lands

<p>The <strong>Shadow Knight</strong> is one of the elite undead of Hytale, encountered in the deeper, more dangerous parts of the world where corruption and ancient power concentrate. Where the Aberrant Zombie is the feral, mutated end of undeath and the skeletons are its rank-and-file, the Shadow Knight is its aristocracy โ€” an armored, disciplined, heavy undead combatant whose presence signals that the player has stepped into a place that the dead take seriously. For players pushing into the harder ruins, tombs, or corruption-adjacent zones, the Shadow Knight is the encounter that separates a routine delve from a real one.</p> <h2>Combat & encounter</h2> <p>The Shadow Knight is an elite-tier undead combatant, and his fight reflects that. (community-sourced) he combines the durability of a Defender with the discipline of a trained soldier โ€” heavy armor that shrugs off weak hits, deliberate attacks that punish face-tanking, and enough health to hold a fight for an extended trade. He is not the feral aggressor the Aberrant Zombie is; he is a measured, dangerous opponent who controls spacing and forces the player to respect his wind-ups. The recommended approach is the same as for any elite heavy: isolate, respect his telegraphs, and don't get greedy on the punish.</p> <p>Because he is elite rather than a swarm unit, the Shadow Knight typically appears as a set-piece rather than as filler. (speculation) consistent with his armored, aristocratic design, he reads as a guardian or champion โ€” the kind of undead placed to protect something specific, like the inner chamber of a tomb, the approach to a greater boss, or a corruption-touched objective. The practical implication is that a Shadow Knight's presence is a reliable signal that the thing he is standing in front of is worth the trouble of fighting him.</p> <h2>Lore & origin</h2> <p>Undeath in Hytale is established as a spectrum rather than a single category, and the Shadow Knight sits at its disciplined, martial end. (speculation) the very existence of an armored, trained undead implies that undeath in Orbis can preserve skill and purpose, not just animate flesh โ€” these are not raised corpses but retained warriors, which suggests that whatever power sustains them is sophisticated enough to maintain a hierarchy. That ties the Shadow Knight to the same undead aristocracy that the Sand Empress and her court represent, and it implies that the undead of Orbis are organized rather than merely numerous.</p> <h2>Loot & rewards</h2> <p>No official drop table exists; treat specific item lists as (community-sourced). As an elite undead, the Shadow Knight plausibly drops the upper end of the undead-themed loot table โ€” higher-tier death-flavored reagents, a chance at a notable piece of gear, and the kinds of materials tied to deeper crafting recipes. His presence also marks that there is something worth defending nearby, so killing him usually opens access to the chamber, boss approach, or objective he was guarding.</p> <div class="callout"> <p><strong>Tip:</strong> A Shadow Knight is a set-piece guardian, not filler. Isolate him, respect his telegraphs, and treat his presence as a signal that what he's guarding is worth the fight โ€” the reward for killing him is usually whatever he was standing in front of.</p> </div> <h2>Shadow Knight โ€” Frequently Asked Questions</h2> <h3>Where do I find the Shadow Knight?</h3> <p>In the deeper ruins, tombs, and corruption-adjacent zones of Orbis, typically as a guardian of a specific chamber or boss approach. He is an elite undead combatant.</p> <h3>How is he different from other undead?</h3> <p>He is the aristocracy of undeath โ€” armored, disciplined, and heavy. Aberrant Zombies are feral, skeletons are rank-and-file, and Shadow Knights are elite guardians.</p> <h3>Is he dangerous?</h3> <p>(community-sourced) Yes โ€” he is elite-tier. Heavy armor, deliberate punishing attacks, and enough health for an extended fight. Isolate him and respect his telegraphs.</p> <h3>What does he drop?</h3> <p>No official drop table exists; any item list is community-sourced. Expect the upper end of the undead-themed loot table, and treat his presence as a marker for what he was guarding.</p>

๐Ÿ•

Bleached Hound

Hound Bleached

Hostile
Devastated Lands

The Bleached Hound moves through the Devastated Lands in near-total silence, its pale, corruption-drained coat making it difficult to spot until it's already closing the distance. It attacks on sight with 126 health โ€” enough durability that dismissing it as a nuisance will get you hurt. Unlike most threats in the region, its danger lies in how quietly it closes the gap. Take it down and the carcass yields Raw Wildmeat and two-to-three pieces of Medium Hide, solid returns for hunters willing to work in one of Orbis's most hostile zones. This encounter is saved as a World Memory.

Werewolf

Werewolf

Hostile
Zone 1

<p>The <strong>Werewolf</strong> is one of the signature cursed creatures of Hytale, encountered in the wilder, more overgrown parts of the world where civilization thins out. Where the wolf is a natural predator and the Shadow Knight is disciplined undead, the Werewolf is the cursed middle ground โ€” a humanoid twisted into a bestial form, combining animal aggression with a twisted intelligence. For players traveling through the darker forests, moors, and frontier edges of Orbis, the Werewolf is the creature that makes the wilderness feel dangerous at night and in the places where the world is less mapped.</p> <h2>Combat & encounter</h2> <p>The Werewolf is a fast, aggressive combatant, and his fight reflects that. (community-sourced) he combines the speed and aggression of a natural wolf with the durability and intentionality of a humanoid โ€” fast closes, heavy hits, and enough health to take a trade rather than fold to a single burst. His threat is mobility and pressure: he closes distance quickly, hits hard when he gets there, and is harder to kite than a natural predator. The recommended approach is to respect his gap-closing and to punish his recovery rather than trying to out-trade him in the open.</p> <p>The encounter is shaped by the Werewolf's dual nature. (speculation) consistent with the cursed-humanoid concept, his AI plausibly reads as more tactical than a pure beast โ€” he closes, he pressures, and he may disengage and re-engage rather than simply committing to a straight fight. The practical implication is that a Werewolf encounter is less predictable than a wolf fight: he is not just faster, he fights like something that knows what it is doing, which makes him genuinely dangerous in the dark or in dense cover where the player can't easily track him.</p> <h2>Lore & origin</h2> <p>Curses and transformations are an established part of Hytale's worldbuilding, and the Werewolf represents the cursed-humanoid end of that spectrum. (speculation) the existence of such a creature implies that the line between humanoid and beast in Orbis is not fixed โ€” that there are forces, whether magical, divine, or environmental, that can twist one into the other. That ties the Werewolf to the broader theme of corruption and transformation that runs through Hytale's harder zones, and it makes him part of the world's darker folklore rather than just another monster type.</p> <h2>Loot & rewards</h2> <p>No official drop table exists; treat specific item lists as (community-sourced). As a signature cursed creature of the wilderness, the Werewolf plausibly drops reagents and materials associated with curses, transformation, and wild places โ€” cursed-flavored crafting components, pelts or parts tied to dark recipes, and the occasional piece of gear worth picking up. He is a target worth seeking out for players who need those specific reagents rather than a routine mob to farm.</p> <div class="callout"> <p><strong>Tip:</strong> A Werewolf closes distance fast and hits hard when he gets there โ€” don't try to out-trade him in the open. Respect his gap-closing, punish his recovery, and fight him in clear ground where you can track him rather than in dense cover.</p> </div> <h2>Werewolf โ€” Frequently Asked Questions</h2> <h3>Where do I find the Werewolf?</h3> <p>In the darker forests, moors, and frontier edges of Orbis โ€” the wilder, more overgrown parts of the world where civilization thins out. He is a signature cursed creature.</p> <h3>How is he different from a natural wolf?</h3> <p>He combines animal speed with a twisted intelligence. Where a wolf is a pure predator, the Werewolf fights like a humanoid โ€” tactical, durable, and harder to kite.</p> <h3>Is he dangerous?</h3> <p>(community-sourced) Yes. He closes distance fast, hits hard, and may disengage and re-engage rather than simply committing. He is especially dangerous in the dark or in dense cover.</p> <h3>What does he drop?</h3> <p>No official drop table exists; any item list is community-sourced. Expect cursed-flavored reagents and wild-place materials โ€” pelts, parts, and components tied to dark recipes.</p>

๐Ÿ›

Void Larva

Larva Void

Hostile
Devastated Lands

Alone, a Void Larva is almost easy to dismiss โ€” a wriggling juvenile form barely the size of a fist, creeping out of cracked ground when night falls over the Devastated Lands. The danger is the swarm. Dozens emerge at once, and their combined pressure overwhelms cautious adventurers before a retreat can be organised. At 36 health they die quickly, but each one guarantees a drop of Essence of the Void, making mass culls worthwhile. On very rare occasions a Voidheart surfaces too. Every encounter is recorded as a World Memory on Orbis.

๐Ÿ•ท๏ธ

Void Crawler

Crawler Void

Hostile
Devastated Lands

The Void Crawler has shed the helplessness of larval life and grown into something far more unsettling. It skitters across walls and even ceilings, ignoring gravity in ways that make defensive positioning nearly useless. Active after dark in the Devastated Lands, it hunts on sight and hits hard enough at 74 health to punish sloppy play. Dropping 1โ€“2 Essence of the Void on every kill, it is a dependable resource target โ€” though the rare Voidheart is the real prize. World Memory records every clash for Orbis.

๐Ÿ‘๏ธ

Void Eye

Eye Void

Hostile
Devastated Lands

Unlike its ground-dwelling kin, the Void Eye floats โ€” a disembodied, watchful orb that patrols corrupted stretches of the Devastated Lands around the clock. It does not need darkness to hunt; day or night, the moment it registers an intruder it becomes relentlessly aggressive. With 61 health it takes a few solid hits to bring down, and when it falls it yields 4โ€“6 Essence of the Void guaranteed โ€” one of the better passive-farming targets in the region. There is also a meaningful 15 % chance of a Voidheart. Every kill is preserved as a World Memory.

๐Ÿ‘พ

Void Spawn

Spawn Void

Hostile
Devastated Lands

The Void Spawn is what happens when the corruption of the Devastated Lands reaches critical mass and extrudes something fully formed into the living world. It does not scout โ€” it arrives to corrupt and to kill, and at 193 health it has the endurance to see that through. Treat any encounter as a deliberate fight: it attacks on sight and does not relent. Bringing it down rewards you with 6โ€“9 Essence of the Void, and there is a 15 % chance it drops a Voidheart. The World Memory system registers every clash on Orbis's record.

Earthen Golem

Earthen Golem

Golem Crystal Earth

Boss
Zone 1

<p>The <strong>Earthen Golem</strong> (in-game id <em>golem-crystal-earth</em>) is one of the first real boss encounters a Hytale player meets, and it sets the template for how zone bosses behave in Orbis. A hulking construct of stone laced with green crystal, it patrols fixed positions in <span class="chip chip-zone">Zone 1 โ€” Emerald Wilds</span> and responds to intruders with the slow, deliberate violence of something that was built โ€” or grown โ€” to guard territory. For new players pushing past the Kweebecโ€“Trork conflict, the Earthen Golem is the natural next step up in difficulty.</p> <h2>Combat & Encounter</h2> <p>The Earthen Golem's combat identity is "heavy and telegraphed." Its attacks land hard โ€” hard enough to two-shot a Zone 1-geared player who is not blocking โ€” but they are clearly wind-up, giving a player who has learned to read Hytale's combat animations time to dodge or block. (community-sourced) the fight is balanced around patience rather than burst: chip damage during recovery windows, retreat during attack animations, and never greed a trade with a creature whose health pool dwarfs yours.</p> <p>Movement is the dominant defensive tool here. The Golem does not chase aggressively across long distances; it punishes players who stand in range. Maintaining spacing, attacking only during recovery, and respecting the Golem's tell before each swing will get a careful player through the encounter cleanly even at modest gear levels.</p> <h2>Lore & Origin</h2> <p>Where Hytale's dragons read as apex predators and the Trorks as a hostile faction, the Earthen Golem fits into the world as a constructed or elemental guardian. (speculation) the green crystal laced through its body โ€” and the Green Crystal Shards it drops โ€” suggests a connection to Zone 1's crystalline resources, possibly as an animated guardian of a mineral deposit or ancient site. The official blog has not given the golems a unified origin, but their shared visual language (stone body, crystal inclusions, deliberate movement) reads as a deliberate "guardian construct" archetype rather than a natural creature.</p> <h2>Loot & Rewards</h2> <p>The Earthen Golem has a confirmed (community-sourced) drop table:</p> <ul> <li><strong>Cobblestone</strong> โ€” basic building material, useful for early base construction.</li> <li><strong>Green Crystal Shards</strong> โ€” a Zone 1 crystalline crafting reagent, thematically tied to the Golem's body.</li> <li><strong>Emerald</strong> โ€” a rare drop, the sort of high-value gem that justifies farming the encounter.</li> </ul> <p>This drop profile makes the Earthen Golem one of the earliest reliable sources of crystal-themed crafting materials in the game โ€” useful for players working on Zone 1-tier gear and constructions.</p> <div class="callout"> <p><strong>Tip:</strong> The Earthen Golem is a teaching boss. Treat your first kill as a tutorial in Hytale's combat rhythm โ€” read the wind-up, block or dodge, punish recovery. The lesson transfers directly to every later boss in the game.</p> </div> <h2>Earthen Golem โ€” Frequently Asked Questions</h2> <h3>Where do I find the Earthen Golem?</h3> <p>In the Emerald Wilds (Zone 1). It is a territorial boss encountered at fixed positions rather than a roaming creature.</p> <h3>Is the Earthen Golem hard?</h3> <p>It is the gentlest of Hytale's bosses โ€” by design, since it is one of the first a new player meets. Its attacks are heavy but clearly telegraphed, so the fight rewards learning to read animations more than raw gear.</p> <h3>What does the Earthen Golem drop?</h3> <p>Confirmed (community-sourced): Cobblestone, Green Crystal Shards, and a rare Emerald. It is an early reliable source of Zone 1 crystal crafting materials.</p> <h3>What is the green crystal in the Earthen Golem?</h3> <p>(speculation) The green crystal appears tied to Zone 1's crystalline resources โ€” possibly indicating the Golem is an animated guardian of a mineral deposit. The official blog has not confirmed an origin.</p>

Firesteel Golem

Firesteel Golem

Golem Firesteel

Boss
Volcanic Cave

<p>If the Earthen Golem is the gentle introduction to Hytale's boss roster, the <strong>Firesteel Golem</strong> is the next step up โ€” a heavier, hotter, more aggressive guardian encountered deeper underground in the <span class="chip chip-zone">Volcanic Cave</span>. Where its Earthen cousin lumbers slowly across Zone 1, the Firesteel Golem brings metallic armor and fire-aspected attacks to a fight that already takes place inside a lava-veined cavern. Players hunting high-tier fire crafting materials treat this construct as a mandatory milestone.</p> <h2>Combat & Encounter</h2> <p>The Firesteel Golem shares the "heavy and telegraphed" combat identity of the Earthen variant, but layers on fire damage that punishes a player who simply tries to out-trade it. (community-sourced) its slam attacks leave brief burning ground, and its melee hits are heavy enough to threaten a Zone 1-geared player hard. The cavern environment compounds the danger โ€” limited space means fewer escape lanes than an open-air boss, and the ambient lava punishes sloppy footwork with environmental fire damage.</p> <p>The fight rewards the same discipline as the Earthen Golem โ€” read wind-ups, punish recovery โ€” with the added requirement of fire mitigation. A player wearing any fire-resistant gear will feel the difference immediately. Like most Volcanic Cave encounters, the Firesteel Golem is best treated as a gear check before pushing deeper into the volcanic content, where the Ember Dragon waits.</p> <h2>Lore & Origin</h2> <p>The Firesteel Golem reads as the volcanic counterpart to the Earthen Golem โ€” the same "constructed guardian" archetype, reskinned for a different biome. (speculation) the iron plating fused into its body โ€” and the Iron Ingot it drops โ€” suggests it was either forged deliberately by someone with metalworking skill, or grew around mineral deposits the way the Earthen Golem grew around green crystal. The shared silhouette across both golems supports the inference that Hytale's golems are a single conceptual lineage adapted to their host zones.</p> <h2>Loot & Rewards</h2> <p>The Firesteel Golem has a confirmed (community-sourced) drop table:</p> <ul> <li><strong>Essence of Fire</strong> โ€” a fire-aspected crafting reagent, the volcanic equivalent of the Yeti's Essence of Ice.</li> <li><strong>Iron Ingot</strong> โ€” a refined metal, consistent with the golem's armored body.</li> </ul> <p>For players building fire-themed or metal-tier gear, the Firesteel Golem is one of the most efficient early sources of Essence of Fire in the volcanic depths.</p> <div class="callout"> <p><strong>Tip:</strong> Bring fire resistance. The Firesteel Golem's burning-ground effect is the real killer, not its raw melee โ€” a player who mitigates the burn can outlast the fight; a player who ignores it burns through healing in seconds.</p> </div> <h2>Firesteel Golem โ€” Frequently Asked Questions</h2> <h3>Where do I find the Firesteel Golem?</h3> <p>In the Volcanic Cave biome. It is a heavier, fire-aspected variant of the golem archetype, encountered deeper underground than the Zone 1 Earthen Golem.</p> <h3>How is the Firesteel Golem different from the Earthen Golem?</h3> <p>Same combat identity (heavy, telegraphed) but fire-aspected and better armored. It drops fire/metal materials (Essence of Fire, Iron Ingot) instead of crystal materials, and lives in the Volcanic Cave rather than Zone 1.</p> <h3>What does the Firesteel Golem drop?</h3> <p>Confirmed (community-sourced): Essence of Fire and Iron Ingot. It is an efficient early source of fire-aspected crafting reagents in the volcanic depths.</p> <h3>Is the Firesteel Golem harder than the Earthen Golem?</h3> <p>Yes โ€” by a noticeable margin. The fire damage and confined cavern arena make it a gear check, where the Earthen Golem is a teaching fight.</p>

๐Ÿ—ฟ

Frost Golem

Golem Crystal Frost

Hostile
Zone 3

Carved from glacier stone and animated by ancient cold, the Frost Golem stands sentinel across the frozen north, attacking anyone who wanders too close. Its crystalline body is reinforced with blue ice that dulls blade strikes, making the 224-health fight feel longer than the numbers suggest. It will not wait for you to make the first move โ€” the moment you enter its territory, it is already charging. Defeating it records the encounter in Orbis as a World Memory. It drops 25 Cobblestone, 15 Blue Crystal Shards, and a Sapphire โ€” all guaranteed.

๐Ÿ—ฟ

Ember Golem

Golem Crystal Flame

Hostile
Volcanic Cave

The Ember Golem radiates heat before it even swings โ€” a living furnace of volcanic rock and red crystal that permanently trails sparks and embers as it patrols the Volcanic Cave. With 283 health points it is the toughest of the crystal golem variants, attacking on sight and pressing hard with searing blows. Each kill is recorded in Orbis as a World Memory. It reliably drops 25 Cobblestone, 15 Red Crystal Shards, 1โ€“3 Cindercloth Scraps, and a Ruby โ€” making it one of the most rewarding hostile constructs in the caves.

๐Ÿ—ฟ

Sandswept Golem

Golem Crystal Sand

Hostile
Zone 2

Somewhere beneath the dunes of the Howling Sands, whoever raised the ancient desert ruins also bound a guardian to watch over them. The Sandswept Golem is that guardian โ€” a 193-health construct of animated sandstone that attacks intruders on sight, its cyan crystal veins pulsing faintly with each footfall. It is not a subtle threat; the grinding roar of stone on stone announces it well before you see it. Every fight is logged in Orbis as a World Memory. It drops 25 Cobblestone, 15 Cyan Crystal Shards, and a Zephyr โ€” all guaranteed.

๐Ÿ—ฟ

Thunder Golem

Golem Crystal Thunder

Hostile
Caves

Deep in the cave systems of Orbis, the crackle of electricity in still air is the only warning the Thunder Golem gives. This crystalline construct channels raw electrical energy through its body, attacking any living thing that crosses its path. At 193 health points it hits harder than its durability might imply โ€” the electrical discharges carry a sharp, disorienting punch. Fighting it in confined tunnels leaves little room to maneuver. The encounter is preserved in Orbis as a World Memory. Killing it yields 25 Cobblestone, 15 Yellow Crystal Shards, and a Topaz โ€” all guaranteed.

๐Ÿ‘ป

Frost Spirit

Spirit Frost

Hostile
Zone 3

The Frost Spirit is an ethereal being of cold that drifts silently through the blizzards of Borea, barely distinguishable from the swirling ice around it. With 81 health, it is no fleeting apparition โ€” it hunts down any intruder who ventures into its frozen domain and attacks on sight. Each confirmed encounter is recorded as a World Memory in Orbis. Defeat one and it yields 2โ€“3 Essence of Ice, a guaranteed drop worth braving the storm for.

๐Ÿ‘ป

Thunder Spirit

Spirit Thunder

Hostile
Caves

Deep in the Caves of Orbis, the Thunder Spirit crackles with arcing electricity that illuminates the dark tunnels in violent bursts. This volatile entity has 249 health โ€” a substantial pool that demands serious preparation before engaging. It attacks any player it detects without hesitation, and the confined underground spaces give it a natural advantage. Every battle here is preserved as a World Memory. Bring it down and claim a guaranteed 2โ€“3 Essence of Lightning.

๐Ÿ‘ป

Root Spirit

Spirit Root

Neutral
Zone 1

Woven from the ancient roots of the Emerald Grove's oldest trees, the Root Spirit is a gentle presence bound to the living wood of Zone 1. Unlike many spirits of Orbis, it will not strike first โ€” with 49 health it is not built for prolonged combat. Treat it with respect, however, because it will retaliate if provoked. Every Root Spirit encounter is etched as a World Memory. Defeat one should conflict arise, and it reliably drops 2โ€“3 Essence of Life.

๐Ÿ‘ป

Ember Spirit

Spirit Ember

Hostile
Volcanic Cave

Born from the volcanic fire of Orbis's deepest magma chambers, the Ember Spirit blazes through the Volcanic Cave leaving a trail of smoldering cinders wherever it passes. It carries 126 health and launches into aggression the moment it spots a player, making any exploration of its territory a tense affair. The superheated air and narrow lava-lit corridors complicate any attempt to retreat. This encounter is preserved as a World Memory. Bringing it down guarantees 2โ€“3 Essence of Fire.

๐Ÿ”ฅ

Magma Rhino Toad

Toad Rhino Magma

Hostile
Volcanic Cave

The Magma Rhino Toad is what happens when the standard Rhino Toad adapts to a lifetime in lava caves โ€” toughened hide, fiery temperament, and 124 health to back it up. It dwells in the Volcanic Cave and charges at players with blazing aggression the moment they enter its range. This volcanic variant should never be treated as a routine obstacle; the confined cave environment leaves little room to maneuver. This encounter is preserved as a World Memory. It always drops 1โ€“2 Raw Wildmeat and 1โ€“2 Medium Hide.

๐Ÿฆ–

Cave Raptor

Raptor Cave

Hostile
Caves

Cave Raptors are fast, coordinated killers that hunt in packs deep within the cave systems of Orbis. Unlike many underground threats that rely on brute force, these reptiles use speed and flanking to overwhelm explorers who wander in unprepared. With 103 HP per individual the real danger is numbers โ€” fighting one often means fighting several. Each kill yields Medium Hide and Raw Wildmeat. Because the encounter is saved as a World Memory, descending into raptor territory carries genuine narrative weight.

Cave Rex

Cave Rex

Rex Cave

Hostile
Caves

<p>The <strong>Cave Rex</strong> is the apex predator of the secret underground jungle hidden beneath the volcanic surface of the <span class="chip chip-zone">Devastated Lands (Zone 4)</span> โ€” a tyrant lizard that rules the Forgotten Jungle as the T-Rex ruled its era. Where the Zone 4 surface is dominated by the Void Dragon and the corruption-adjacent creatures of a volcanic hellscape, the Cave Rex is the throwback apex of a hidden, prehistoric ecosystem that players only discover once they break through the ash and lava into the lush underworld below. Encountering one is the moment the Devastated Lands reveal their biggest secret.</p> <h2>Combat & encounter</h2> <p>The Cave Rex is a boss-tier creature, and his fight reflects that scale. (community-sourced) he combines enormous health, heavy telegraphed attacks, and the kind of raw damage that punishes any player who treats him as a routine mob. His design reads as a brutal, physical threat โ€” bites, charges, and ground-shaking attacks rather than the magical or corruption-flavored mechanics of the Void Dragon. The recommended approach is the one for any large carnivore boss: respect his telegraphs, mind your positioning, and do not get caught in front of him when he commits to an attack.</p> <p>Because he is an apex predator in a hidden biome, the encounter is also a navigation milestone. (speculation) consistent with his role at the top of the underground jungle's food chain, the Cave Rex plausibly guards the richest part of the Forgotten Jungle โ€” the deeper you push into his territory, the better the loot and the rarer the resources, and his presence is the gate that keeps under-geared players out of the high-tier Zone 4 materials. The practical implication is that a Cave Rex fight is not optional once you are in his biome; he patrols the ground you need to cross.</p> <h2>Lore & origin</h2> <p>The Devastated Lands are established in official Hytale material as a volcanic endgame zone with a hidden secret: beneath the scorched surface lie lush underground jungles with dinosaurs and underground lakes. (speculation) the Cave Rex is the apex of that hidden ecosystem, and his very existence implies that the Forgotten Jungle is not just scenery but a full biome โ€” a self-sustaining prehistoric world that has survived beneath the volcanic shell of Zone 4. That makes him part of Hytale's broader theme of worlds-within-worlds, and it ties him to the dinosaurs, triceratops, and dimetrodons that share his underground home.</p> <h2>Loot & rewards</h2> <p>No official drop table exists; treat specific item lists as (community-sourced). As the apex predator of the Forgotten Jungle, the Cave Rex plausibly gates access to the richest endgame loot in the Devastated Lands โ€” high-tier crafting materials tied to the underground jungle, rare reagents from a prehistoric ecosystem, and a chance at a trophy that records the kill. He is a target for players who have broken into the Forgotten Jungle and need its premium materials, not a routine mob to farm on the surface.</p> <div class="callout"> <p><strong>Tip:</strong> The Cave Rex patrols the ground you need to cross in the Forgotten Jungle, so the fight isn't optional. Respect his telegraphs, never get caught in front of him when he commits, and treat his presence as the gate to the richest underground-jungle loot in Zone 4.</p> </div> <h2>Cave Rex โ€” Frequently Asked Questions</h2> <h3>Where do I find the Cave Rex?</h3> <p>In the Forgotten Jungle โ€” the secret underground jungle hidden beneath the volcanic surface of the Devastated Lands (Zone 4). He is the apex predator of that hidden biome.</p> <h3>How is he different from the Void Dragon?</h3> <p>He is a physical, brutal apex predator rather than a corruption-flavored boss. The Void Dragon rules the Zone 4 surface; the Cave Rex rules the underground jungle beneath it.</p> <h3>Is he dangerous?</h3> <p>(community-sourced) Yes โ€” he is boss-tier. Enormous health, heavy telegraphed attacks, and raw damage. Respect his telegraphs and never get caught in front of him when he commits.</p> <h3>What does he drop?</h3> <p>No official drop table exists; any item list is community-sourced. Expect high-tier crafting materials and rare reagents from the underground-jungle ecosystem, and treat him as the gate to the richest Zone 4 loot.</p>

๐Ÿ‘ป

Fen Stalker

Hostile
Zone 1

Something lurks between the waterlogged roots and brackish pools of Zone 1 โ€” the Fen Stalker moves through marsh mist with unsettling patience, singling out travelers who stray from safer paths. It attacks without warning, closing distance before its prey can react. Despite a comparatively modest 74 health points, the threat lies in its timing: you rarely see it until it has already committed to the assault. Bringing it down rewards Raw Wildmeat and Medium Hide, and the moment is preserved forever as a World Memory on Orbis.

โœจ

Living Spark

Spark Living

Hostile
Volcanic Cave

Not every danger in Orbis's volcanic caverns takes a monstrous form. The Living Spark is a mote of raw fire energy โ€” barely larger than a fist โ€” that drifts erratically through lava tunnels and attacks anything that enters its territory. With only 61 health points it falls quickly, but its aggression means it rarely gives you the first move. Occasionally it collapses into a pocket of Essence of Fire, a valuable crafting material worth the detour into the heat. The World Memory system ensures this fleeting encounter still leaves its mark on Orbis.

๐Ÿ”ฅ

Emberwulf

Hostile
Volcanic Cave

The Emberwulf is what happens when predatory instinct meets volcanic fury. This wolf-shaped beast of the lava caves hunts on sight, and at 193 health points it has the endurance to outlast unprepared challengers. Its hide withstands extreme heat, and even in death it yields 1โ€“2 Heavy Hide alongside 2โ€“3 units of Essence of Fire โ€” making it one of the more rewarding targets in the volcanic depths. World Memory records every engagement, so the scar this creature leaves on an adventure's story is permanent. Come ready for a sustained fight.

Yeti

Yeti

Hostile
Zone 3

<p>The <strong>Yeti</strong> is one of the signature hostile creatures of the <span class="chip chip-zone">Whisperfrost Frontiers (Zone 3)</span>, the frozen tundra that is Hytale's ice-themed zone. Where the Outlanders are the zone's organized human threat and the Void Spectres are its supernatural one, the Yeti is its apex beast โ€” a towering, cold-adapted humanoid whose presence makes the tundra's already-deadly snowstorms feel like a real survival challenge rather than just a slow DOT. For players pushing into Zone 3, the Yeti is the creature that defines what makes the frozen north dangerous.</p> <h2>Combat & encounter</h2> <p>The Yeti is a heavy, hard-hitting combatant, and his fight reflects that. (community-sourced) he combines the durability and raw damage of an elite with the kind of physical bulk that suits a creature built for the cold โ€” heavy melee swings, a large health pool, and enough damage to punish any player who tries to face-tank him. His threat is amplified by the environment he lives in: the Zone 3 snowstorm reduces visibility and applies a damage-over-time effect, which means a Yeti fight happens under conditions that are already hostile before he swings.</p> <p>The encounter is shaped by the Yeti's biome. (speculation) consistent with his role as the apex beast of the frozen tundra, the Yeti is typically encountered in the open snowfields and frozen wastes where the storm is worst โ€” which means the player is managing exposure, visibility, and the Yeti at the same time. The practical implication is that fighting a Yeti is as much about preparation (cold-weather gear, healing for the storm's DOT) as about the melee itself, and a player who treats him as a pure melee threat will be worn down by the environment before the Yeti lands the killing blow.</p> <h2>Lore & origin</h2> <p>The Whisperfrost Frontiers are established in official Hytale material as a frozen tundra with regular snowstorms that reduce visibility and deal damage over time, and the Yeti is the apex creature of that biome. (speculation) his very existence implies that Zone 3's ecosystem supports cold-adapted megafauna, which makes the tundra feel like a real biome rather than just a cold obstacle. That ties the Yeti to the broader theme that each of Hytale's zones has its own signature apex โ€” the Kraken for the Ocean, the Cave Rex for the underground jungle, and the Yeti for the frozen north โ€” which is part of what makes each zone feel distinct.</p> <h2>Loot & rewards</h2> <p>No official drop table exists; treat specific item lists as (community-sourced). As the apex beast of the frozen tundra, the Yeti plausibly drops the reagents and materials associated with Zone 3 and its cold-adapted ecosystem โ€” frost-flavored crafting components, pelts or parts tied to cold-weather recipes, and the occasional piece of gear suited to surviving the very storms he hunts in. He is a target for players who need Zone 3 materials rather than a routine mob, and killing one often yields something useful for pushing deeper into the frozen north.</p> <div class="callout"> <p><strong>Tip:</strong> A Yeti fight happens in a snowstorm, so prep for the environment as much as for him. Cold-weather gear and healing for the storm's damage-over-time are as important as your melee โ€” the environment will wear you down before he does if you skimp on either.</p> </div> <h2>Yeti โ€” Frequently Asked Questions</h2> <h3>Where do I find the Yeti?</h3> <p>In the Whisperfrost Frontiers (Zone 3) โ€” the frozen tundra. He is the apex beast of the zone, typically encountered in the open snowfields where the snowstorm is worst.</p> <h3>How is he different from other Zone 3 threats?</h3> <p>He is the apex beast, not the organized threat. Outlanders are the human faction, Void Spectres are the supernatural threat, and the Yeti is the megafauna that makes the tundra dangerous.</p> <h3>Is he dangerous?</h3> <p>(community-sourced) Yes โ€” he is heavy-hitting and elite-tier, and the fight happens inside a snowstorm that reduces visibility and deals damage over time. Prep for the environment as much as for him.</p> <h3>What does he drop?</h3> <p>No official drop table exists; any item list is community-sourced. Expect frost-flavored reagents and pelts tied to Zone 3 cold-weather recipes, useful for pushing deeper into the frozen north.</p>

๐Ÿฒ

Snapdragon

Hostile
Zone 1

The Snapdragon is no ordinary plant โ€” it is a trap with roots. Lurking in the undergrowth of Zone 1, this carnivorous horror waits motionless until something wanders within range, then lunges with a devastating bite. With 103 health points it takes sustained effort to bring down, and it will not stop attacking once it has locked onto a target. Players who mistake it for harmless foliage rarely repeat the error. Every fight against this creature is preserved as a World Memory, giving the encounter permanent weight in your story of Orbis.

๐Ÿ•ท๏ธ

Spider

Hostile
Caves

Step into any cave system on Orbis after dark and the Spider is likely the first thing that finds you โ€” not the other way around. This hostile arachnid attacks on sight, its 61 hit points making it a sturdier foe than its skittering movement suggests. It spawns with the night, meaning the deeper you push into dungeons and underground passages, the denser the webs get. Kill one and it always leaves a Venom Sac behind โ€” a useful material that rewards the risk of fighting in the dark. Your first cave encounter with a Spider is preserved as a World Memory.

๐Ÿ’€

Sandswept Skeleton Warlock

Dungeon Skeleton Sand Mage

Hostile
Zone 2

Sun-bleached and stubbornly persistent, the Sandswept Skeleton Warlock stands guard deep within the desert tombs of Zone 2. These undead sentinels attack on sight, wielding arcane power drawn from the scorching sands that eroded their flesh long ago. At 49 health they aren't the most durable foes, but their magical attacks demand respect. Defeat one and it crumbles into Bone Fragments and Linen Scraps โ€” remnants of a burial wrapped body that never found its final rest beneath the dunes of Orbis.

๐Ÿ’€

Skeleton

Hostile
Devastated Lands

The Skeletons haunting the Devastated Lands are not mere dungeon fodder โ€” these undead warriors are hardened by the corruption that permeates Orbis's most blighted region. They attack without hesitation, pressing the assault with grim purpose. Their 92 health makes them a genuine threat, capable of punishing careless adventurers who wade in without a plan. When one finally collapses, it leaves behind Bone Fragments and Linen Scraps, modest spoils from a combatant that clearly perished long before the land around it did.

๐Ÿฎ

Wraith's Lantern

Wraith Lantern

Hostile
Caves

Something is wrong with the light ahead โ€” it drifts, it pulses, it waits. The Wraith's Lantern is a haunted artifact adrift in Orbis's cave networks, its pale glow designed not to guide but to deceive. It closes on anything living with silent menace and attacks on sight. At 30 health it can be destroyed, but its eerie light and unpredictable movement make it unsettling to fight in the dark. It carries no loot; whatever curse animates it leaves nothing useful behind when the flame finally goes cold.

๐Ÿ•ท๏ธ

Cave Spider

Spider Cave

Hostile
Caves

The Cave Spider claims every shadowed corner of Orbis's underground tunnels as its hunting ground. Small enough to squeeze through cracks you'd barely notice, it closes the gap fast and attacks on sight โ€” there's no warning before the first bite. With 74 HP and a guaranteed venom sac on every kill, it's a reliable crafting source, but the real danger compounds at night when it surfaces beyond the cave mouth. Its kills are recorded as World Memory, so every encounter carries weight beyond the moment.

๐Ÿ”ฅ

Magma Slug

Slug Magma

Hostile
Volcanic Cave

Deep in Orbis's volcanic caverns, the Magma Slug moves with a slow, ominous patience โ€” its molten body scorching anything it touches. Don't mistake that sluggish pace for weakness: it is aggressively territorial with 103 HP, attacking anyone who ventures too close. The heat alone demands fire resistance before engaging. A complete kill rewards Raw Wildmeat, Medium Hide, and Essence of Fire, making it one of the most resource-dense creatures in volcanic zones. Its presence is permanently recorded in the World Memory of Orbis.

๐Ÿƒ

The Hedera

Hedera

Hostile
Zone 1

Somewhere in the deep forest of Zone 1, ivy moves with intention. The Hedera is an animated mass of creeping vine that treats intruders as threats the moment they draw near, lashing out before a player can properly react. Its 226 health makes it one of the more durable hostile creatures in the Emerald Grove, and its plant-like form gives it an unsettling camouflage among the undergrowth. The kill is recorded as a World Memory on Orbis, but bring no expectations of loot โ€” the Hedera leaves nothing behind.

Frost Dragon

Frost Dragon

Dragon Frost

Boss
Zone 3

<p>Where the Ember Dragon claims the heat of the Volcanic Cave, the <strong>Frost Dragon</strong> rules the cold. Native to <span class="chip chip-zone">Zone 3 โ€” Whisperfrost Frontiers</span>, it is one of the canonical dragon bosses of Hytale and the apex aerial threat of the frozen zone. Encounters with the Frost Dragon are not chance meetings; it defends its territory with the calculated aggression of a creature that has no natural predators and knows it. Players pushing into Zone 3's deeper frozen regions treat the Frost Dragon as the gatekeeper that separates casual exploration from endgame-oriented play.</p> <h2>Combat & Encounter</h2> <p>The Frost Dragon's threat profile combines raw melee pressure with cold-themed area denial. (community-sourced) its breath attack lays down chilling zones that punish stationary positioning, and its melee strikes carry enough damage to seriously threaten a player still wearing Zone 2 gear. The fight is balanced around mobility: a player who can read the dragon's wind-ups, dodge the breath lines, and punish recovery windows will take it down cleanly; a player who tries to face-tank the encounter will burn through healing and die.</p> <p>Cold resistance is the single most important prep step. Zone 3's environment is already hostile to underprepared players, and the Frost Dragon's attacks compound that environmental chill. Bringing gear or consumables that mitigate cold damage substantially reduces the encounter's effective difficulty โ€” more than any single weapon upgrade would.</p> <h2>Lore & Origin</h2> <p>Of Hytale's named dragons, the Frost and Ember variants read as the "elemental" pair, with the Void Dragon representing the corrupted extreme. (speculation) the split between a frost-aligned dragon in Zone 3 and a fire-aligned dragon in the Volcanic Cave suggests the species adapts to โ€” or is shaped by โ€” its home biome over time. The official NPC blog has not given dragons a unified origin story, but the consistency of the elemental pattern across zones supports the inference that dragons are an ancient Orbis lineage, with each regional variant shaped by its environment.</p> <h2>Loot & Rewards</h2> <p>No official drop table exists; treat any item list as (community-sourced) until confirmed in the live build. As a Zone 3 boss, the Frost Dragon is expected to drop cold-themed crafting materials โ€” plausibly items in the same family as the Essence of Ice dropped by lesser Zone 3 creatures like the Yeti โ€” alongside boss-tier trophies. Players farming high-tier cold-resistant gear will find this encounter the natural source for those reagents.</p> <div class="callout"> <p><strong>Tip:</strong> Stack cold resistance before pulling the Frost Dragon. A single piece of frost mitigation gear often reduces effective damage more than a full tier of weapon upgrade, because so much of the fight's damage comes from the breath attack rather than raw melee.</p> </div> <h2>Frost Dragon โ€” Frequently Asked Questions</h2> <h3>Where is the Frost Dragon in Hytale?</h3> <p>The Frost Dragon is a boss native to Zone 3, the Whisperfrost Frontiers. It is a territorial apex creature rather than a fixed dungeon spawn.</p> <h3>How is the Frost Dragon different from the Ember Dragon?</h3> <p>They are the elemental pair of Hytale's dragons โ€” frost-aligned in Zone 3, fire-aligned in the Volcanic Cave. Mechanically, the Frost Dragon emphasizes cold-themed area denial and rewards cold-resistance gearing.</p> <h3>What does the Frost Dragon drop?</h3> <p>No official drop table exists; any item list is community-sourced. Expect cold-themed crafting reagents (in the Essence of Ice family) and boss-tier trophies consistent with a Zone 3 encounter.</p> <h3>Can I fight the Frost Dragon in Zone 2 gear?</h3> <p>(speculation) Possible but risky. The fight's damage profile seriously threatens undergeared players. Cold-resistance gear or consumables matter more than raw weapon upgrades for this encounter.</p>

๐Ÿ‰

Ember Dragon

Dragon Fire

Boss
Volcanic Cave

<p>The <strong>Ember Dragon</strong> is the fire-aspected mirror to the Frost Dragon and the apex boss of Hytale's <span class="chip chip-zone">Volcanic Cave</span> biome. Where most creatures of the volcanic depths are content to be dangerous in their own right, the Ember Dragon is the encounter that defines the zone โ€” a territorial flyer whose presence turns the already-hostile cavern into a gauntlet. Players mining Obsidian, hunting the Firesteel Golem, or pushing toward deeper volcanic content all eventually run into this dragon, and it does not share its lair politely.</p> <h2>Combat & Encounter</h2> <p>Mechanically, the Ember Dragon reads as the fire equivalent of the Frost Dragon: heavy fire-aspected breath damage, area denial through burning ground, and melee pressure severe enough to punish a player who treats it like a generic flyer. (community-sourced) the encounter is balanced around the same rhythm โ€” read wind-ups, dodge breath lines, punish recovery โ€” but with fire-themed mitigation as the relevant defensive layer. The volcanic cavern itself adds environmental hazards (lava, loose terrain, constrained sightlines) that make the fight feel claustrophobic compared to an open-air dragon fight.</p> <p>Fire resistance is the dominant gearing decision here. The cavern's ambient lava already punishes underprepared players with environmental fire damage, and the dragon's attacks stack on top of that. Coming in with fire-mitigation gear turns a fight that would otherwise burn through your healing into one you can outlast.</p> <h2>Lore & Origin</h2> <p>Paired with the Frost Dragon, the Ember Dragon fills the fire half of Hytale's elemental dragon pair, with the Void Dragon representing the corrupted extreme. (speculation) the species' presence in both the frozen Zone 3 and the volcanic depths supports the inference that dragons are a lineage shaped by โ€” or adapting to โ€” their host biome. The Ember Dragon's choice of the Volcanic Cave rather than open volcanic surface is consistent with Hytale's broader design preference for lair-based boss encounters inside contested dungeon spaces.</p> <h2>Loot & Rewards</h2> <p>The Ember Dragon has a confirmed (community-sourced) drop of <strong>Cindercloth Scraps</strong> โ€” a fire-themed crafting material in the same conceptual family as the Frost Dragon's expected cold-aspected drops. No other official drops are published; treat extended item lists as unconfirmed. As a Volcanic Cave boss, this encounter is the natural source for high-tier fire-themed crafting reagents and a trophy that records the kill.</p> <div class="callout"> <p><strong>Tip:</strong> Treat the Volcanic Cave itself as part of the boss's kit. The constrained cavern means the Ember Dragon's breath covers a larger fraction of the usable arena than it would outdoors โ€” plan movement around the terrain, not in spite of it.</p> </div> <h2>Ember Dragon โ€” Frequently Asked Questions</h2> <h3>Where do I find the Ember Dragon?</h3> <p>The Ember Dragon is a boss of the Volcanic Cave biome. It is a territorial apex creature encountered inside the volcanic depths rather than on the surface.</p> <h3>How is the Ember Dragon different from the Frost Dragon?</h3> <p>They are Hytale's elemental dragon pair: Ember Dragon is fire-aspected in the Volcanic Cave, Frost Dragon is cold-aspected in Zone 3. Mechanically they share the same shape โ€” breath, area denial, punishing melee โ€” but the relevant defensive layer is fire mitigation versus cold mitigation.</p> <h3>What does the Ember Dragon drop?</h3> <p>Confirmed (community-sourced): Cindercloth Scraps, a fire-themed crafting material. No other official drops are published; treat extended lists as unconfirmed until verified in-game.</p> <h3>Is the Ember Dragon harder than the Frost Dragon?</h3> <p>(speculation) Comparable in design. The Ember Dragon's cavern arena makes the fight feel more constrained; the Frost Dragon's open Zone 3 arena allows more mobility. Difficulty depends heavily on your elemental resistance gearing.</p>

๐ŸŒฟ

Bramblekin

Hostile
Zone 1

Bramblekin are what happens when the overgrown forests of Zone 1 grow something with a temper. These small, hostile plant creatures are woven together from thorns, twisted vines, and dense bramble matter โ€” barely distinguishable from the undergrowth until they lunge. They are aggressive on sight, making even a casual walk through dense woodland a prickly affair. Their compact size belies how quickly they close distance, and the thorn-covered frame they attack with can shred unprotected skin. Clearing an area of Bramblekin is often the unglamorous first step of any Zone 1 exploration.

๐Ÿ•ท๏ธ

Crawler

Hostile
Caves

<p>The <strong>Crawler</strong> is one of the most unsettling hostile creatures players meet beneath the surface of Orbis, a multi-limbed horror that haunts the lightless tunnels of the <span class="chip chip-zone">Caves</span> biome. Where surface mobs like Trorks and Kweebecs belong to a recognizable ecology of villages and factions, the Crawler belongs to something older and less hospitable โ€” a creature built for total darkness, where the rules of the overworld stop applying. The April 2019 Hytale development blog dedicated to monster design highlighted the Crawler as one of the creatures that defines the look and feel of Hytale's underground, grouping it with the broader family of Void-touched horrors that emerge wherever light and life recede. For players descending into the Caves for ore, lore, or loot, the Crawler is the creature that reminds them they are no longer on friendly ground.</p> <h2>Combat & encounter</h2> <p>Crawlers are hostile on sight and tuned around the disorientation of cave fighting. (community-sourced) they close distance quickly along walls and ceilings, using the verticality of the tunnels โ€” a player who treats a cave like a flat arena and only watches eye level is exactly the prey the Crawler is built to ambush. Their attack pattern reads as fast melee pressure: once a Crawler commits, it tries to chain strikes and pin the player against a wall or into a dead end, where the player's movement options collapse. The recommended response is the opposite of a face-tank: keep moving, use the tunnel geometry to break line of sight, and never let one get directly overhead.</p> <p>The encounter is shaped less by the Crawler's stat block than by the environment it shares. Darkness is the real weapon here. (speculation) consistent with the monster-design blog's framing of underground creatures as darkness-attuned, Crawlers plausibly fight harder and path more aggressively in unlit areas, which means a well-placed torch or light source is as valuable as a sword. Players who light their way in, mark their retreat path, and engage Crawlers one at a time in lit corridors turn a lethal ambush into a manageable fight. Players who blunder into a dark nest without preparation usually learn the lesson once.</p> <h2>Lore & origin</h2> <p>Hytale's official monster-design development blog (April 2019) explicitly tied the Crawler to the game's broader Void aesthetic, presenting it as a creature of darkness that belongs to the same family of horrors as the Void Dragon and the Wraith. (speculation) that placement is meaningful: it implies the Crawler is not simply a cave animal but something shaped by โ€” or naturally aligned with โ€” the Void, the corrupting force that defines the endgame Devastated Lands. The implication for worldbuilding is that the Caves are not a neutral dungeon but a place where the Void's influence already leaks upward, long before the player ever reaches Zone 4. The Crawler is, in that sense, an early messenger of the same threat the player will face in full at the end of the game.</p> <h2>Loot & rewards</h2> <p>No official drop table exists; treat any specific item list you see elsewhere as (community-sourced) and unconfirmed. What is consistent with the Crawler's place in the ecosystem is that it would drop reagents tied to darkness and the underground โ€” materials used in light-relevant crafting, Void-flavored components for higher-tier recipes, or curiosities that hint at the deeper lore of the Caves. Because Crawlers are encountered throughout cave exploration rather than gated behind a boss room, they function as a renewable source of those materials for players willing to delve repeatedly. They are not a loot-pinata, but a steady, dangerous harvest.</p> <div class="callout"> <p><strong>Tip:</strong> Light is your best weapon against a Crawler, not your sword. Torch the corridor before you push in, mark your exit, and engage them one at a time in lit space. A Crawler in darkness on a ceiling is a death sentence; a Crawler in a lit corridor is a fight you can win.</p> </div> <h2>Crawler โ€” Frequently Asked Questions</h2> <h3>Where do I find Crawlers in Hytale?</h3> <p>In the Caves biome โ€” the underground tunnel networks beneath Orbis's surface zones. They are hostile creatures of darkness encountered throughout cave exploration, not tied to a single dungeon.</p> <h3>Is the Crawler a Void creature?</h3> <p>Yes. The official April 2019 monster-design development blog groups the Crawler with Hytale's Void-touched family of horrors, alongside creatures like the Void Dragon. (speculation) this implies the Caves are a place where Void influence already leaks upward, foreshadowing the endgame.</p> <h3>How dangerous is a Crawler?</h3> <p>(community-sourced) Dangerous enough that unprepared delvers die to them regularly. The threat comes less from raw stats than from ambush in darkness โ€” they use walls and ceilings, and fight hardest where light is absent.</p> <h3>What does a Crawler drop?</h3> <p>No official drop table exists; any specific item list is community-sourced. Expect reagents tied to darkness and the underground, Void-flavored crafting components, and lore curiosities โ€” a steady, renewable harvest for repeat delvers rather than a single boss payoff.</p>

๐Ÿชจ

Earth Elemental

Hostile
Zone 1

Born from the land itself, the Earth Elemental is one of Zone 1's most imposing threats. This animated mass of rock and compacted soil is tied to the earth element, giving it a slow, grinding presence that belies real destructive force. It attacks on sight, and its stone-hard body means glancing blows do little โ€” players need to commit to focused strikes rather than chip away carelessly. Earth Elementals don't pursue with speed, but their resilience means a prolonged fight drains resources fast. Encountering one in open terrain at least allows for spacing; catching one in a confined area is a far grimmer situation.

๐Ÿธ

Frog Monster

Hostile
Zone 1

Lurking in the sodden margins of Zone 1's wetlands, the Frog Monster is a large amphibian predator that attacks on sight. Its camouflage among reeds and murky shallows makes it easy to overlook until it lunges. Players passing through swampy terrain should stay alert โ€” this creature does not wait for provocation. It leaves no loot behind, making every encounter a pure survival test rather than a rewarding hunt.

๐Ÿ•ท๏ธ

Giant White Spider

Hostile
Caves

The Giant White Spider has claimed the cave systems of Orbis as its territory, spinning pale webs across tunnels and alcoves in the dark. Its bleached coloration is an eerie warning โ€” this oversized arachnid is aggressive and will charge intruders the moment they venture too close. There is no reasoning with it and no loot to salvage after the fight, so unless spelunking is necessary, giving these caves a wide berth is the wiser option.

๐Ÿ‘พ

Grooble

Neutral
Caves

Deep in Orbis's cave networks lives the Grooble, a small oddly-shaped creature whose curious silhouette has puzzled explorers since the earliest expeditions underground. It is neutral by nature โ€” it will not initiate conflict, but corner one or strike first and expect retaliation. The Grooble leaves nothing useful behind, so most adventurers opt to observe it from a distance rather than pick a fight in already treacherous tunnels.

๐Ÿ‘พ

Klop

Neutral
Zone 1

The Klop is one of the more unusual sights in Zone 1 โ€” a small, peculiarly shaped creature that seems almost out of place among Orbis's more fearsome wildlife. It is neutral and will not bother players who pass by without incident. Provoke it, however, and it will defend itself. It drops nothing on defeat, making encounters with it relevant mainly for those cataloguing every oddity the early zones have to offer.

๐ŸŒ‹

Magma Golem

Boss
Volcanic Cave

<p>Deeper still in the <span class="chip chip-zone">Volcanic Cave</span>, past the Firesteel Golem's territory, the <strong>Magma Golem</strong> represents the most extreme fire-aspected construct in Hytale's volcanic roster. Where the Firesteel Golem is armored metal, the Magma Golem is semi-molten โ€” a body of cooling lava held loosely together, radiating enough ambient heat that simply standing near it is hazardous. It is a boss-tier creature and a natural progression target for players who have already cleared the Firesteel Golem and are pushing toward the Ember Dragon.</p> <h2>Combat & Encounter</h2> <p>The Magma Golem's defining mechanic is its heat. (community-sourced) its melee strikes carry fire damage, but the real threat is the persistent burn aura and the patches of molten ground it leaves behind โ€” fighting it is as much about controlling where you stand as about dealing damage. The encounter is balanced around mobility and fire mitigation: a player who treats it like a generic heavy golem and stands in to trade will die to ambient fire damage before the golem's health bar moves meaningfully.</p> <p>Because it shares the Volcanic Cave with the Firesteel Golem and the Ember Dragon, the Magma Golem functions as a mid-tier gear check โ€” the encounter that tells you whether you are ready for the zone's capstone boss. If you can comfortably down the Magma Golem, your fire mitigation is sufficient; if you are struggling, you are not yet ready for the Ember Dragon.</p> <h2>Lore & Origin</h2> <p>The Magma Golem completes the volcanic golem trio's conceptual arc โ€” stone (Earthen), forged metal (Firesteel), molten rock (Magma). (speculation) this progression suggests the golems of Hytale are shaped by the intensity of their host environment: a cooler stone zone produces a stone golem, a volcanic zone produces metal and magma variants. The official blog has not codified a unified golem origin, but the consistent archetype-across-biomes pattern is one of the clearest design through-lines in Hytale's worldbuilding.</p> <h2>Loot & Rewards</h2> <p>No official drop table exists for the Magma Golem. Treat any item list as (community-sourced) until confirmed in the live build. Given its position deeper than the Firesteel Golem โ€” which already drops Essence of Fire โ€” players should expect the Magma Golem to drop either enhanced fire-aspected reagents or a unique volcanic material gated behind this encounter. It is not expected to be a casual farm; it is a progression milestone.</p> <div class="callout"> <p><strong>Tip:</strong> Movement beats mitigation here. Even with fire resistance, standing in the Magma Golem's molten-ground trails will kill you. Treat the fight as a positioning puzzle โ€” bait its attacks, reposition to clean ground, and never let it corner you against cavern walls.</p> </div> <h2>Magma Golem โ€” Frequently Asked Questions</h2> <h3>Where do I find the Magma Golem?</h3> <p>Deeper in the Volcanic Cave, past the Firesteel Golem's territory. It is the most extreme fire-aspected construct in the volcanic roster.</p> <h3>How is the Magma Golem different from the Firesteel Golem?</h3> <p>The Firesteel Golem is armored metal; the Magma Golem is semi-molten rock with a persistent heat aura and molten-ground trails. The Magma Golem is the harder, deeper encounter of the two.</p> <h3>What does the Magma Golem drop?</h3> <p>No official drop table exists; any item list is community-sourced. Expect enhanced fire-aspected reagents or a unique volcanic material consistent with its position as a mid-tier volcanic boss.</p> <h3>Is the Magma Golem a gear check for the Ember Dragon?</h3> <p>(speculation) Functionally, yes. If you can comfortably down the Magma Golem, your fire mitigation is likely sufficient to attempt the Ember Dragon. If you are struggling, gear up first.</p>

๐Ÿ‘ป

Pale Danger

Hostile
Caves

Something is very wrong in the depths of Orbis's cave systems when the Pale Danger is nearby. This colorless, ghostly creature blends unnervingly into the dim stone walls, making it easy to stumble upon before you ever notice it lurking. It attacks on sight, and the confined tunnel environment works entirely in its favor โ€” wide swings and hasty retreats are rarely options underground. Experienced spelunkers treat any flicker of pale movement as an immediate threat and adjust accordingly.

๐Ÿ‘‘

Sand Empress

Boss
Zone 2

<p>The <strong>Sand Empress</strong> is the signature boss of the <span class="chip chip-zone">Howling Sands (Zone 2)</span>, a standalone desert ruler who is not pinned to a faction like the Scaraks or Outlanders. Where the Broodmother commands a hive and the Outlander Chief a village, the Sand Empress rules the desert itself โ€” or at least the ancient ruin at its heart, where Zone 2's loot and danger are concentrated. She is the zone's marquee encounter in the same way the Kraken is the Ocean's: a creature whose scale matches the threat level of the biome she caps, and a fight that players progressing through Hytale's second zone are expected to gear up for rather than stumble into blind.</p> <h2>Combat & encounter</h2> <p>The Sand Empress is a full boss, not an elite, and her fight is balanced to test a Zone 2-ready party. (community-sourced) the encounter reads as multi-phase, with the Empress cycling between direct attacks and desert-themed area effects โ€” sandstorm bursts, ground hazards, and summons or illusions that split the party's attention. The common thread is that she weaponizes the environment the Howling Sands is already known for: reduced visibility, movement-sapping terrain, and the constant pressure of an arid, hostile zone. A player who has only fought in Zone 1 will find the rhythm of her fight noticeably less forgiving than anything the Emerald Wilds threw at them.</p> <p>Preparation is the defining variable. The recommended approach is a party with Zone 2-tier gear, consumables for sustained combat, and a plan for the add or hazard phases rather than a pure damage-race. Players who attempt her under-geared or solo typically do not get to learn the fight through attrition โ€” they get punished fast enough that the lesson is a quick death and a corpse run.</p> <h2>Lore & origin</h2> <p>Official Hytale material establishes the Howling Sands as a zone dotted with ancient ruins of a vanished civilization, and the Sand Empress sits at the intersection of that theme. (speculation) her title โ€” Empress, not Queen or Matriarch โ€” implies a sovereign over a domain rather than a hive, which fits a creature tied to the desert's buried history rather than its living ecosystem. Whether she is the last ruler of the civilization that built those ruins, a guardian left behind to protect them, or something that grew into the role over centuries is not explicitly stated, and that ambiguity is part of what makes the encounter feel significant rather than transactional.</p> <h2>Loot & rewards</h2> <p>No official drop table is published; treat specific item lists elsewhere as (community-sourced) and unverified. As the signature boss of Zone 2, the Sand Empress would plausibly gate access to high-tier desert crafting materials, rare reagents tied to the Howling Sands, and a trophy that records the zone-cap kill. Consistent with Hytale's design language, players should expect rewards that justify mounting a proper expedition into the ruin she guards, not a trivial payout for a trivial fight.</p> <div class="callout"> <p><strong>Tip:</strong> Treat the Sand Empress as a gear check, not a surprise. She is the encounter Zone 2 is building you toward, so come with Zone 2-tier equipment, a party, and consumables โ€” not with the assumption you can outplay her with Zone 1 gear.</p> </div> <h2>Sand Empress โ€” Frequently Asked Questions</h2> <h3>Where do I find the Sand Empress?</h3> <p>At the heart of an ancient ruin in the Howling Sands (Zone 2). She is the zone's signature boss and caps the desert's hardest content.</p> <h3>Is she tied to a faction?</h3> <p>No. Unlike the Broodmother (Scaraks) or the Outlander Chief, the Sand Empress is a standalone ruler not pinned to one of the zone's named factions.</p> <h3>Can I fight her solo?</h3> <p>(speculation) Soloing is technically possible for an over-geared player but strongly discouraged. She is a multi-phase boss balanced around a Zone 2-ready party.</p> <h3>What does she drop?</h3> <p>No official drop table exists; any item list is community-sourced. Expect high-tier desert crafting materials, rare Howling Sands reagents, and a kill trophy consistent with a zone-cap boss.</p>

๐Ÿฒ

Void Dragon

Boss
Devastated Lands

<p>The <strong>Void Dragon</strong> is what the Devastated Lands produce when corruption is allowed to run its full course. Once a creature of Orbis โ€” plausibly an ordinary dragon twisted by prolonged exposure to Void energy โ€” it has been wholly remade into something the world file treats as an apex boss. Its body reads as wrong: cracked hide radiating dark distortion, movements that ignore the usual predator tells, and an aggression stripped down to pure hostility. Among the continent's hardest encounters, the Void Dragon is the capstone threat of <span class="chip chip-zone">Zone 4 โ€” Devastated Lands</span> and a creature even veteran adventurers approach with respect bordering on dread.</p> <h2>Combat & Encounter</h2> <p>What sets the Void Dragon apart is that the arena itself feels hostile. The air in the Devastated Lands is thick with distortion, and the dragon's attacks compound that environmental pressure rather than existing independently of it. (community-sourced) the encounter leans heavily into area denial: breath attacks and void-charged strikes that punish greedy positioning, and a damage profile severe enough to threaten a Zone 3-geared player in a small number of hits. Unlike Zone 1 bosses that telegraph generously, the Void Dragon rewards players who have already internalized Hytale's combat rhythm โ€” blocking, spacing, and recognizing recovery windows.</p> <p>Bringing a party is strongly advised. The fight's length and damage output mean a solo player is one mistake away from a costly death, while a group can split aggro, cover revives, and exploit the longer damage windows that coordinated pressure creates. Confront the Void Dragon only at peak readiness.</p> <h2>Lore & Origin</h2> <p>The Devastated Lands are Hytale's canonical "end zone" โ€” the region where Void corruption has overtaken the landscape, and the Void Dragon is its signature product. (speculation) The fact that dragons appear elsewhere in Orbis in less corrupted form โ€” the Frost Dragon in Zone 3, the Ember Dragon in the Volcanic Cave โ€” supports the inference that a Void Dragon is a dragon fully consumed by Void energy rather than a separate species. That places it in the same conceptual family as other "corrupted" creatures of Zone 4, where the defining trait is that the original being is still recognizable but has been repurposed into something hostile. The official blog has not codified this, but the visual and thematic lineage is consistent across Hytale's reveal material.</p> <h2>Loot & Rewards</h2> <p>No official drop table exists for the Void Dragon. Treat any specific item list as (community-sourced) until confirmed in the live build. Given its position as a Zone 4 capstone boss, players should expect rewards that gate the highest tier of progression โ€” most plausibly Void-themed crafting reagents used in endgame gear, rare consumables, or a trophy that permanently records the kill. This is not expected to be a farmed boss for casual loot; it is a milestone encounter.</p> <div class="callout"> <p><strong>Tip:</strong> Treat the Devastated Lands arena as part of the boss. Positioning that would be safe against a Zone 1 or 2 boss can get you killed here because the dragon's attacks interact with the corrupted environment. Clear a fallback line before you commit to damage windows.</p> </div> <h2>Void Dragon โ€” Frequently Asked Questions</h2> <h3>Where do I find the Void Dragon?</h3> <p>The Void Dragon is encountered in the Devastated Lands, Hytale's Zone 4 โ€” the endgame region where Void corruption has overtaken the landscape. It is a boss-tier creature, not a random spawn.</p> <h3>Is the Void Dragon the hardest boss in Hytale?</h3> <p>It is consistently ranked among the hardest alongside the Kraken. The Void Dragon tests raw damage mitigation and positioning in a corrupted arena; the Kraken tests underwater logistics. Different fights, both brutal.</p> <h3>What does the Void Dragon drop?</h3> <p>No official drop table exists; any item list is community-sourced. Expect endgame-tier rewards โ€” Void-themed crafting reagents or trophies โ€” consistent with a Zone 4 capstone encounter.</p> <h3>Is the Void Dragon a corrupted normal dragon?</h3> <p>(speculation) The presence of less-corrupted Frost and Ember dragons elsewhere in Orbis supports the inference that the Void Dragon is a dragon fully consumed by Void energy rather than a distinct species, but this has not been officially confirmed.</p>

๐Ÿ•ท๏ธ

Void Spider

Hostile
Devastated Lands

The blighted terrain of the Devastated Lands harbors many corrupted creatures, but the Void Spider stands out even here. Infused with Void energy, it moves with an unsettling purpose โ€” its natural spider instincts amplified and warped by corruption into something more threatening. It attacks without hesitation, and the environment it calls home offers plenty of cover for ambush. Travelers cutting through the Devastated Lands should expect to meet these creatures repeatedly, and should never mistake their familiar shape for anything manageable.

Quick guide

How to Use the Hytale Creatures & Mobs Wiki

1

Browse creatures by category

The encyclopedia groups every entity of Orbis into four categories โ€” Animals, Aquatic, NPCs & Tribes, and Monsters. Scroll the sections or click a category tab to focus on one group.

2

Filter by hostility

Use the hostility filter to show only Friendly, Neutral, Hostile or Boss creatures. This helps you tell harmless wildlife like the Kweebec apart from dangerous Trork raiders.

3

Search by name or faction

Type a creature name or faction into the search box to jump straight to it. Searching "Trork" or "Kweebec", for example, filters the list instantly.

4

Read the creature card details

Each card shows the creature name, faction, hostility badge and the zone of Orbis where it is found, plus a short description of its role in Hytale.

Good to know

Hytale is in Early Access (launched January 13, 2026), so this creature list is based on the live game and official Hypixel Studios material. It is updated as the game evolves.

Hytale Creatures & Mobs โ€” Frequently Asked Questions